15.14. Fluorescent olive oil#
| Author: | Rutger Ockhorst |
| Time: | 15 minutes |
| Age group: | 12 - 18 |
| Concepts: | Quantum, lumoniscence, fluoresces |
Introduction#
Extra virgin olive oil comes from the first pressing of olives and is more expensive than later pressings. This oil contains chlorophyll that fluoresces, aiding in determining whether olive oil is truly extra virgin. You can describe this phenomenon with a simple energy level diagram and explain the surprising observations.
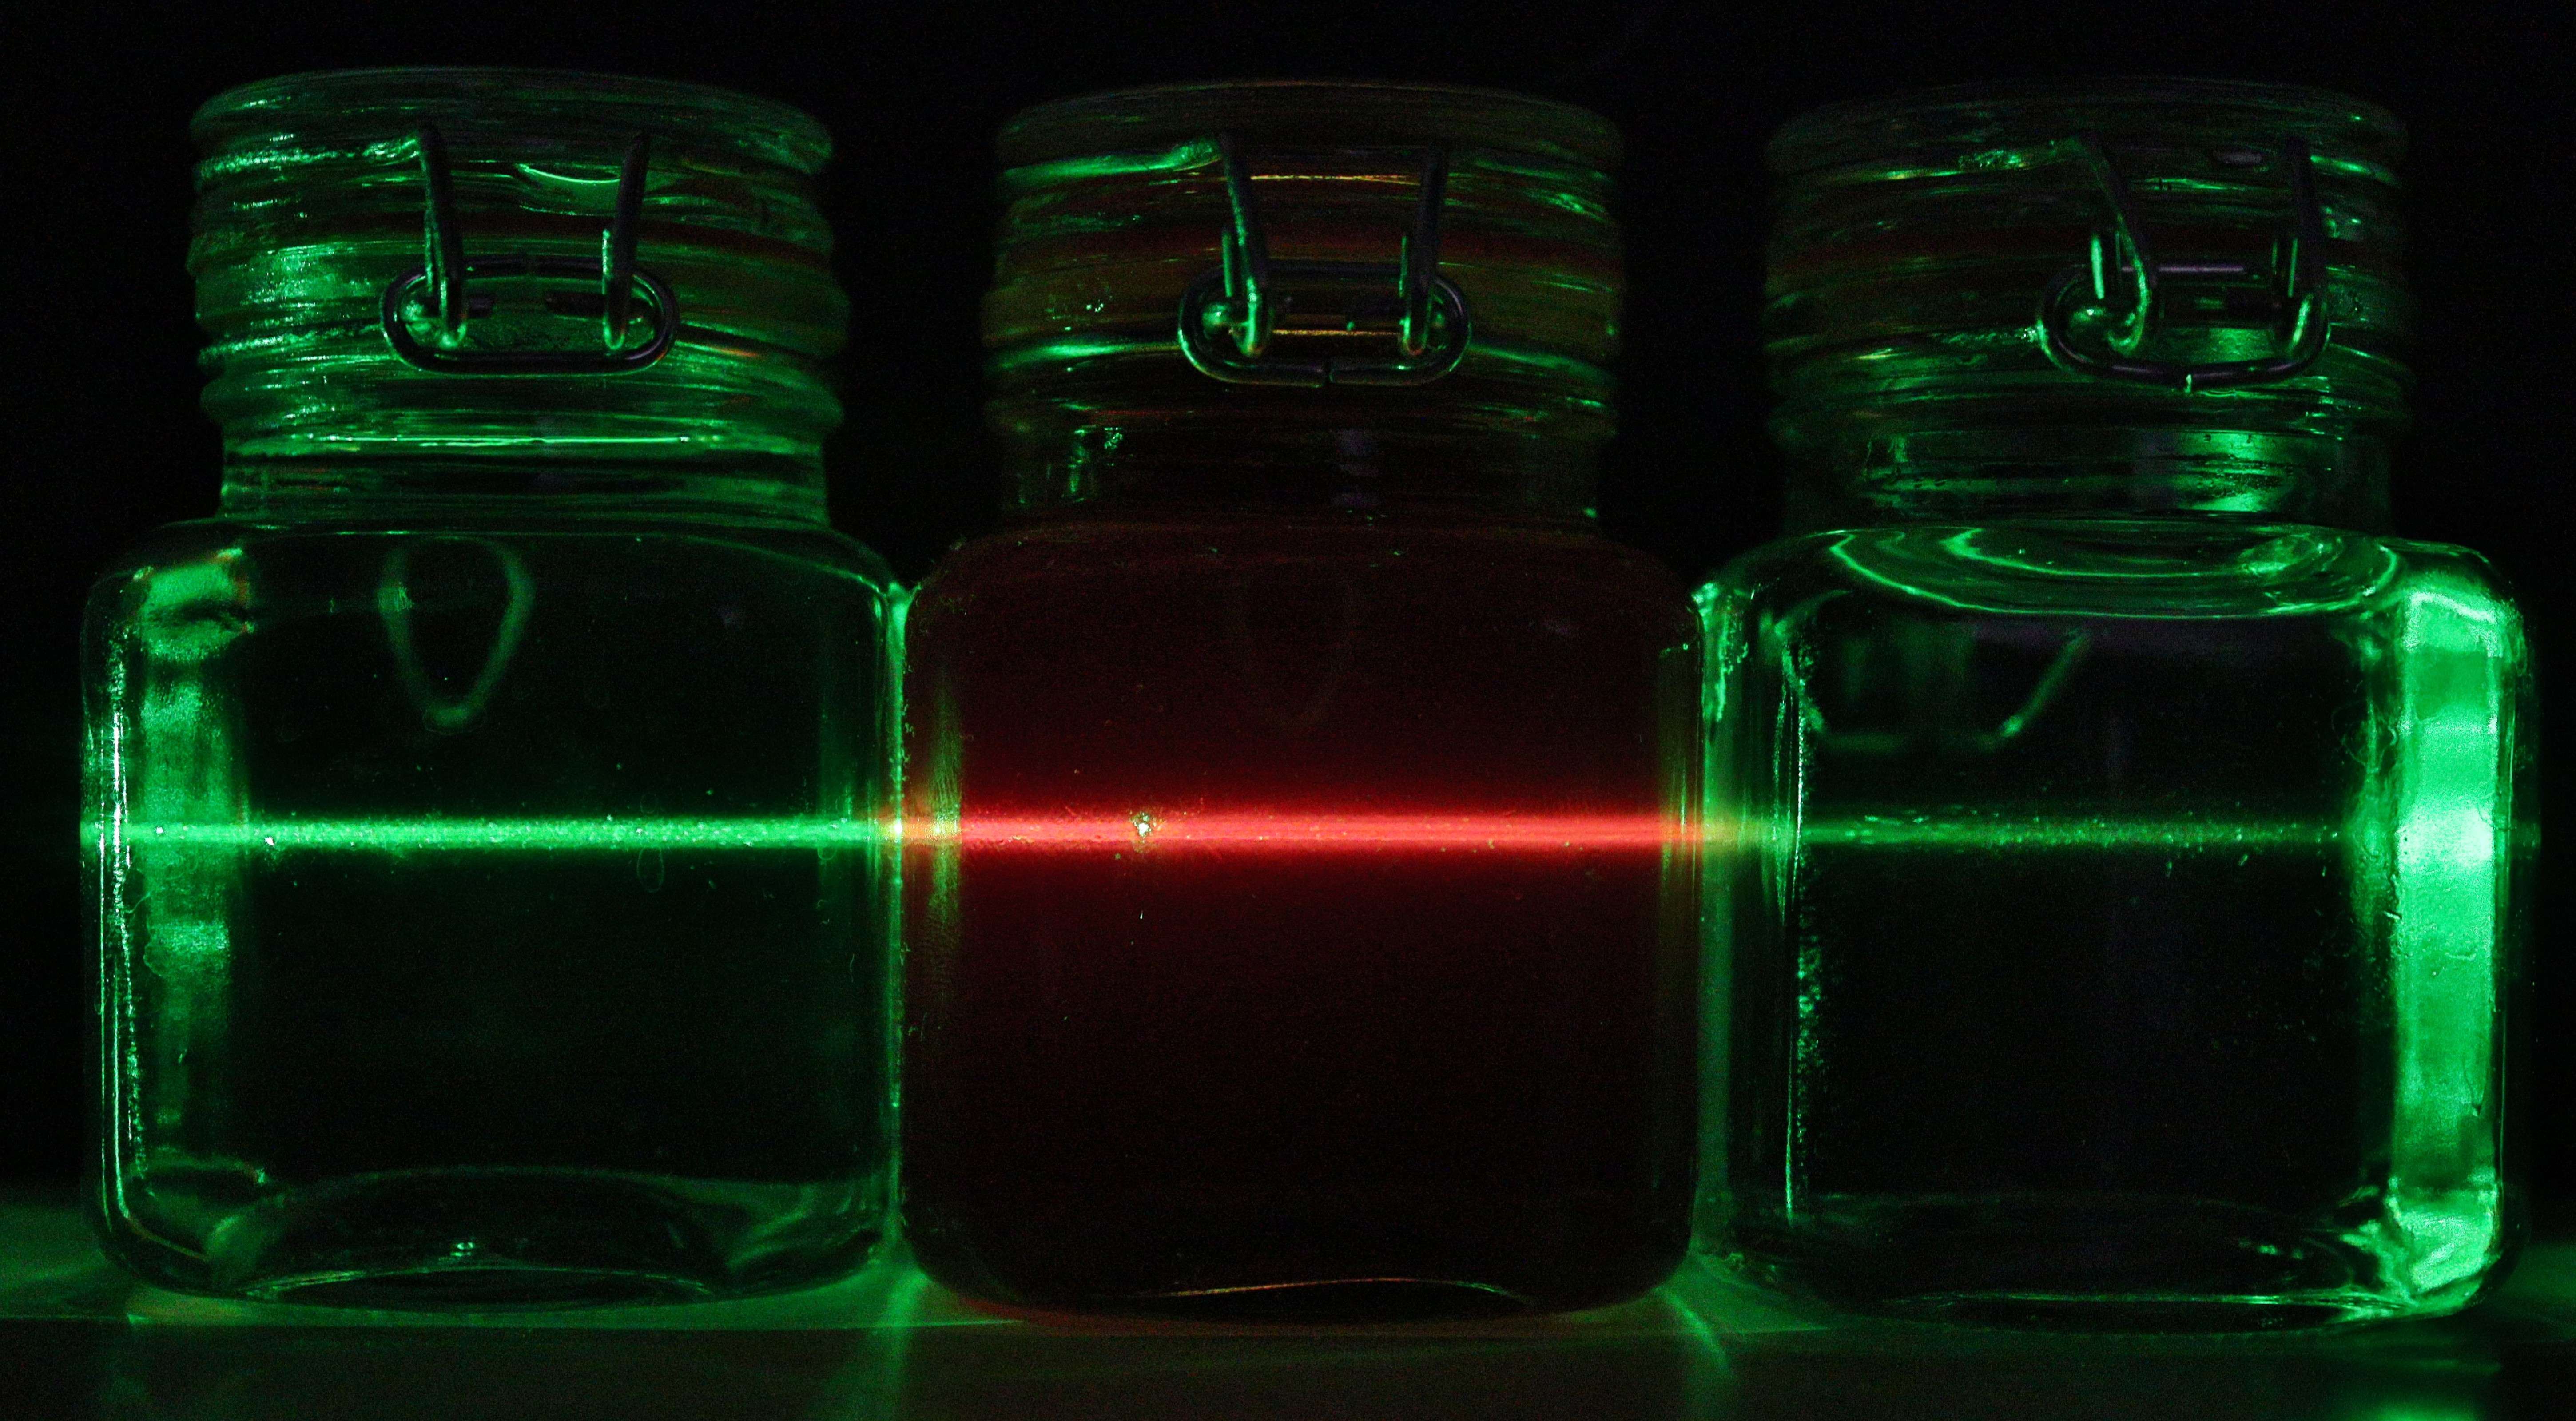
Fig. 15.35 The green laser beam appears to turn orange in olive oil.#
Equipment#
Bottle of extra virgin olive oil
Two bottles of water
Red laser pointer
Green laser pointer
White wall/paper
Plant sprayer (water with some ink from a yellow marker pen)
Warning
Avoid shining laser light into eyes, beware of reflections on the olive oil bottle. Only use Class 2 lasers of less than 1 mW, safe for eye reflex, with known specifications. (Green lasers sometimes also have a much more intense but invisible infrared beam.)
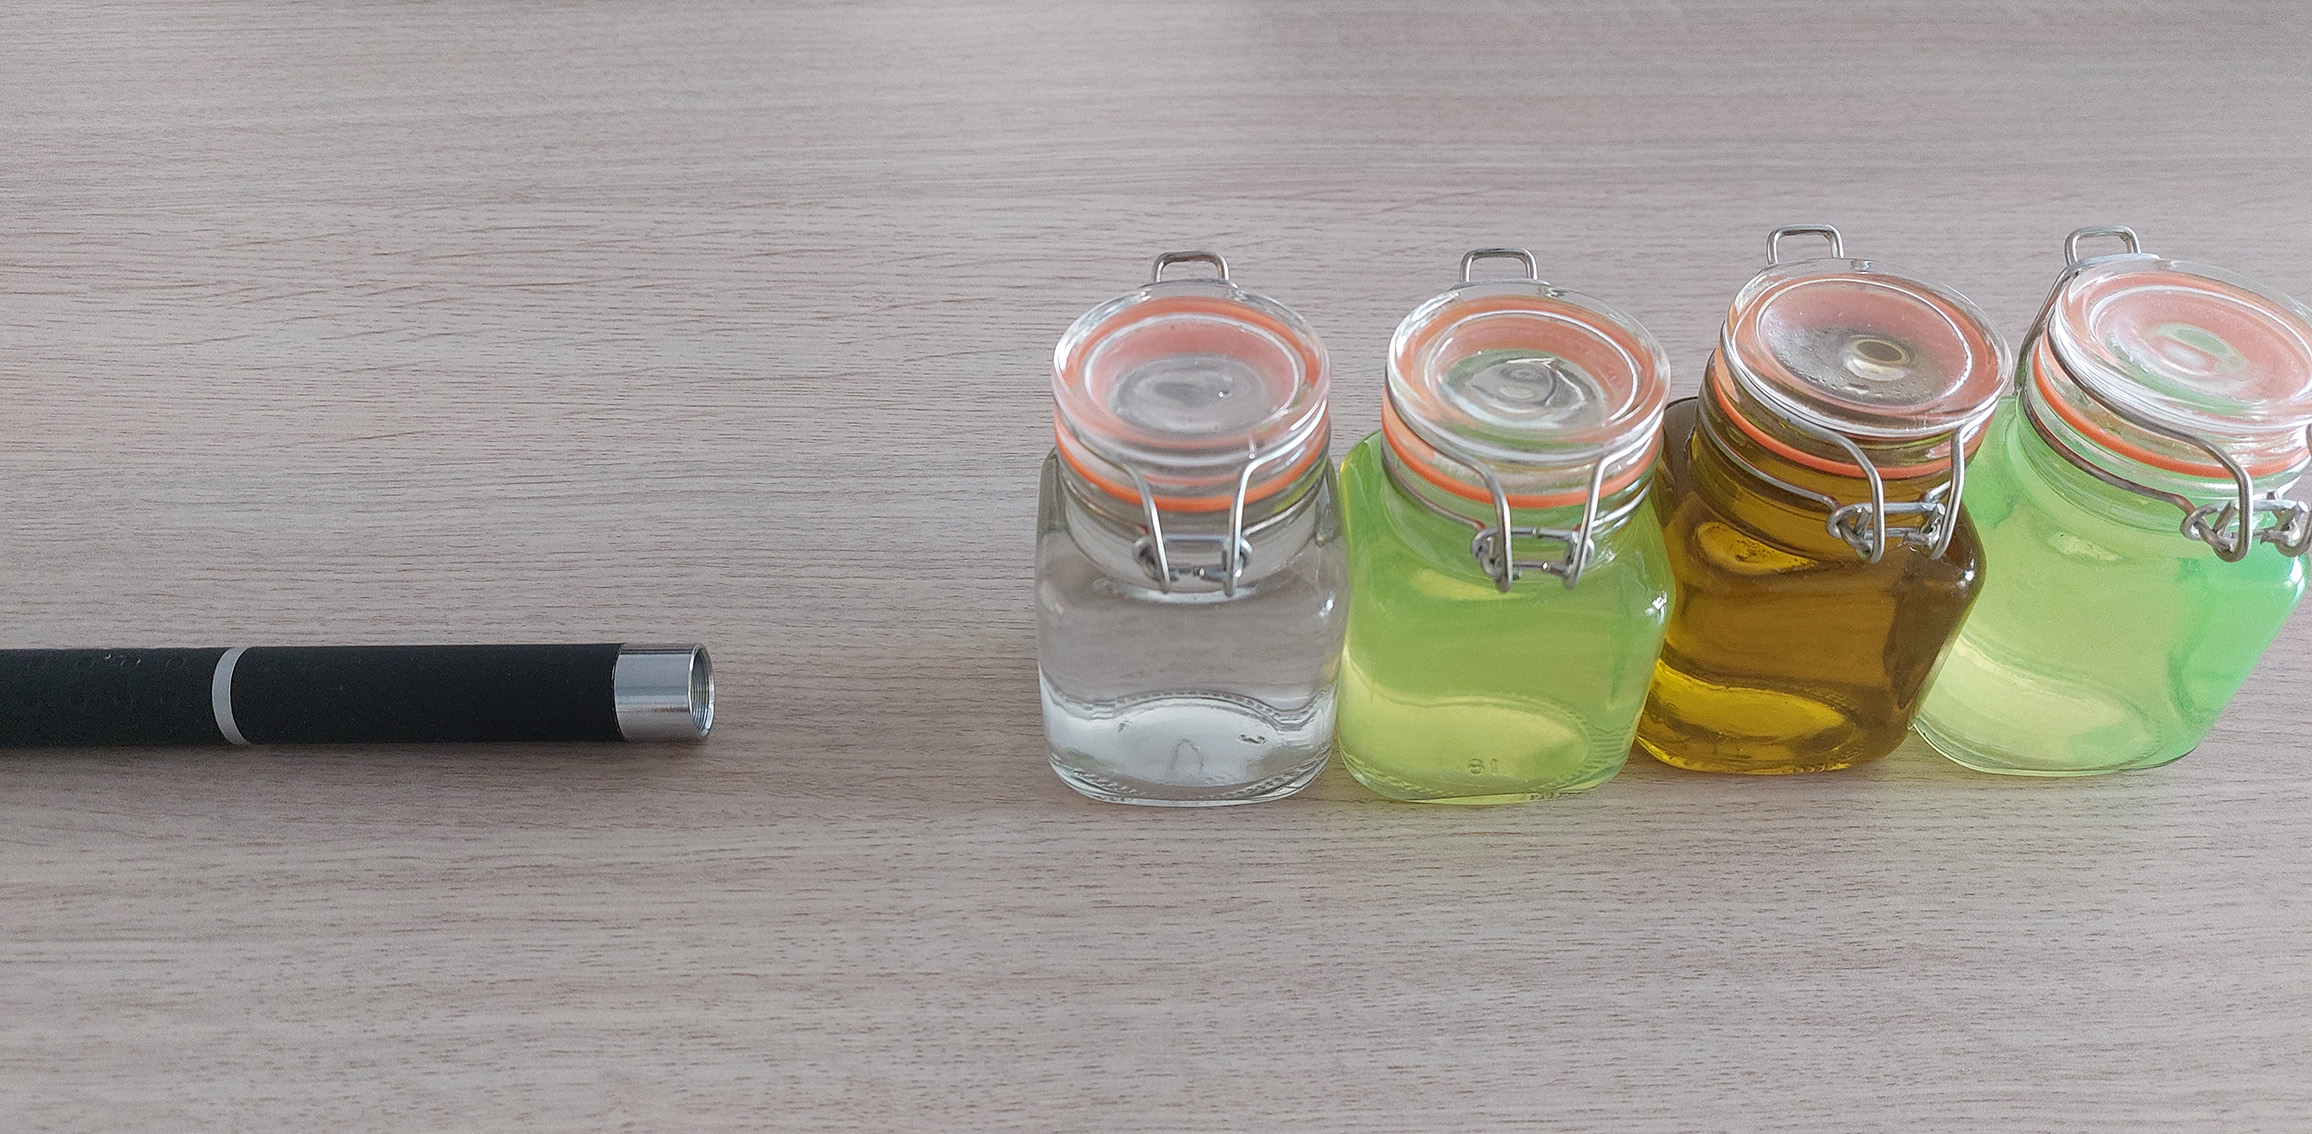
Fig. 15.36 The materials used in this demonstration.#
Preparation#
A darkened room is not required but works better, and a digital camera is also helpful.
Procedure#
Related to the demonstration Light in darkness, you start the demonstration whether you can see light when not directly looking at its source. After an inventory of students’ thoughts, you shine the red laser pointer on the wall. You’ll only see a spot until you spray water mist into the light beam. What you actually see is the scattering of light on the water droplets.
Warning
Directly shining laser light into your eye is harmful.
Build a row of bottles with water, olive oil and water. Shine the red laser pointer through this row as shown in Figure 15.35. You’ll notice a red beam of light visible in the olive oil and that the laser spot on the wall is now less intense. Scattering of light by the olive oil explains why you see the beam from the side and why there is less light falling on the wall than before. Emphasize: like before, the light reaching the wall is not scattered in the olive oil.
Explain to the students that you are going to do the same with a green laser pointer. Let students predict what they will see. Have them write down, describe, and compare their observations. Now perform the experiment. They will see an orange beam of light in the bottle of olive oil, however, the spot on the wall is still green. Spray water mist left and right of the row of bottles to show that the laser beam is green before and after the row of bottles.
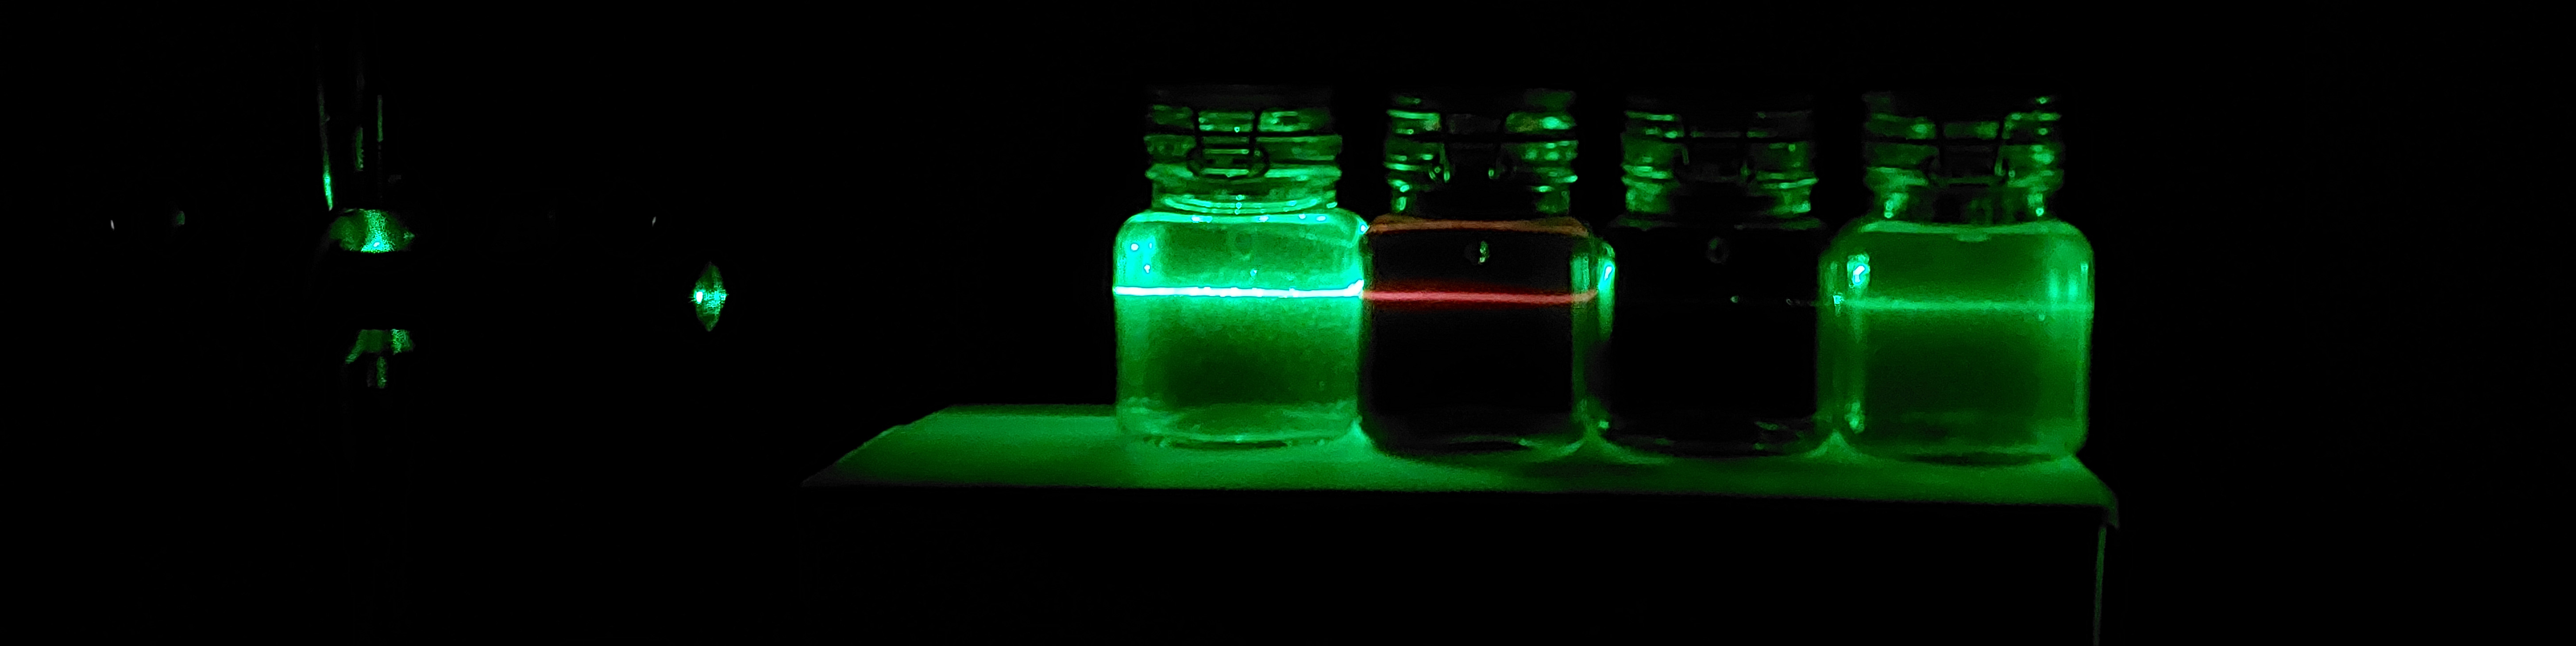
Fig. 15.37 Additionally, you can include a fourth bottle filled with water, placing the bottles in different order. Does that change what you see?#
Students may write something like: “The light is green at first, turns orange in the olive oil, and then turns green again”. This statement seems correct, but how does the color change of the light work then? How does a green beam of light become orange and then green again? Or does it? In essence the question is: Why do we see the light from the middle of the olive oil as orange and not turned back to green?
Discuss with the (qualitative) energy level diagram of chlorophyll (Figure 15.38): a photon with sufficient energy can be absorbed, and then another photon is emitted. This is called fluorescence. The emitted photon can have at most the energy of the absorbed photon. There is no source that can provide extra energy.
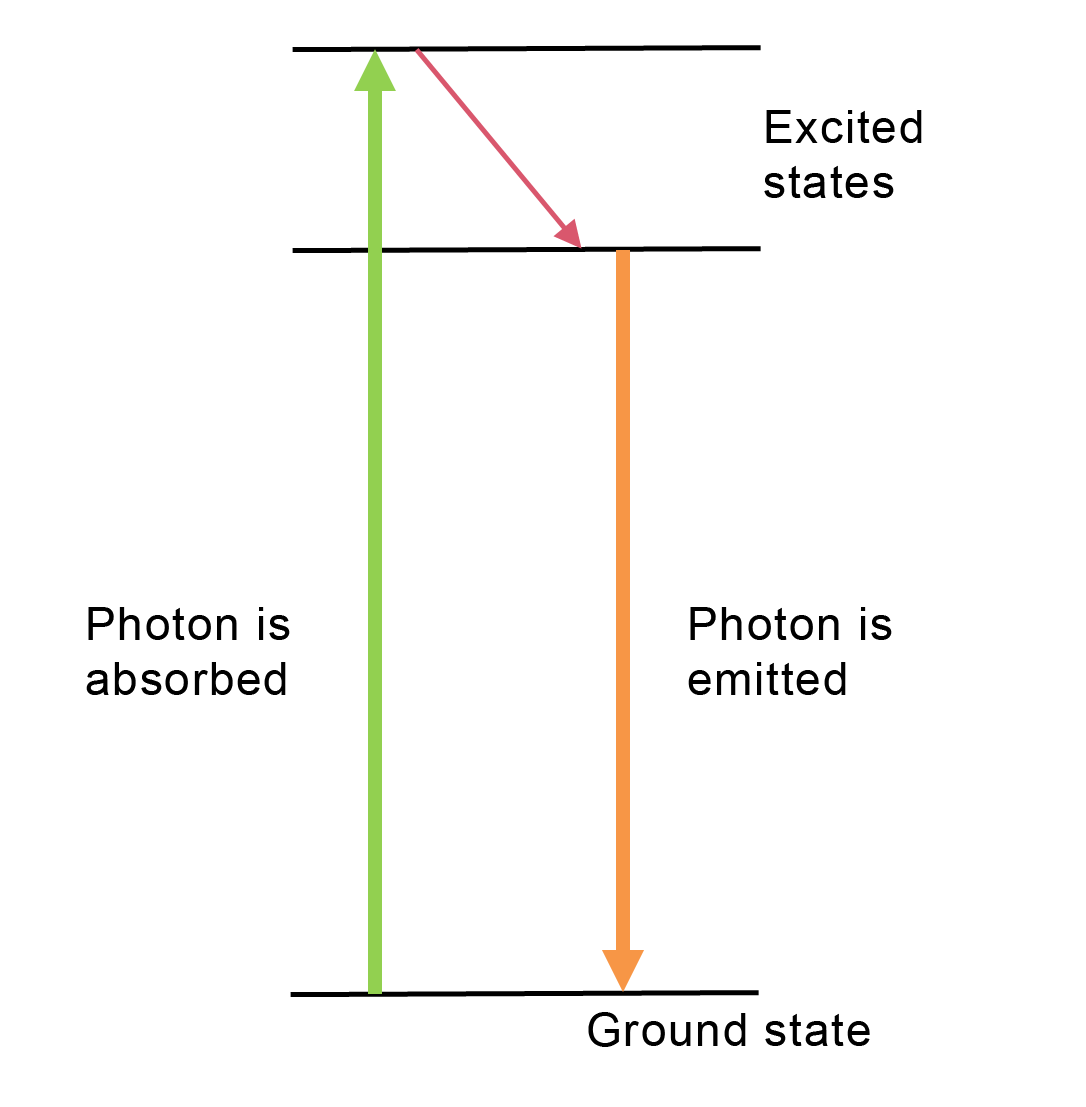
Fig. 15.38 Energy level diagram for fluorescence in olive oil#
Looking up in a reference manual, students can then determine that the red photons cannot be replaced by orange photons in this way, but green photons can. Also, orange photons cannot be replaced by green ones in this manner.
Help students describe and draw the process themselves as much as possible, where a green beam of light was seen before and after the bottle and a green spot on the wall, but an orange beam of light inside.
Physics background#
The energy of photons follows from \(E_f = hf\). For the frequencies, it holds true: \(f_{red} < f_{orange} < f_{green}\). During fluorescence, a (here green) photon is absorbed by the system, and part of the energy is released (how is unimportant) as the system returns to the ground state, see Figure 15.38. The emitted photon, in the case of chlorophyll, orange, has at most the energy of the original photon. An orange photon cannot be replaced by a green photon later on, as the additional energy required is lacking. The red beam of light remained red for another reason. Apparently, a red photon has too little energy to be absorbed; it can at most be scattered without a change in energy.
A question to assess students’ understanding: Some photons were created by scattering, others by fluorescence. What is the most important difference in energy of the photons between these processes?
Find out what the term ‘fluorescence’ has to do with the element fluor.
Follow-up#
Additionally, you can measure the fluorescence spectrum.