15.17. Cold radiation#
| Author: | Leo te Brinke |
| Time: | 15-30 minutes |
| Age group: | 10+ |
| Concepts: | Thermal radiation, reflection and absorption, parabolic mirror, focal point |
Introduction#
Heat is – in popular terms – a form of energy. Its counterpart is ‘cold’. You can get rid of cold by adding heat. You can’t get rid of heat by adding cold, although it might seem that way when you open a window in winter. In fact, heat escapes. Heat is ‘something’, cold is ‘nothing’.
Confusing? Think of it like this: cold is like a hole in a piece of paper; you can’t remove it by cutting it out, only by filling it with paper.
A similar story applies to light and darkness: Gyro Gearloose, famous inventor from the Donald Duck comics, once invented a ‘darkness projector’ to blind the Beagle Boys. But this unfortunately did not work…
How does this apply to other forms of radiation? Thermal radiation is also called heat radiation: the ‘warmer’ an object, the more thermal radiation it emits. And cold radiation doesn’t exist. Right? After seeing this experiment, once demonstrated by David Jones on the German TV show Kopf um Kopf, you might start to doubt.
Equipment#
Two parabolic mirrors
A sensitive temperature sensor with a display
Something very cold (dry ice or liquid nitrogen in a test tube)
A ruler or measuring tape; stands and clamps
A bright light for determining the focal points
Optionally, an infrared camera.
Preparation#
Secure the two mirrors with their principal axes horizontally aligned at the same height.
Place them facing each other and, if necessary, use a bright light and a piece of paper to locate the focal points; mark these in some way, for example with skewers.
Place the sensor in a stand at the same height as the focal points.
Prepare another stand so that the test tube with dry ice or liquid nitrogen can be quickly positioned, with the cold substance at the same height as the focal point.
Ensure dry ice or liquid nitrogen is ready.
Tip
The temperature sensor should have the smallest possible thermal capacity; a standard thermometer might not register a measurable temperature drop.
The experiment can be made even more convincing by placing a second temperature sensor at another location equally distant from A, if possible.
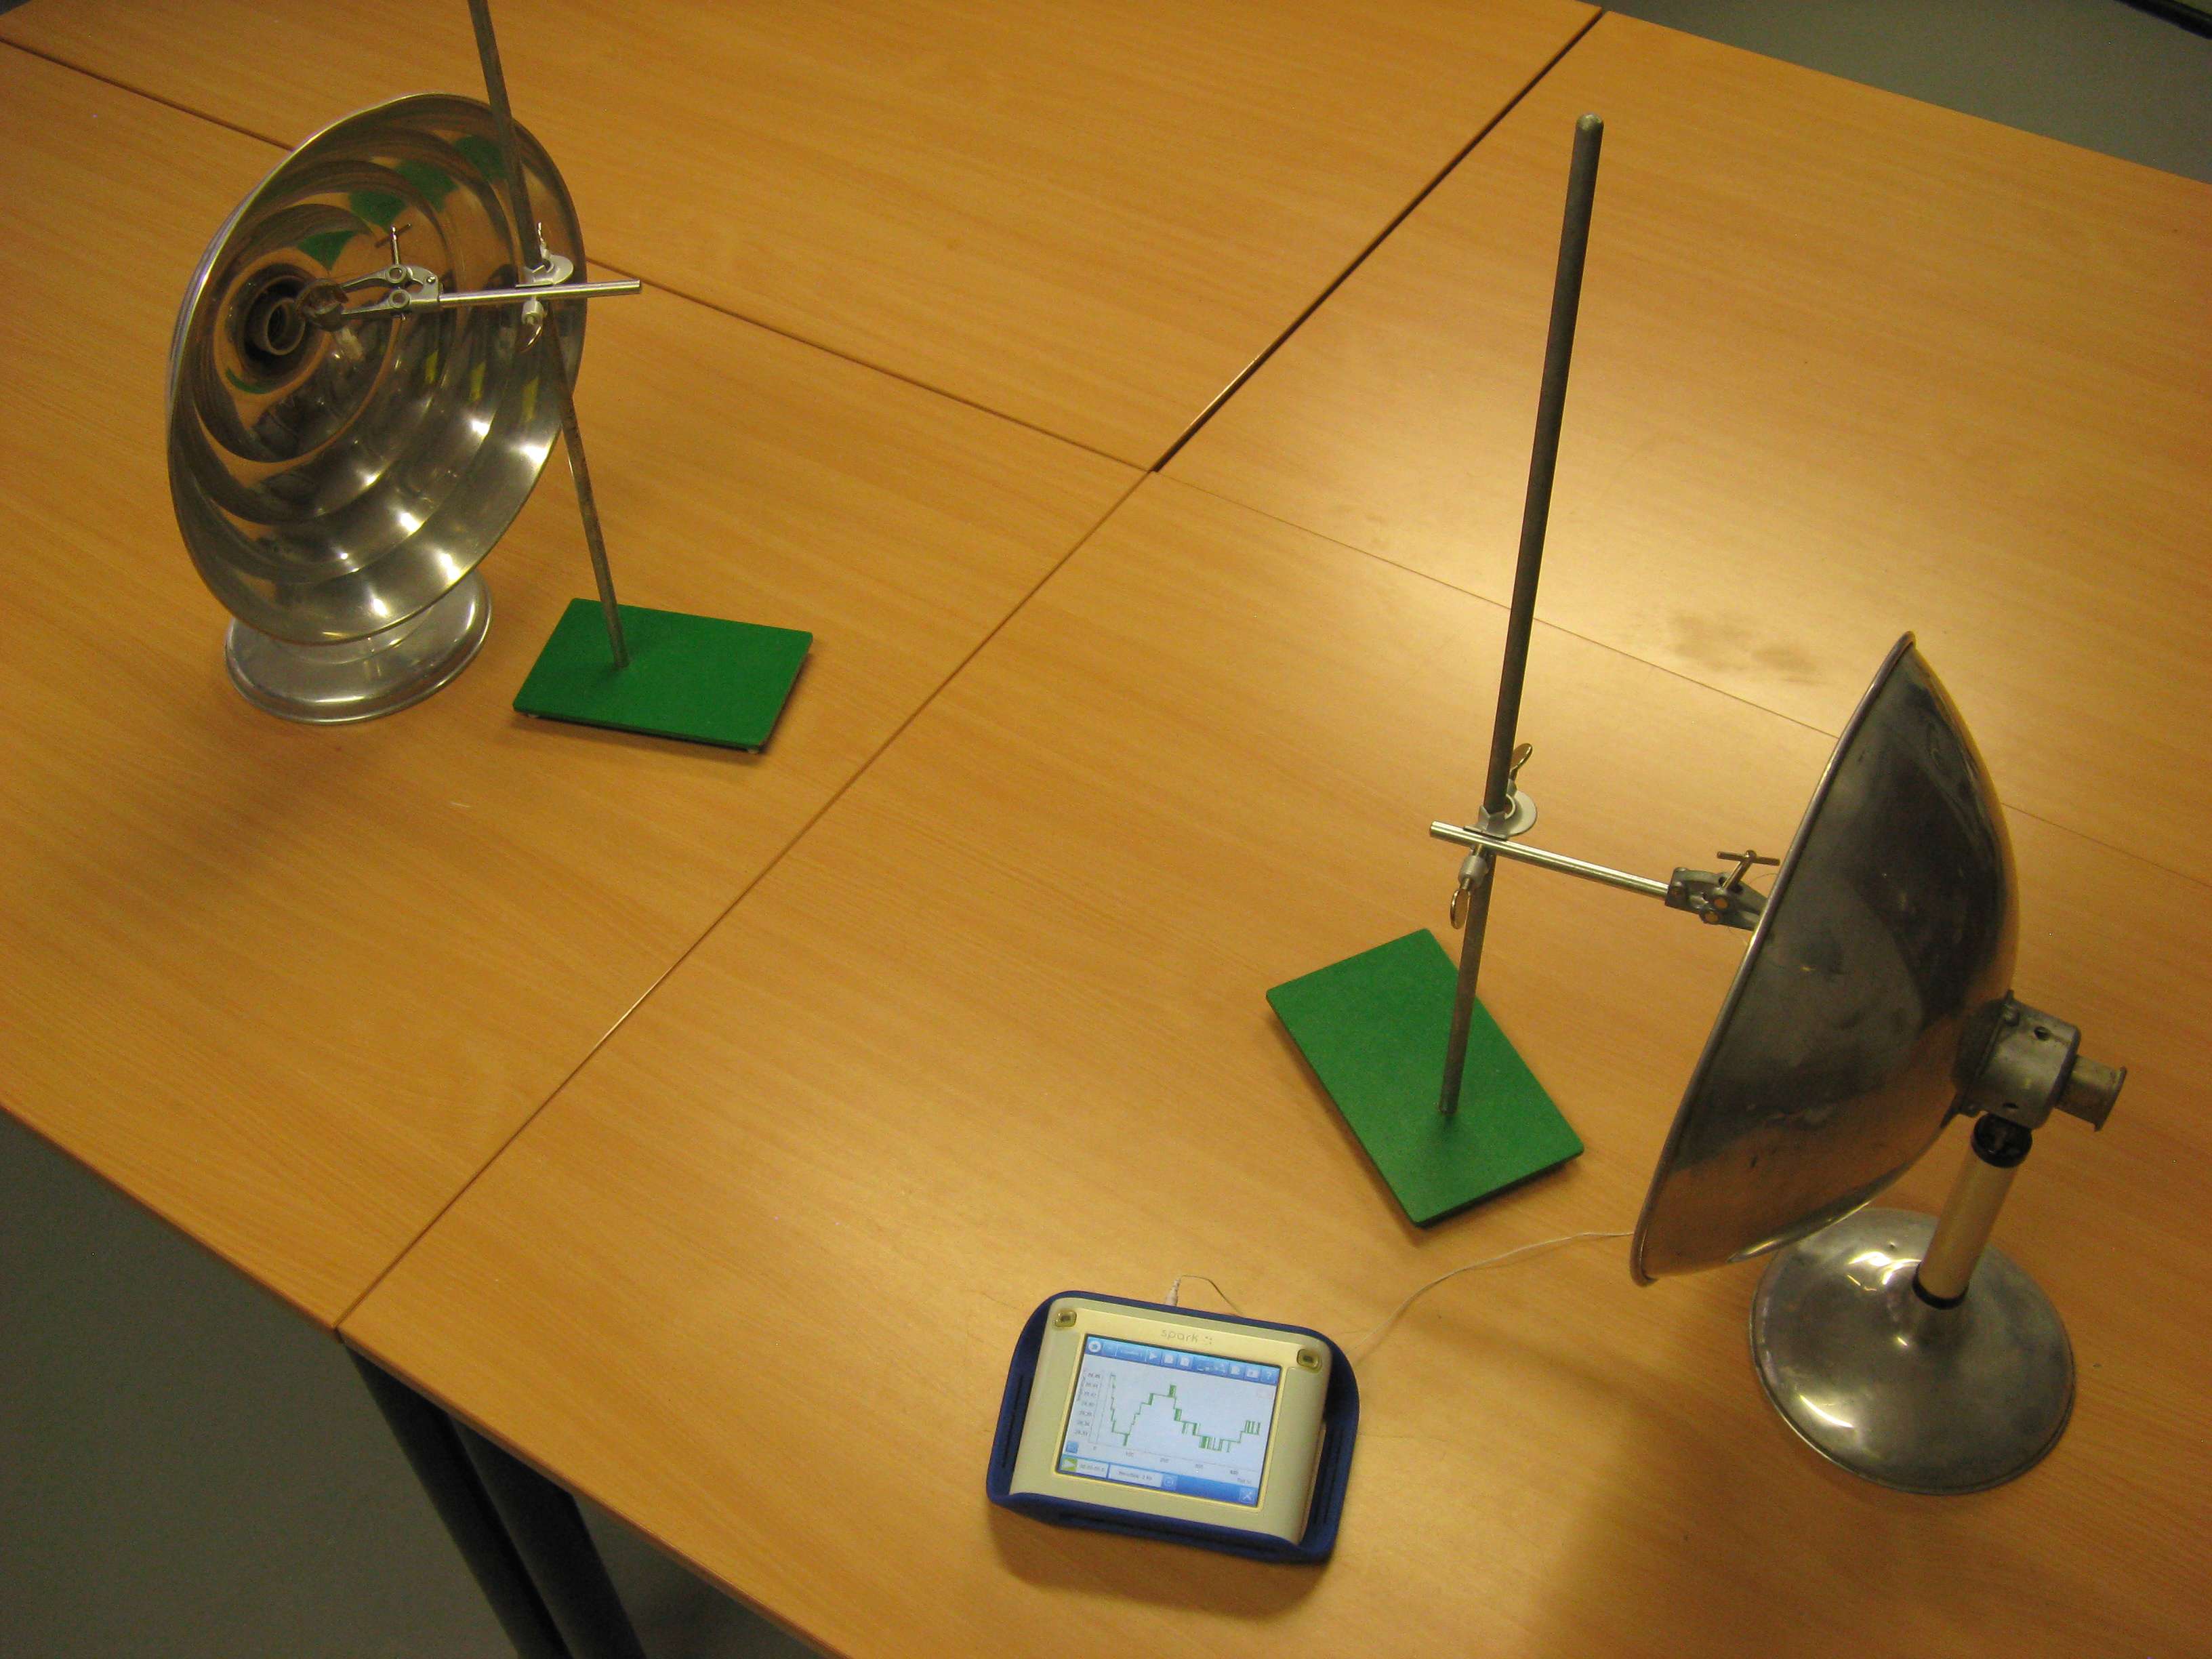
Fig. 15.47 The setup.#
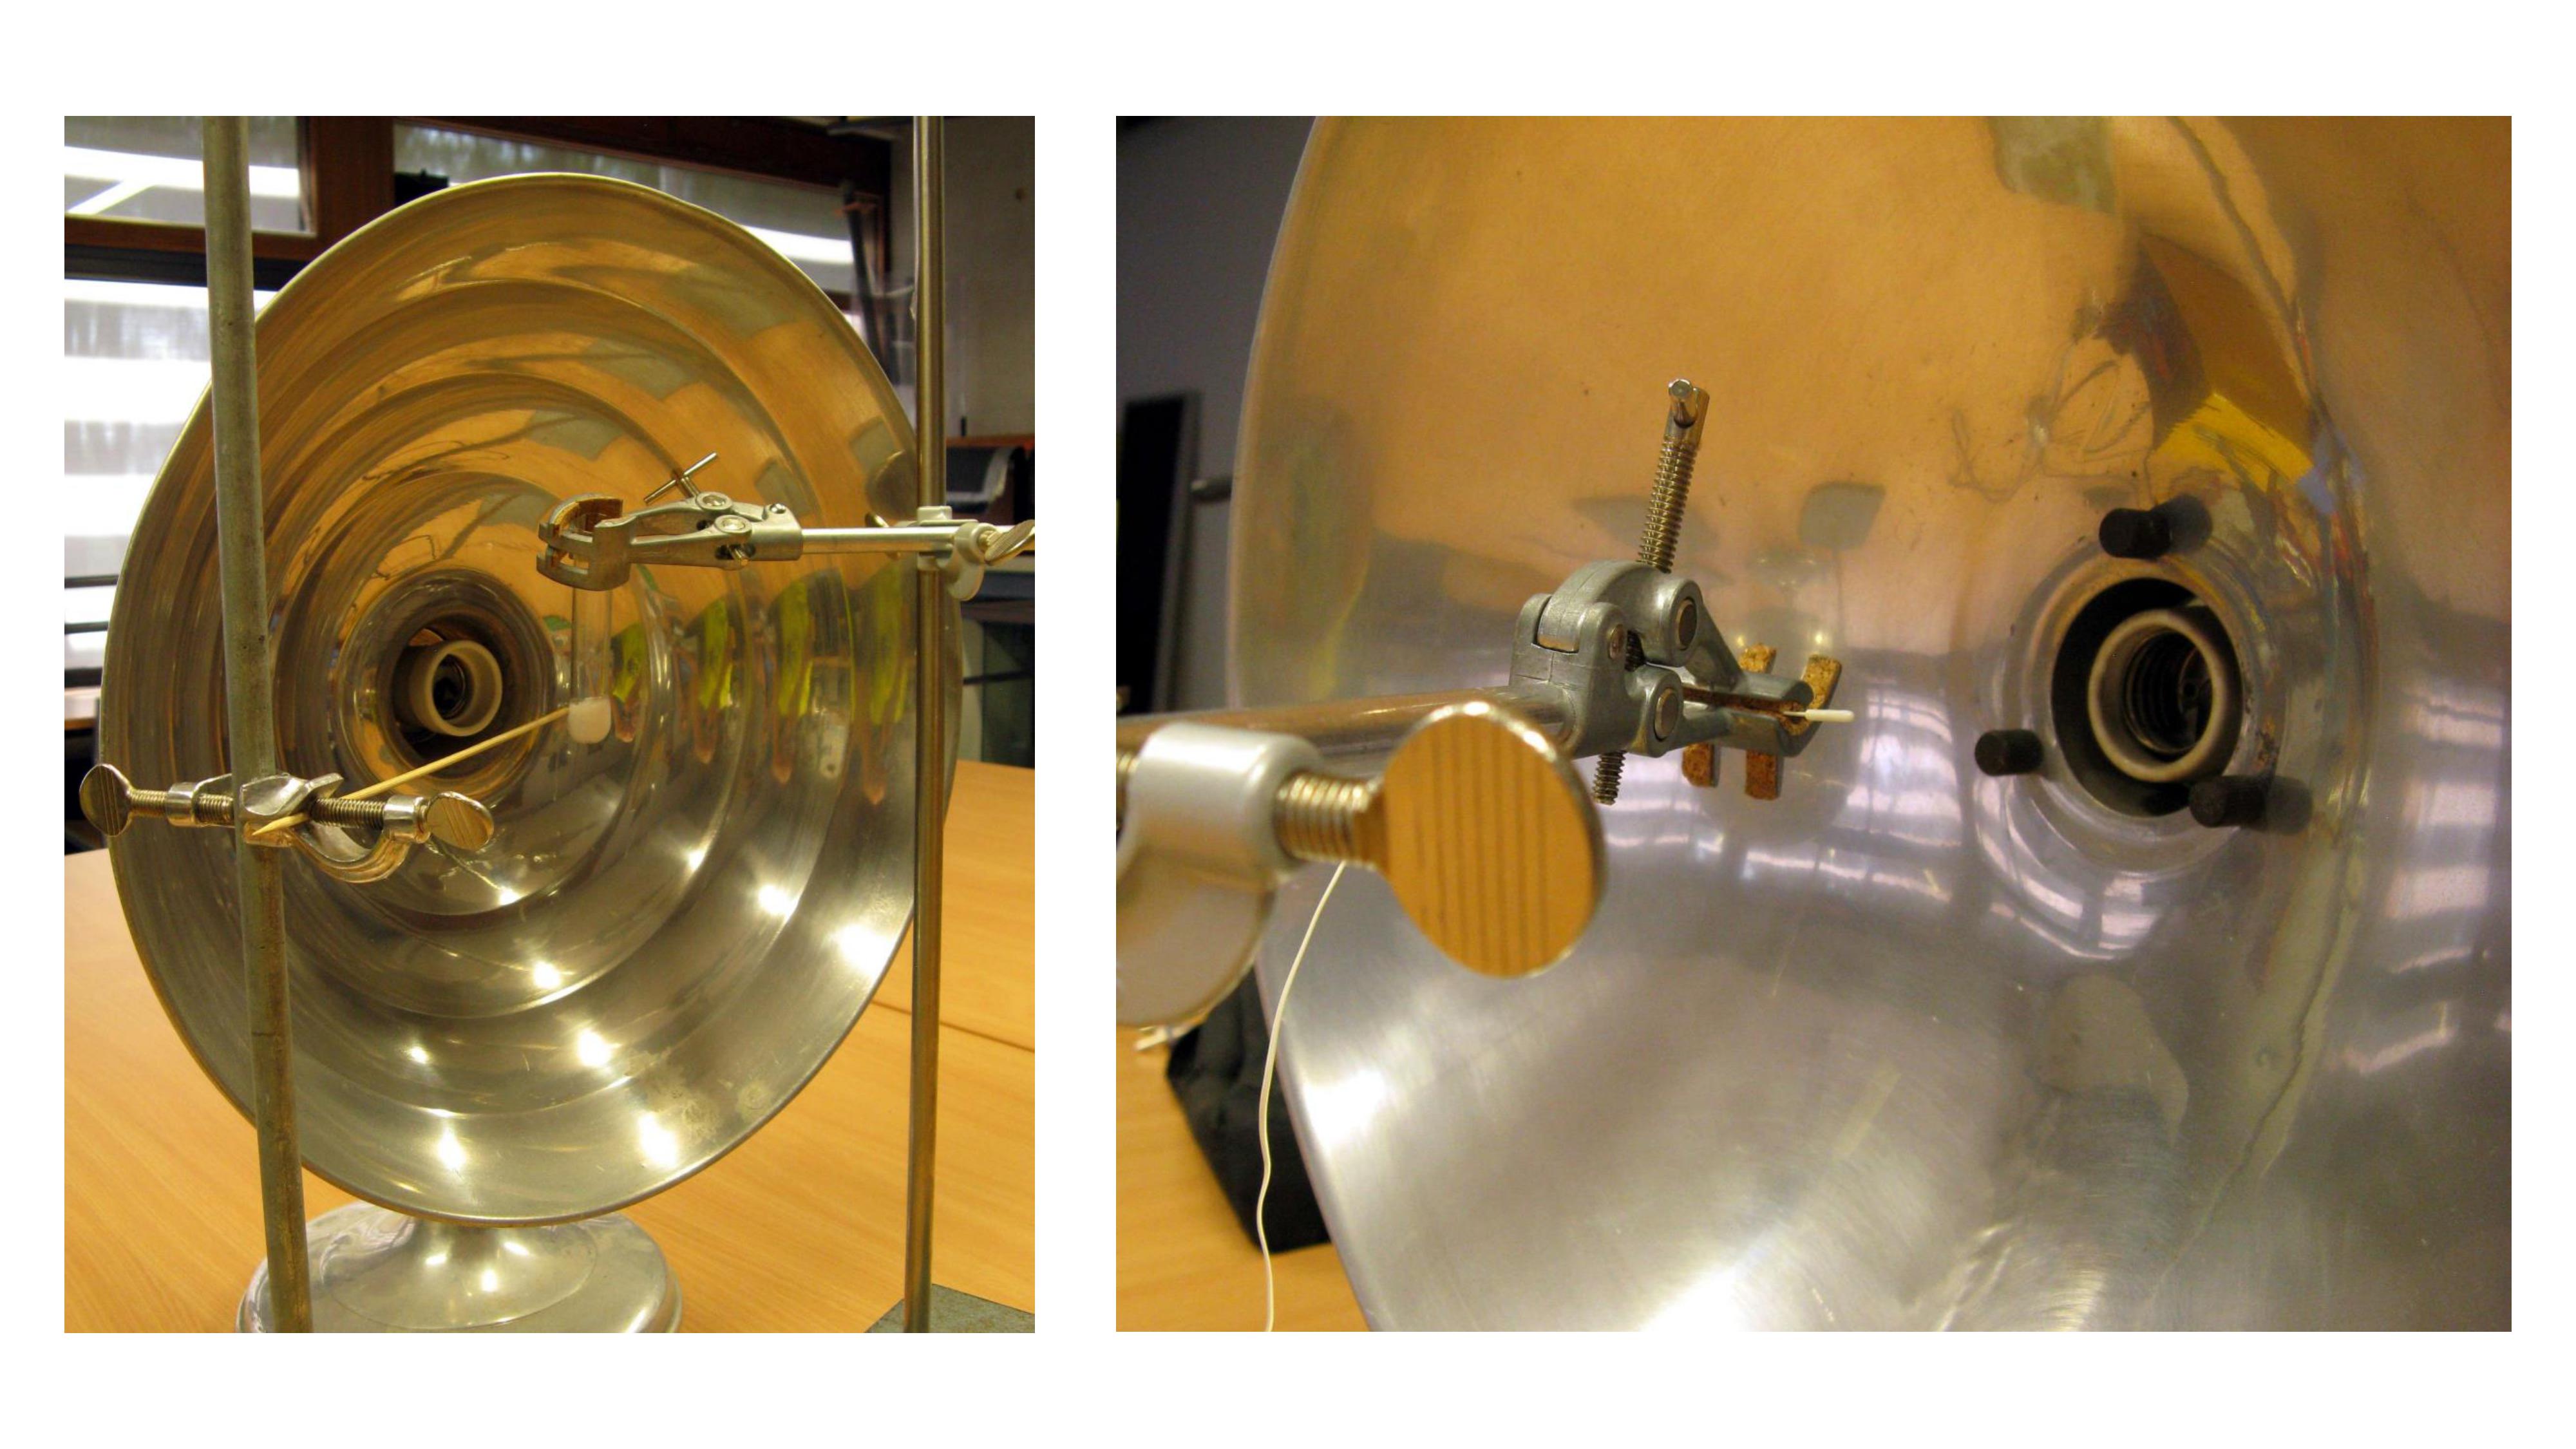
Fig. 15.48 Left: The skewer marks the focal point; place the test tube with dry ice here. Right: The temperature sensor.#
Procedure#
If necessary, demonstrate that the two mirrors focus the light from a lamp placed at one focal point into the other focal point (you can also demonstrate how to find the focal points for the audience).
Place the temperature sensor at one focal point and wait until the temperature stabilizes. Now place the dry ice or liquid nitrogen at the other focal point. The temperature will begin to drop. After a few minutes, remove the ‘cold source’: the temperature will rise again. The only explanation here is that ‘cold radiation’ is converging on the temperature sensor through the two mirrors.
And then, of course, discuss…
Tip
After or to support the discussion, if possible, use an infrared camera.
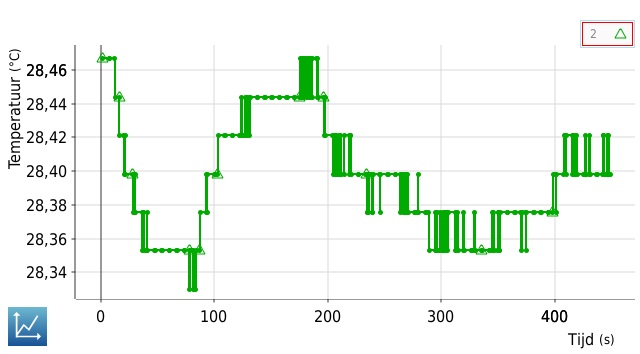
Fig. 15.49 A measurement with dry ice: at t = 0, the test tube is placed; it is removed at 80 seconds and put back at 180 seconds; after about 300 seconds, the dry ice had evaporated. The cooling and warming curves appear neatly exponential to the eye.#
Physics background#
Even in an environment where heat conduction and convection are impossible, two objects at different temperatures will eventually reach the same temperature through radiation exchange. The warmer object emits more radiation than the cooler one; the latter thus receives more net radiation than it emits. Something similar happens here, via two mirrors with focal points A and B. The main axes of the mirrors align. The air insulates well and doesn’t move: heat transfer between points in space occurs solely through radiation.
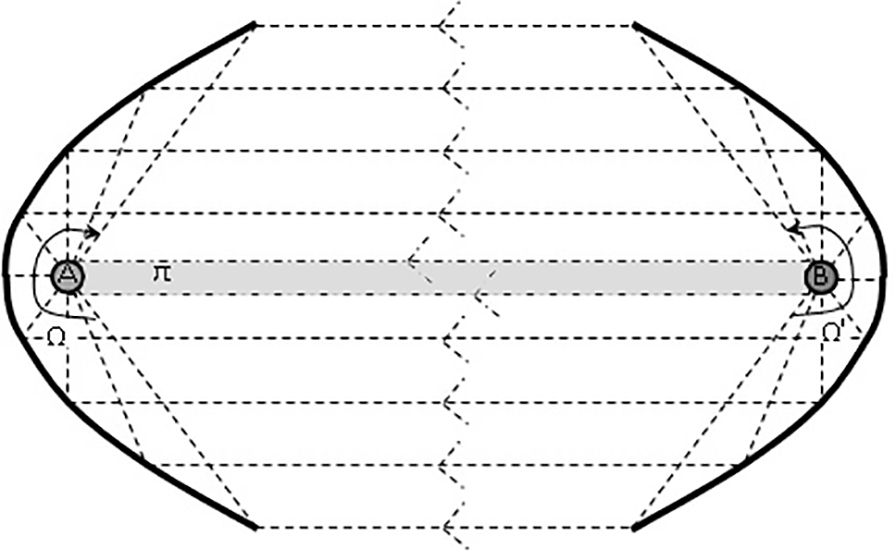
Fig. 15.50 The setup schematically.#
First, consider the situation without mirrors. We focus on what happens at B, where B can be any point in space. Initially, thermal equilibrium exists throughout the space: the total power radiated by B equals the total power B absorbs from the whole space. Now, something very cold is placed at A. Over time, this affects the entire space, which in turn will influence B. But we focus on the immediate effects on B following the change at A.
Think of A and B connected by a cylinder \(\pi\) (gray in Figure 15.50). Every point in space cools down because the radiative power that A sends through \(\pi\) to B is now less than before, when it was equal to the radiative power B sends through \(\pi\) to A. Consequently B experiences a net negative electromagnetic flux from the cylinder, causing B’s temperature to decrease. Without the mirrors, this would apply to every point in the space, and the ‘cold source’ would warm up while the entire rest of the space cooled. Since the emitted power is proportional to the fourth power of the temperature (in Kelvin), this change is quite a strong effect. But with the mirrors placed as shown in the figure, with point B in one focal point and A in the other, B is different from the rest of the space. It is no longer only the gray tube but all of the radiation that A emits within the solid angle \(\Omega\)’ that is received by B from an equally large solid angle \(\Omega\). So the radiative power reaching B via \(\Omega\) also decreases, while B initially emits the same amount into \(\Omega\). This makes B’s temperature drop faster than that of all other points in space, in the area around B. For B, it’s as if A and the entire left mirror are ice-cold.
Tip
As seen in Figure 15.47 and Figure 15.48, we performed the experiment with two aluminum reflectors from old sun lamps, whose shape is far from parabolic. These also lack a clear focal point. We expect a more significant temperature drop with actual parabolic mirrors.
Follow-up#
If an infrared camera is available, the entire demonstration can also be ‘photographed’ thermally. The following photos support the above explanation, but they can also be used to argue for the existence of cold radiation. After all, the photos show that cold radiation converges at the focal point…
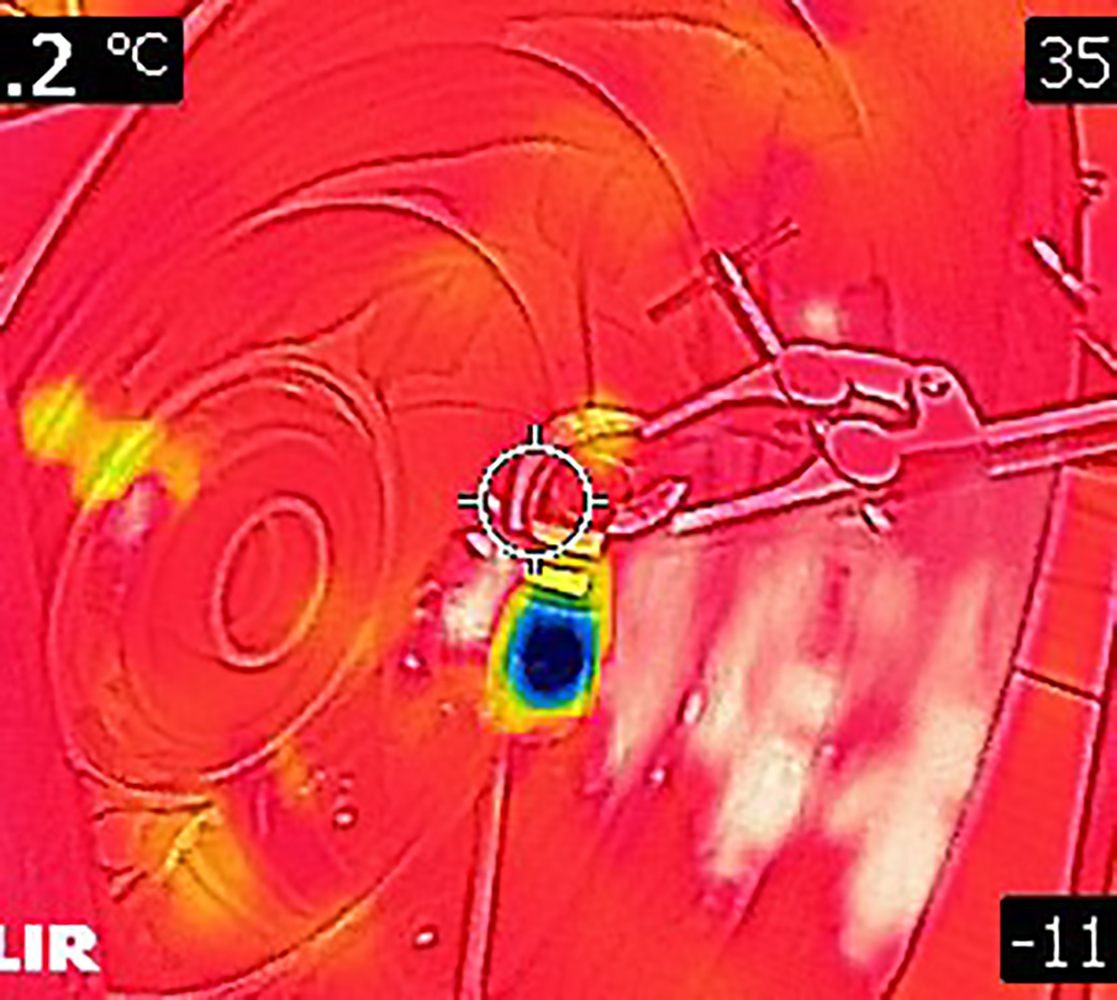
Fig. 15.51 The ‘radiation source’ in the focal point of the emitting mirror; it was 35°C at that moment, hence the ‘overheated’ mirror.#
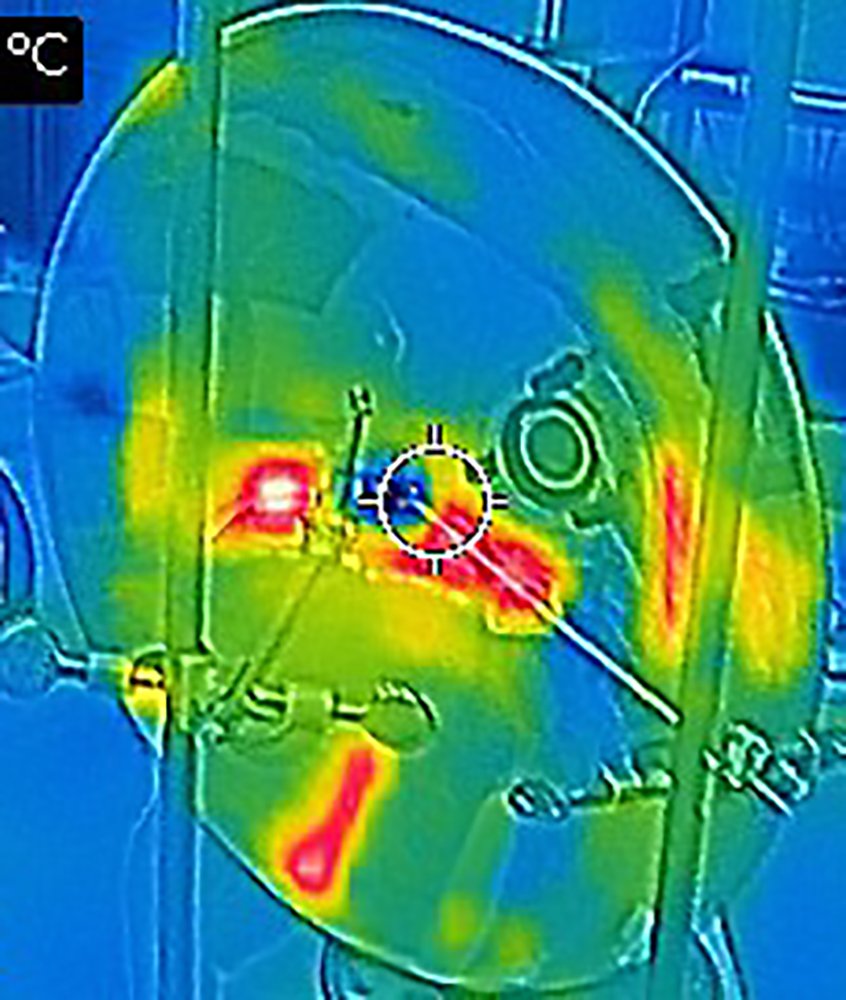
Fig. 15.52 The camera sees a cold spot in the focal point of the receiving mirror.#
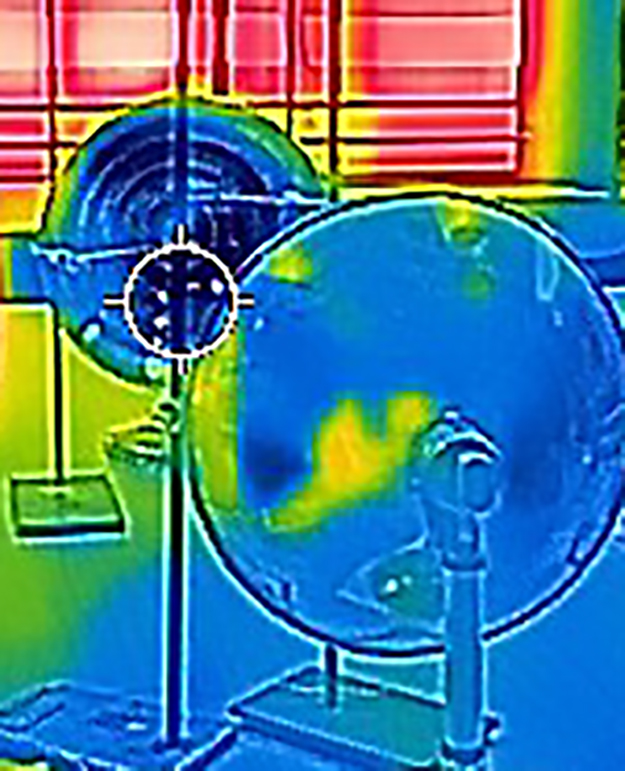
Fig. 15.53 From the right angle, the mirror appears clearly colder than its surroundings, but not from other angles.#
Determining the focal points can also be part of the demonstration. In a classic experiment to illustrate the focal point phenomenon, you use the same two mirrors. A very bright lamp (or heating element) is placed at one focal point, and three matches are placed in front of the other mirror: one with its head precisely at the focal point, and the others a few centimeters in front or behind it. When the lamp is turned on, only the middle match ignites.
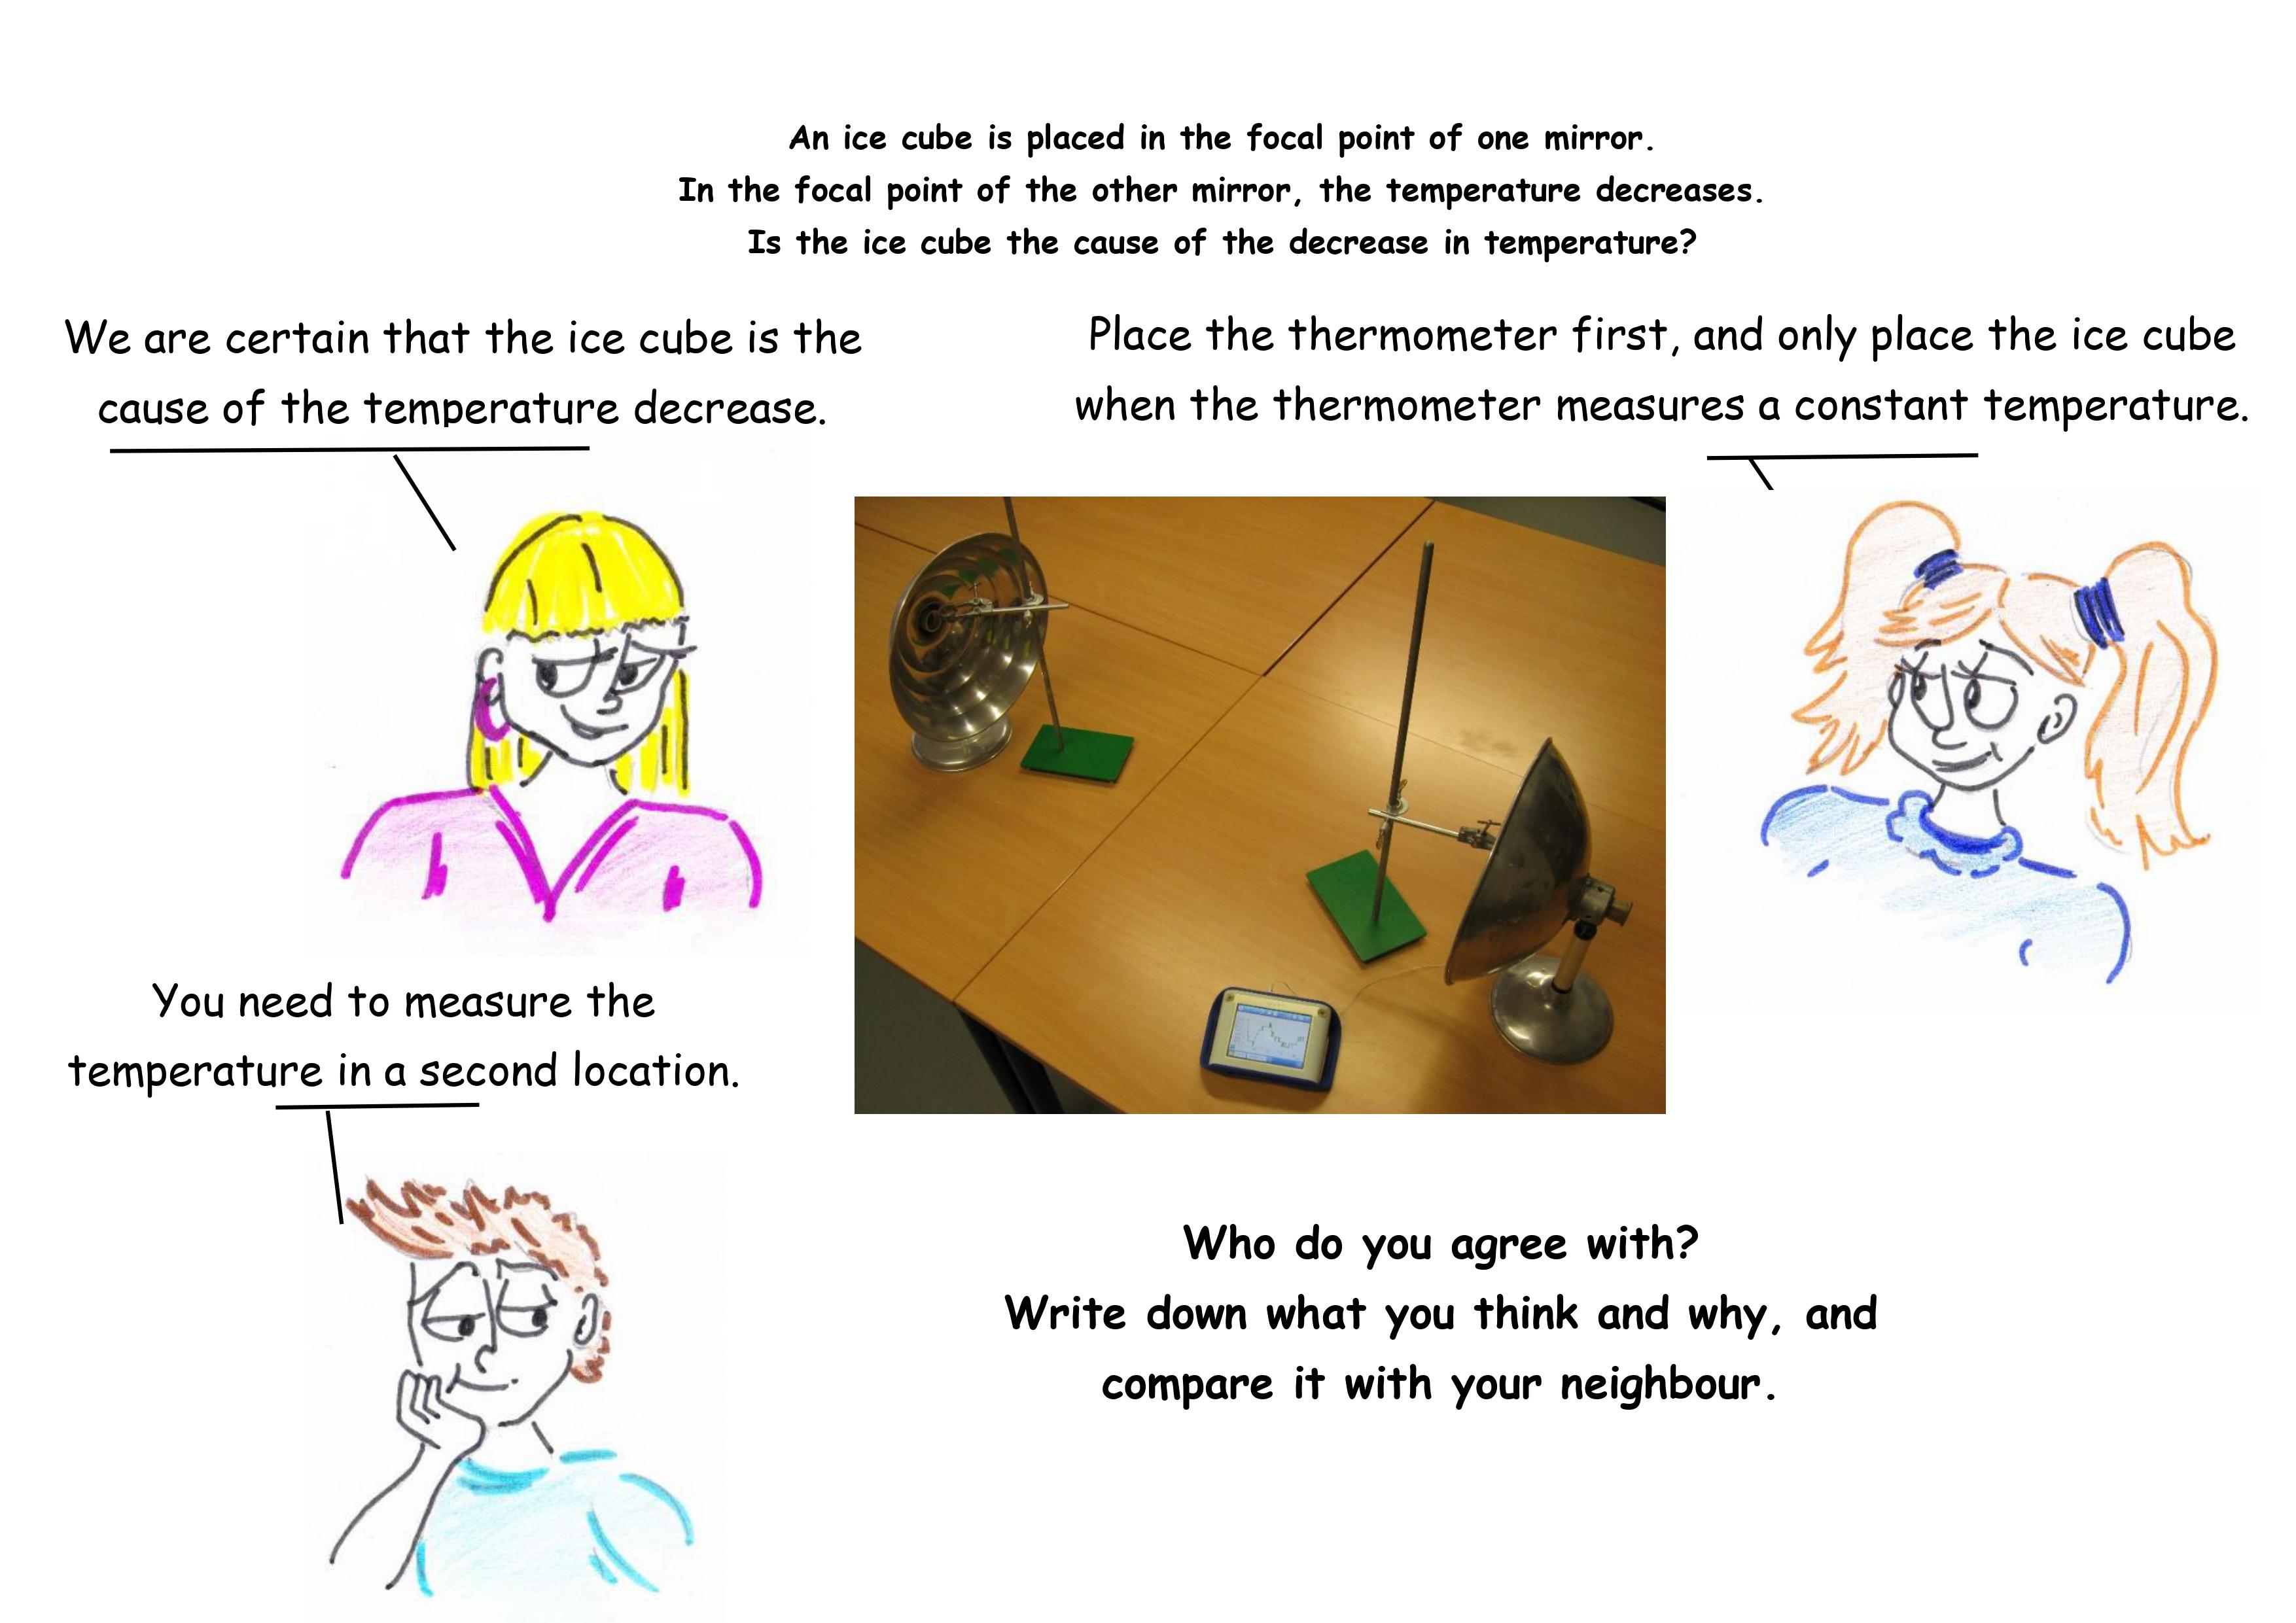
Fig. 15.54 An illustration to show the students, to let them think about the demonstration.#
For those without parabolic mirrors (or something similar), you could try bending shiny metal strips into parabolas. Such a mirror doesn’t have a focal point but a ‘focal line’, but it might still work. We haven’t tried it.