16.2. Blowing out a light bulb#
| Author: | Wouter Spaan |
| Time: | 15 minutes |
| Age group: | 13+ |
| Concepts: | NTC (Negative Temperature Coefficient), series circuit, power, heat generation |
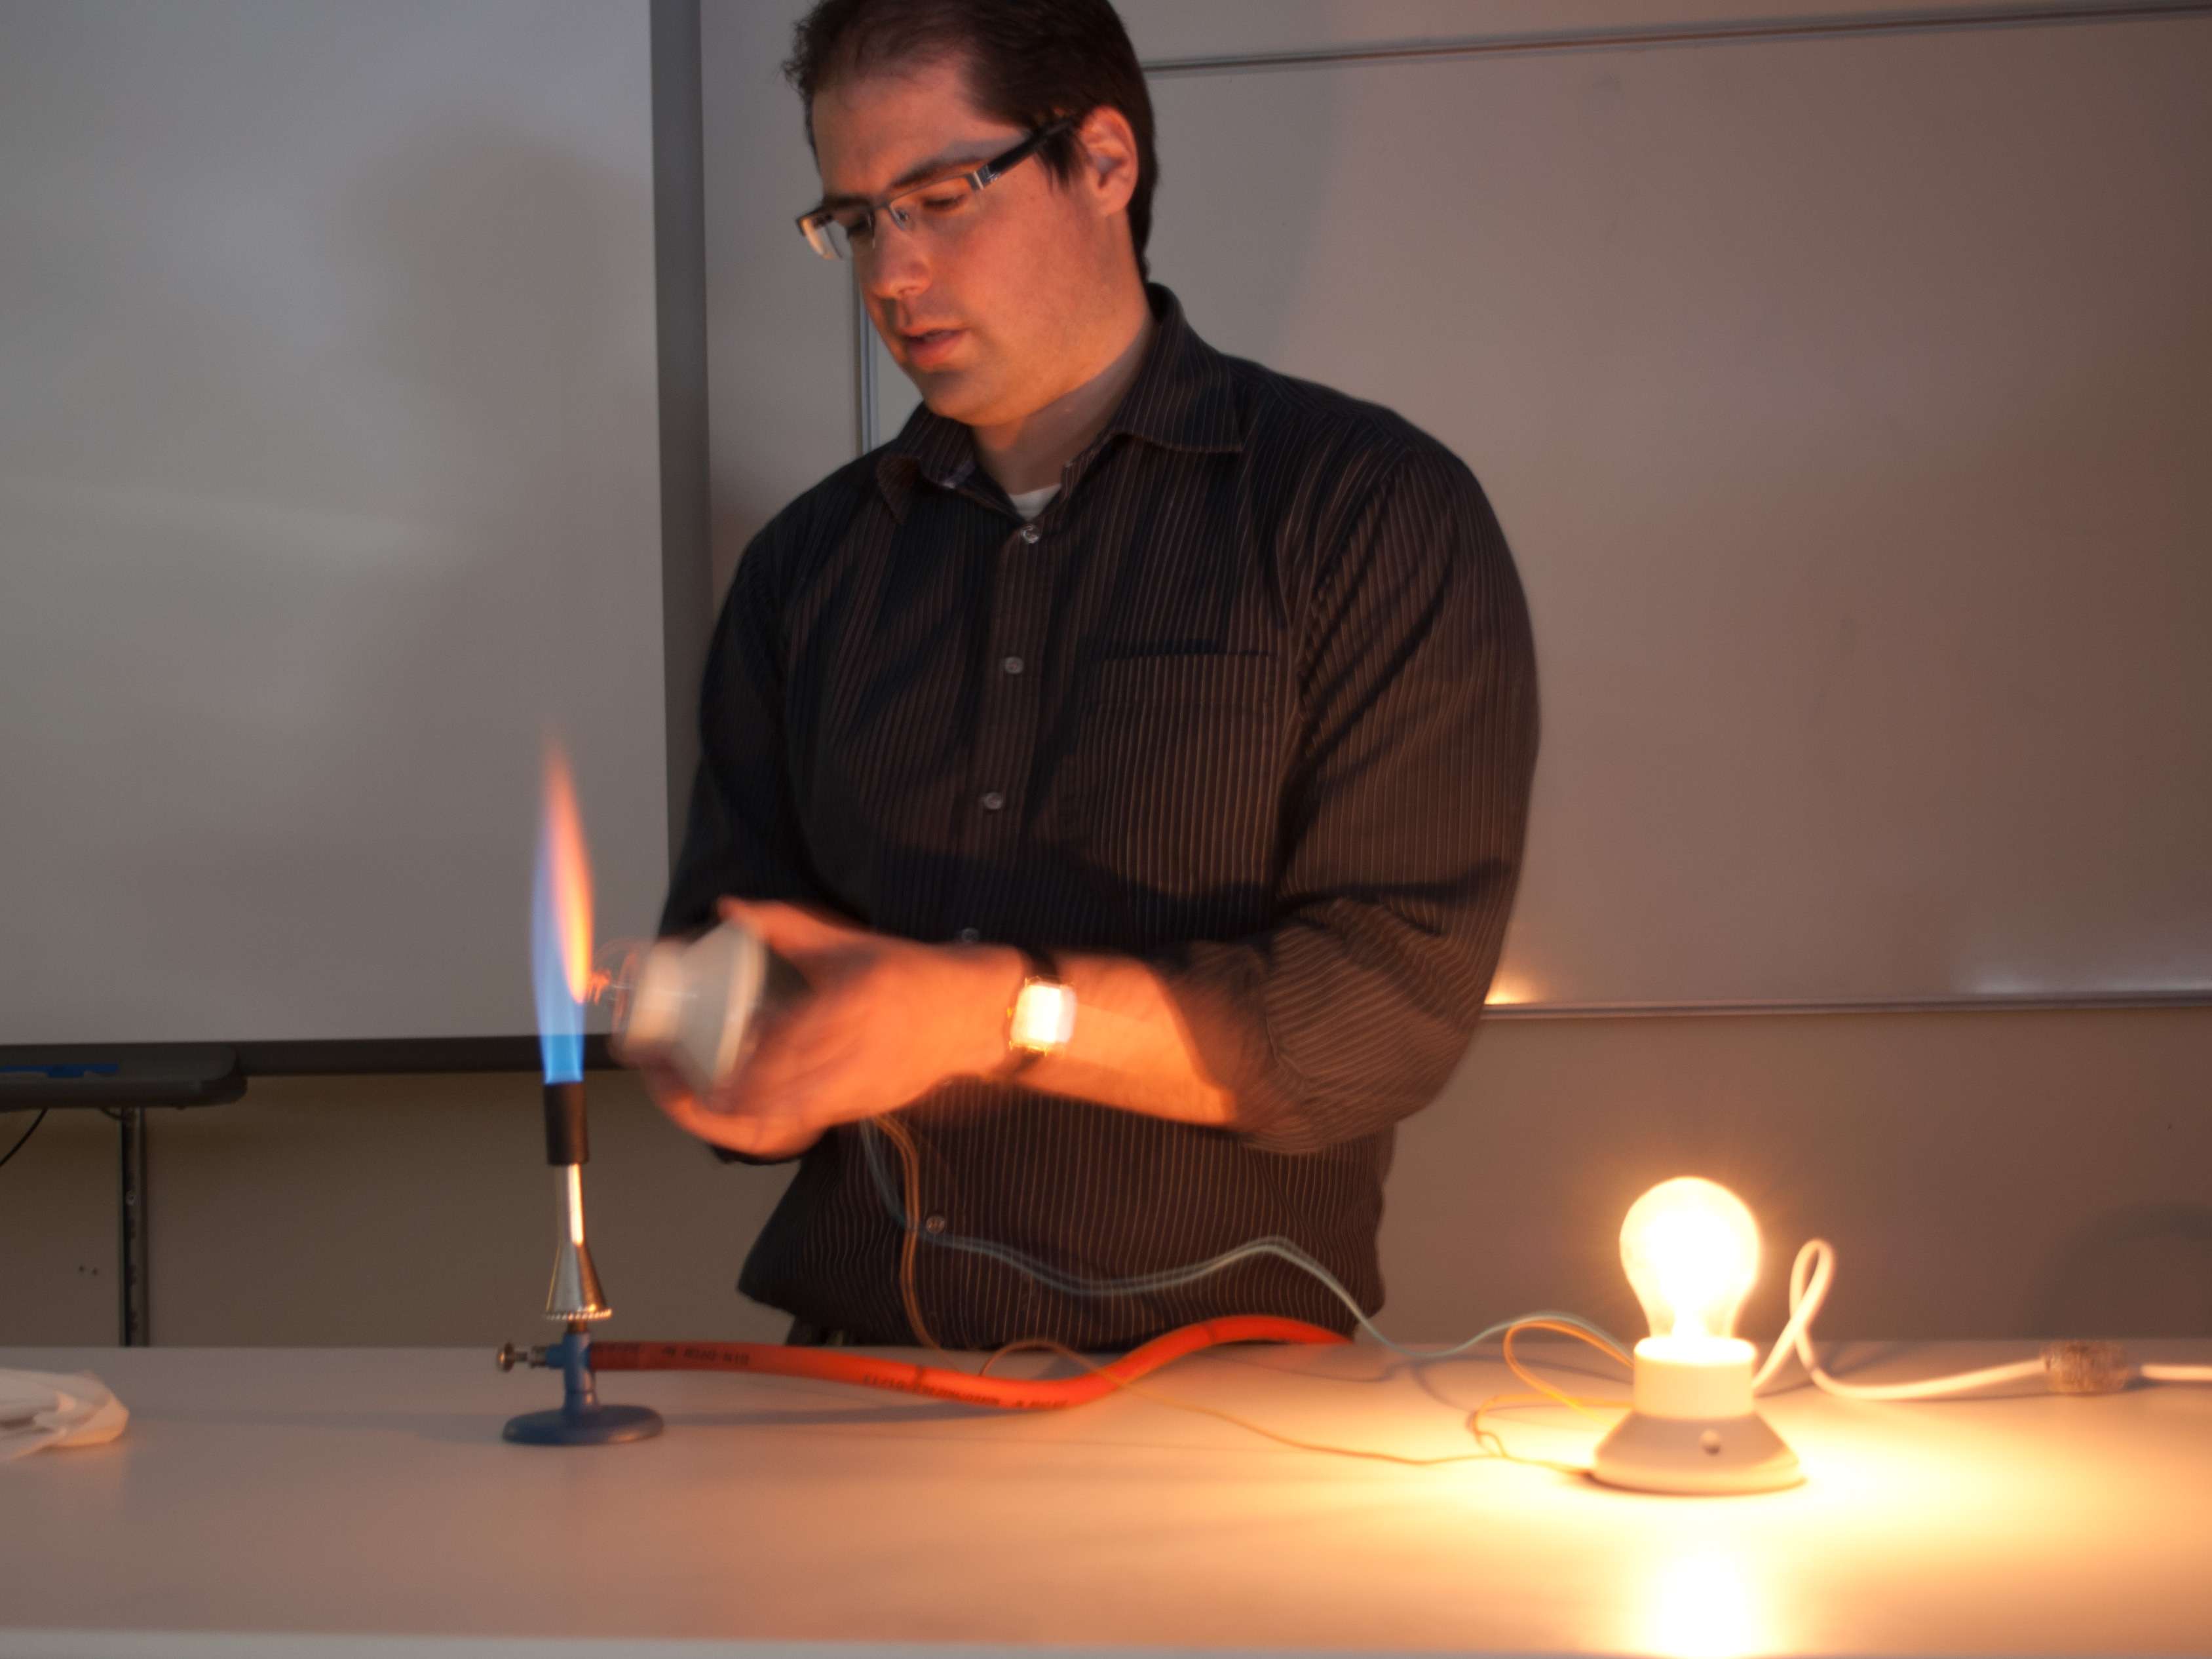
Fig. 16.3 If you (carefully!) heat the piece of glass, the resistance value decreases and the light bulb lights up.#
This demonstration is adapted from [].
Introduction#
The primary goal of this demonstration is to demonstrate the NTC behavior of glass. You can discuss concepts from electrical engineering at various levels and prompt students to think about heating due to current flow.
Equipment#
Random light bulb
40-60 W light bulb (see tips)
Two sockets (for mains voltage), preferably one ceramic for fire resistance
Mains voltage switch
Plug with grounding
Gas burner
Warning
Make sure to wear safety glasses (the same for the front row of students or place a screen)
Preparation#
Break the glass of one of the light bulbs. This works best with a hammer while the light bulb is completely wrapped in a layer of paper. Then remove the filament from the light bulb. Also remove any support for the filament, for example, with a glass saw. The lamp will then look like in Figure 16.4 (without it glowing).
Place the modified bulb and the intact bulb in a suitable socket, which is not too high on the rim (due to later heating). Connect these lamps in series with a switch.
Warning
The glass shards are razor-sharp!
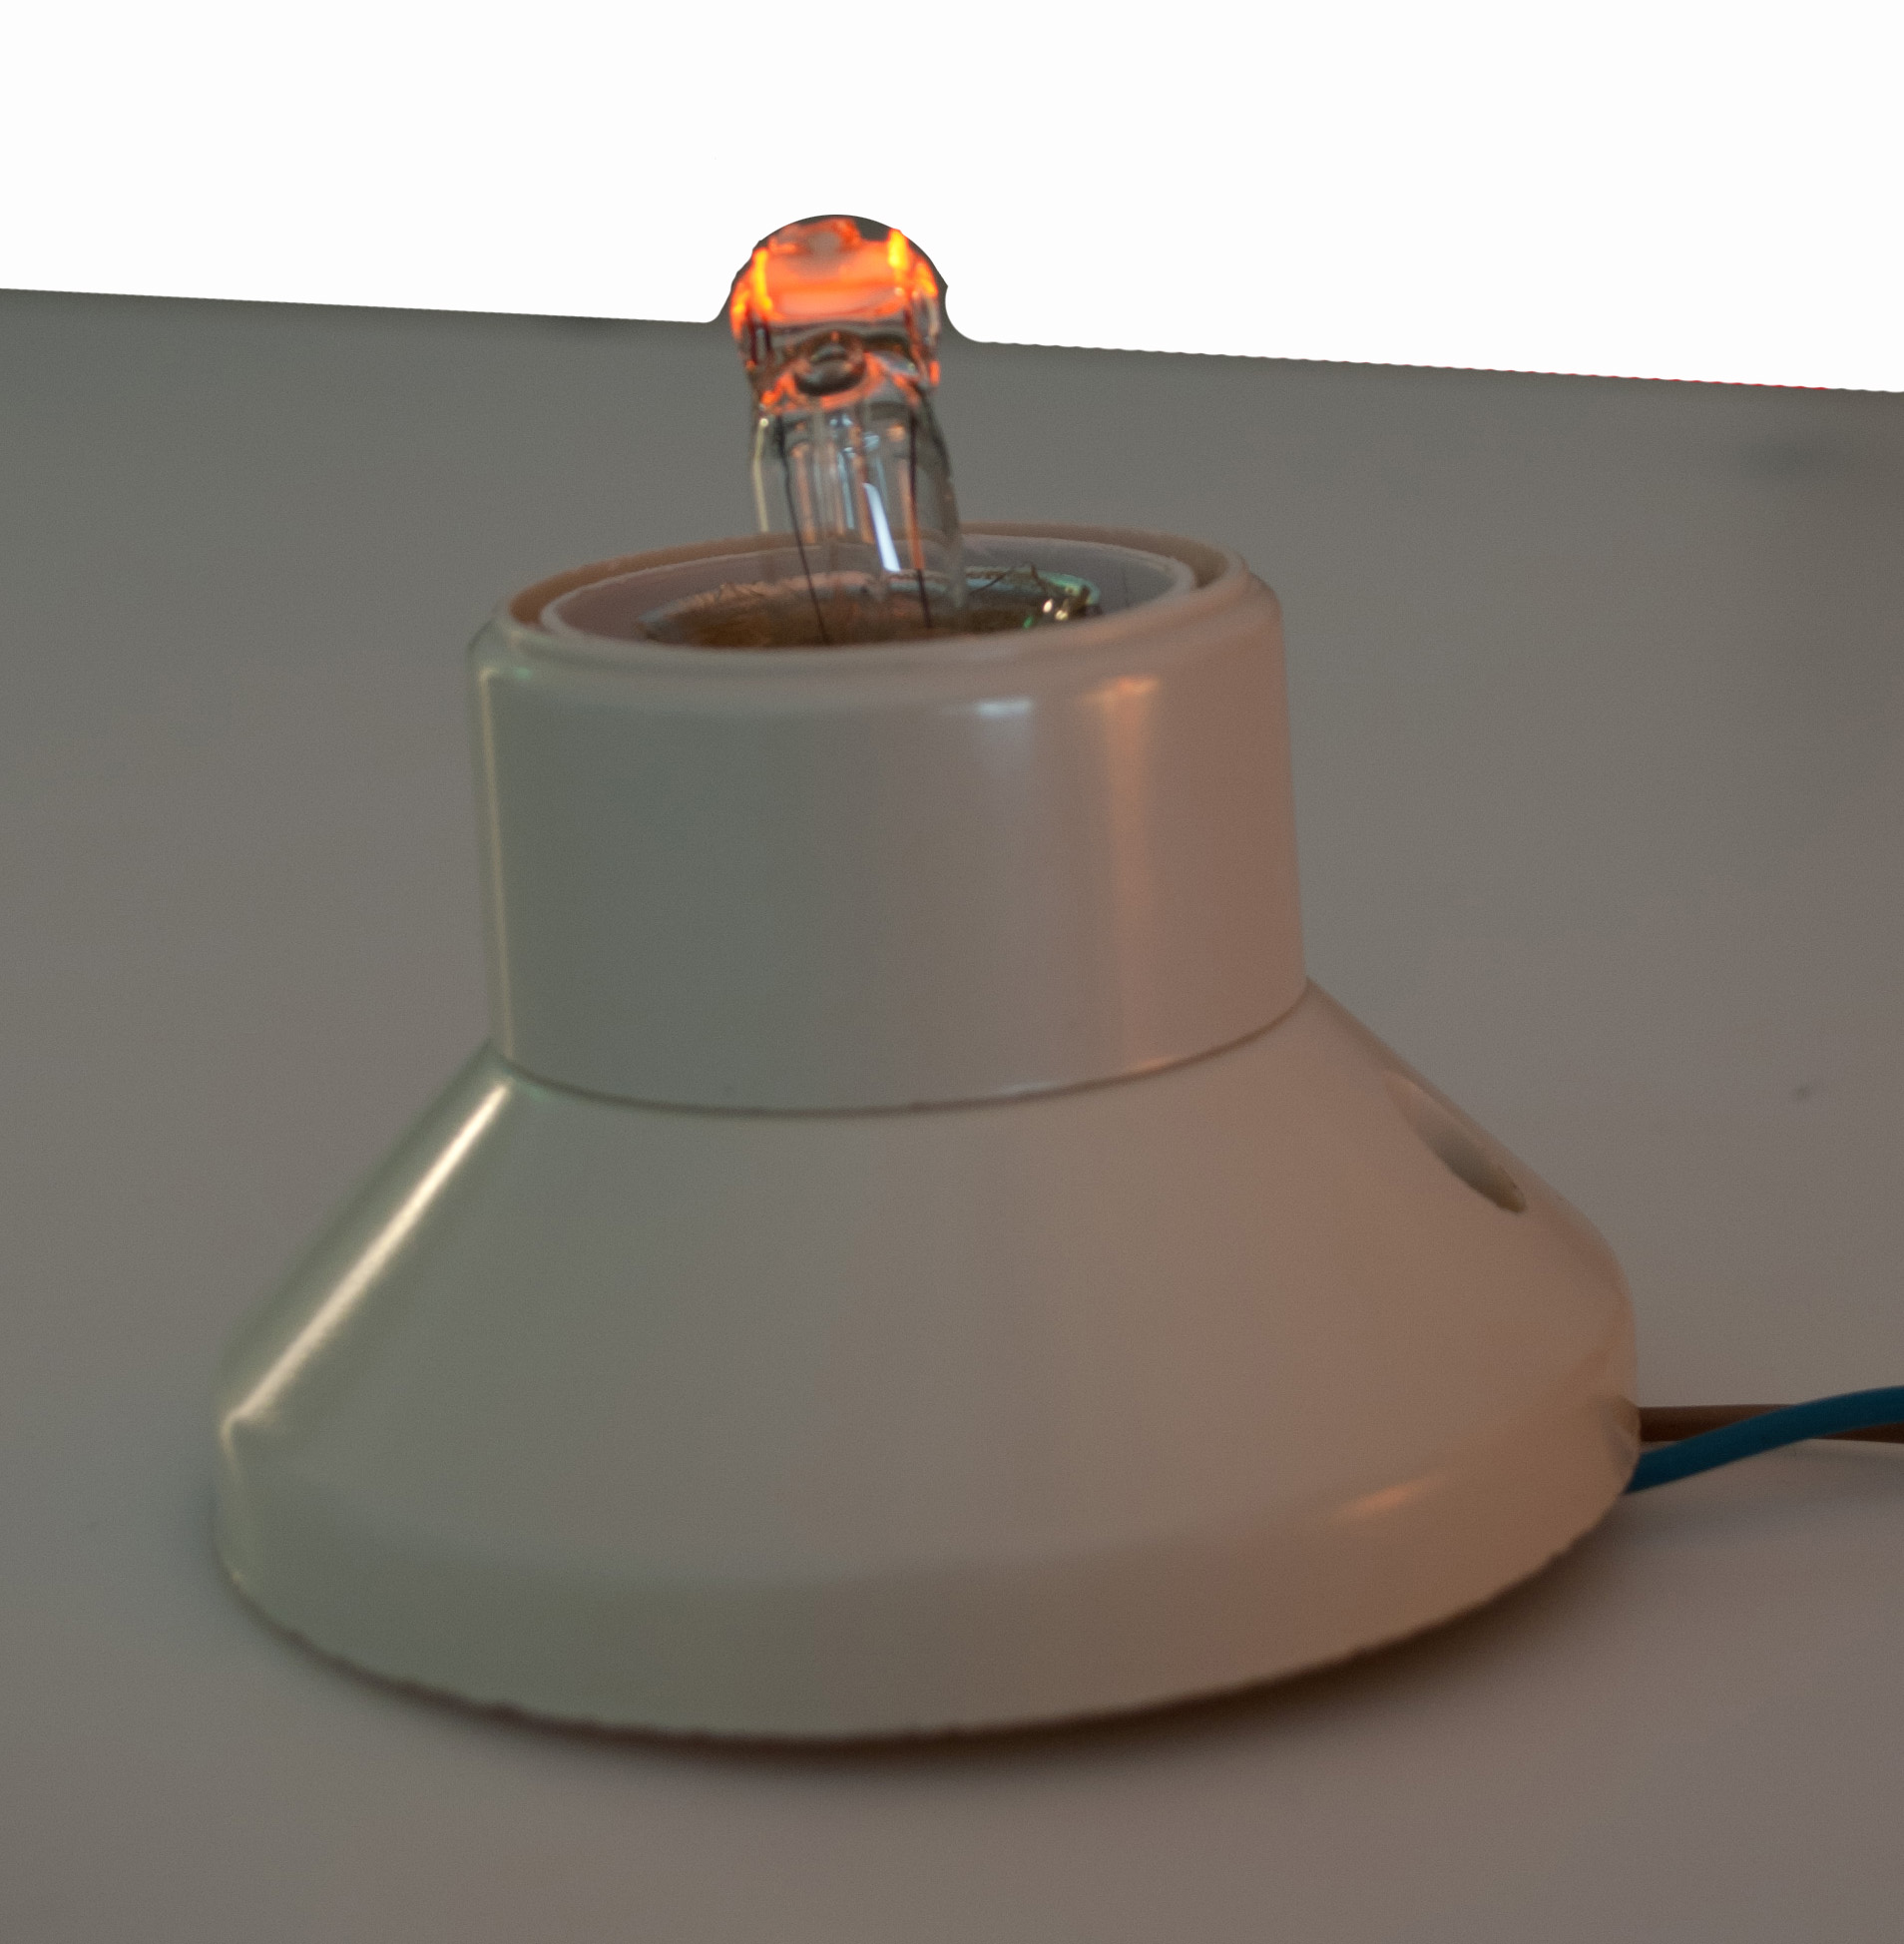
Fig. 16.4 The piece of glass continues to conduct even after it is removed from the flame. By blowing against this glass, you can cool it down and turn off the light bulb.#
Procedure#
Draw the circuit on the schoolboard, set up the equipment, and relate the setup to the circuit. The Bunsen burner is not visible.
Ask the class if the bulb will light when the switch is flipped. After the discussion, flip the switch.
Bring out the Bunsen burner. Carefully heat the glass in the roaring flame: dip it briefly into the flame and then remove it. After heating for a while, the bulb will light up. While continuing heating, you can ask the class what will happen if you stop heating and place the fitting with glass down. This usually leads to lively discussions. After an in-depth discussion, remove the glass from the flame. To the amazement of a large part of the class, the bulb remains on, no matter how long you wait.
Demonstrate that you can turn off the light by blowing against the bulb. How can you explain that?
If you stop blowing and the power of the bulb is well chosen, the glass will heat up again, and the bulb will slowly light.
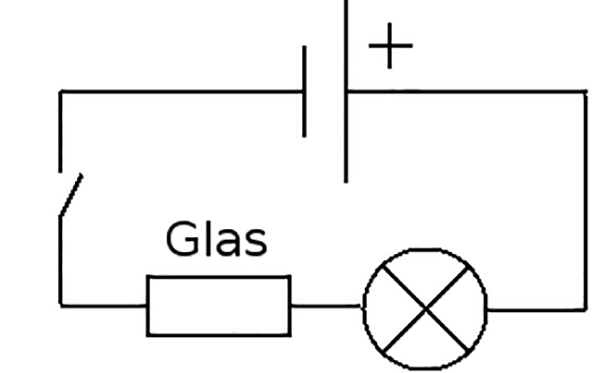
Fig. 16.5 Circuit diagram of the setup. The resistor consists of a piece of glass (see Figure 16.4).#
Physics background#
Glass behaves like an NTC because, in terms of electron structure, it somewhat resembles a semiconductor. At room temperature, the conduction band is empty, and the band gap is too large for the electrons to cross. When heated, the electrons gain enough thermal energy to cross the band gap, and the glass conducts better and better. The ions in the glass play no role in the conduction.
Tip
The power of the light bulb relative to the exact properties and dimensions of the piece of glass is critical: if the power is too low, the current is too small to keep the glass warm. If the power is too high, you cannot blow out the lamp. So, try and optimize!
We used lamps of \(40\) W, \(60\) W, and even \(75\) W for the desired result in different versions of this demonstration. This also provides an opportunity to discuss with the students the effect of the power of the burning lamp.
If you find a well-working combination, stock up on light bulbs (exactly the same); in a few years, they may no longer be available.