18.5. Boiling by cooling#
| Author: | Ed van den Berg |
| Time: | 15 minutes |
| Age group: | Grade 8 and above |
| Concepts: | Boiling |
Introduction#
You usually boil water by heating it. However, with this demonstration, you will make water boil by cooling it! Your students will be very surprised.
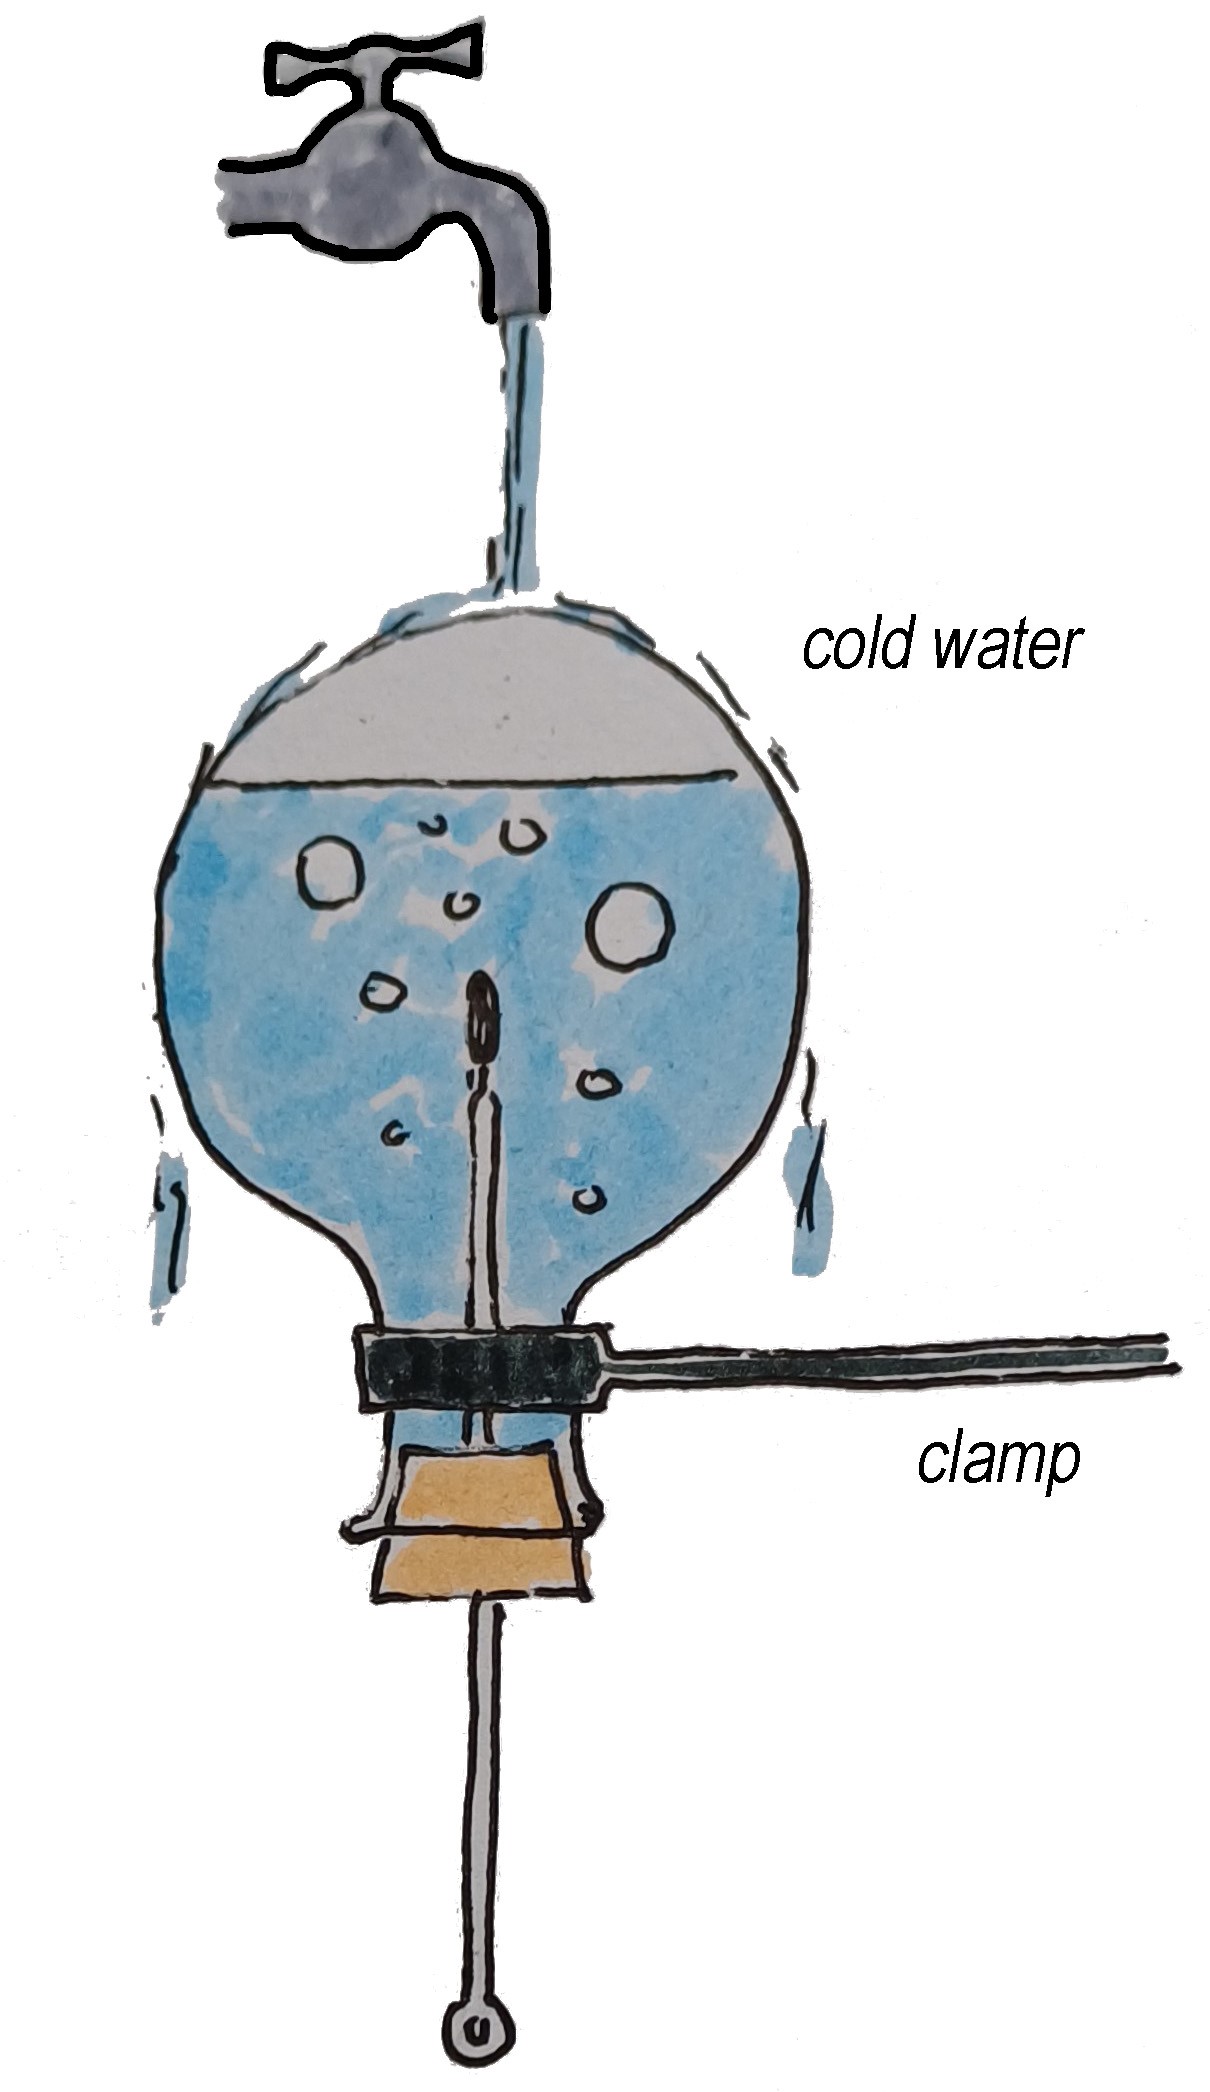
Fig. 18.12 The setup after flipping the flask upside down and pouring cold water on it.#
Materials Needed#
0.5-liter flask
Thermometer
Cork or rubber stopper with a hole for the thermometer
Tripod
Burner
Clamp
Beaker with cold water
Heat-resistant gloves
Preparation#
Set up the apparatus as shown in Figure 18.13.
Procedure#
Fill the flask three-quarters full with water (preheated to save time). Heat until the water boils and let it boil for a while. If needed, hold a glass of cold water with a clamp near the flask opening to show that water vapor is coming out of the flask (the vapor condensates on the colder glass).
While heating the water, ask: What is boiling? Is it the same as evaporating? What is the difference? What do you see during boiling?
Secure the clamp. Turn off the burner. Seal the flask with the stopper and thermometer. Have a student read the temperature, which will be around 98 to 100°C.
Invert the flask and hold it under a cold water tap or pour cold water over it from a beaker as shown in Figure 18.12
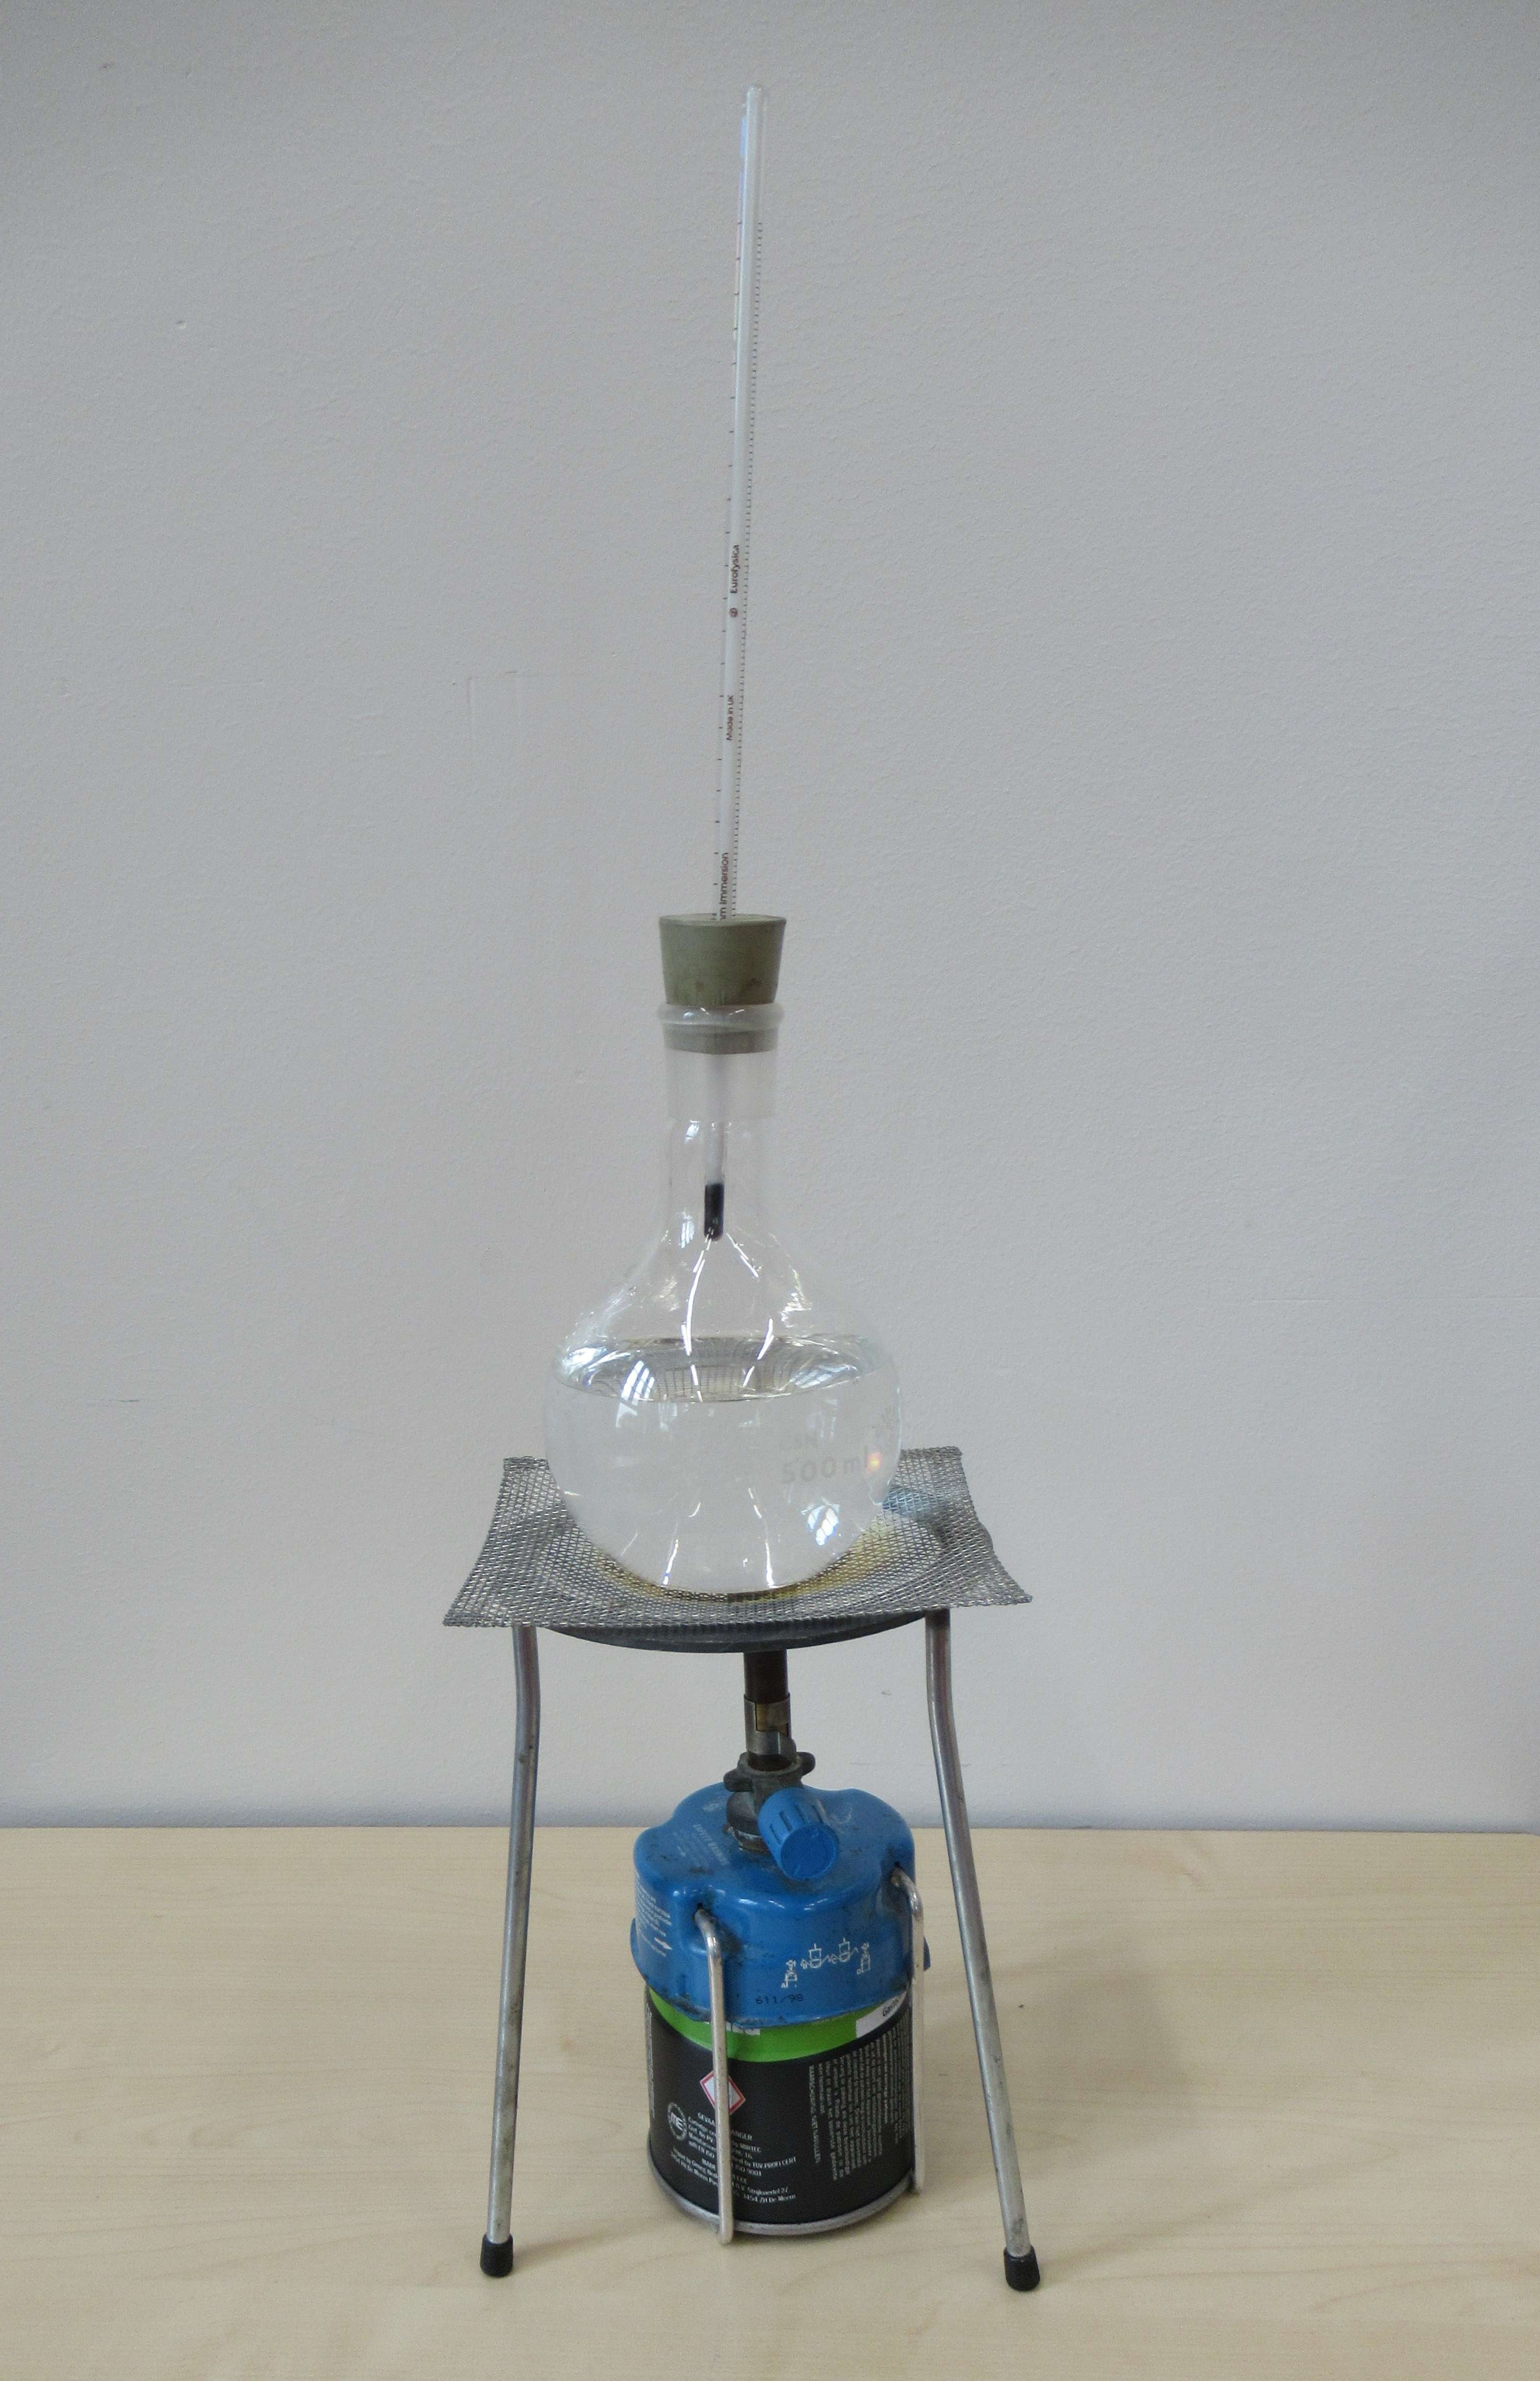
Fig. 18.13 The setup for this demonstration#
Emphasize the surprise of boiling after cooling it by pouring cold water over the flask. What is happening here? Bubbles throughout the liquid, looks like the water is boiling! How can that be when we just cooled the flask with cold water! And what temperature do we measure?
Observe and have a student read the temperature again.
Explain what is happening, and why.
You can check whether students understand the phenomenon thoroughly by posing the question: We have water at 70°C in a closed container. It has not been boiling. If we use a pump to remove air above the water, can the water start boiling? Explain your answer.
Tip
If students need some more convincing, check the video in this demonstration.
Physics background#
Both evaporation and boiling involve liquid water turning into gas. Evaporation only happens at the surface and at any temperature, while boiling occurs throughout the liquid, hence the large bubbles that form in the liquid. Below the boiling point, liquid can also turn into gas, but potential bubbles are immediately crushed by the surrounding water. Only at the boiling point is the pressure sufficient to withstand the pressure of the atmosphere and water.
When the air pressure above the water surface decreases, as it does through the sudden condensation of water vapor in this demonstration, boiling bubbles are less easily crushed, and the water boils at a much lower temperature. In this experiment, the air in the flask is displaced by water vapor. We quickly seal the flask. When pouring cold water, the water vapor condenses, making the ‘air pressure’ in the flask very low, causing boiling bubbles to form even at a much lower temperature.