15.18. Captured laser beam#
Total internal reflection in a water jet
| Author: | Wouter Spaan |
| Time: | 5 minutes |
| Age group: | From grade 8 |
| Concepts: | Total internal reflection, fiber optics |
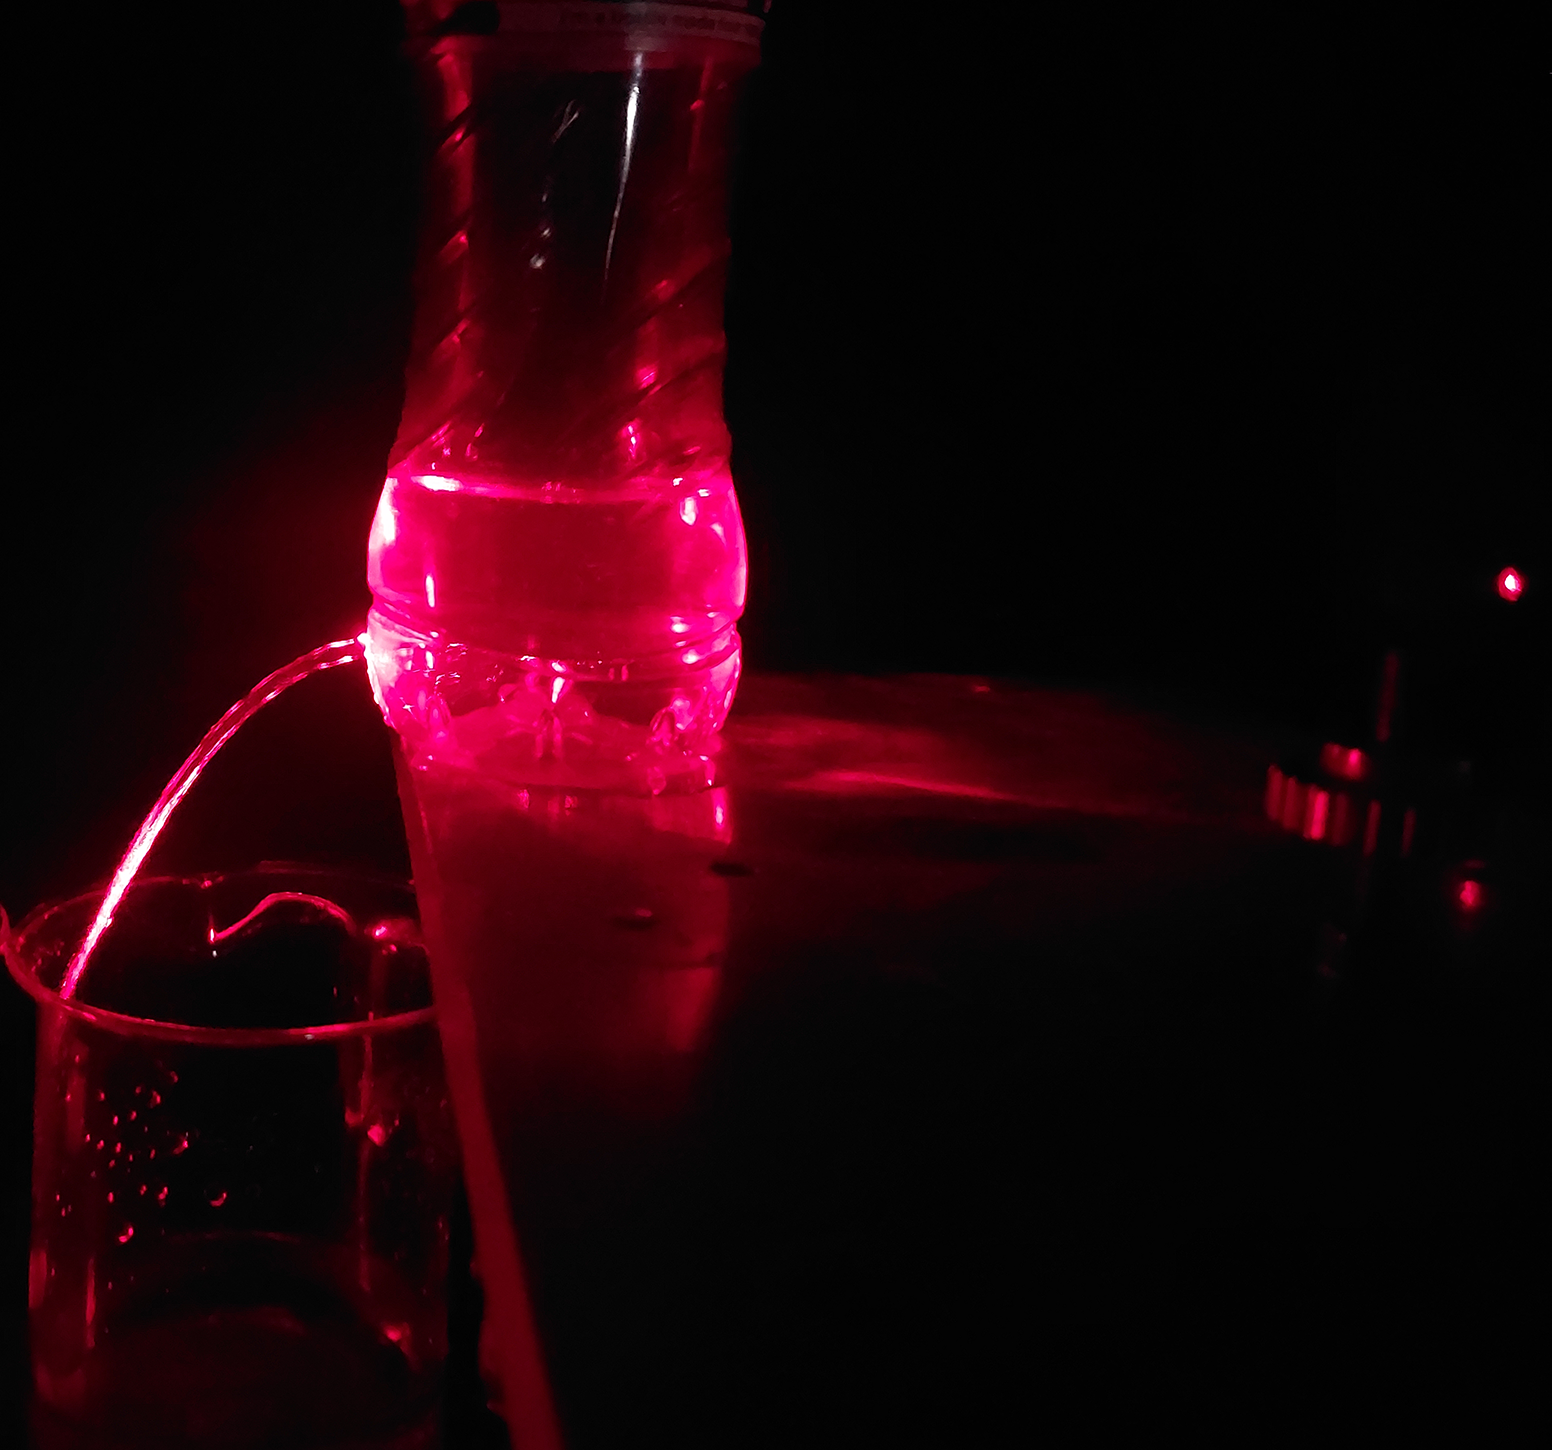
Fig. 15.55 This demonstration shows how fibers allow even sharp corners#
Introduction#
This demonstration shows a beautiful light show. And on physics… it relates to how fiber optics work. This demonstration may serve as an interesting introduction or as a test of students’understanding of the phenomenon.
Equipment#
Transparent water tank (as large as possible) with a hole in it
Laser
Catch basin or sink
Aquarium
Chalk
Warning
Since you are working with a laser, it is important to ensure that the laser beam cannot enter anyone’s eyes. Pay extra attention to reflective surfaces, such as a tap near the sink.
Preparation#
The setup must be well aligned. It is easiest to do this with a plug in the opening of the filled water tank. You can then aim the laser precisely at the plug. The demonstration works best in a darkened room, but it is not necessary.
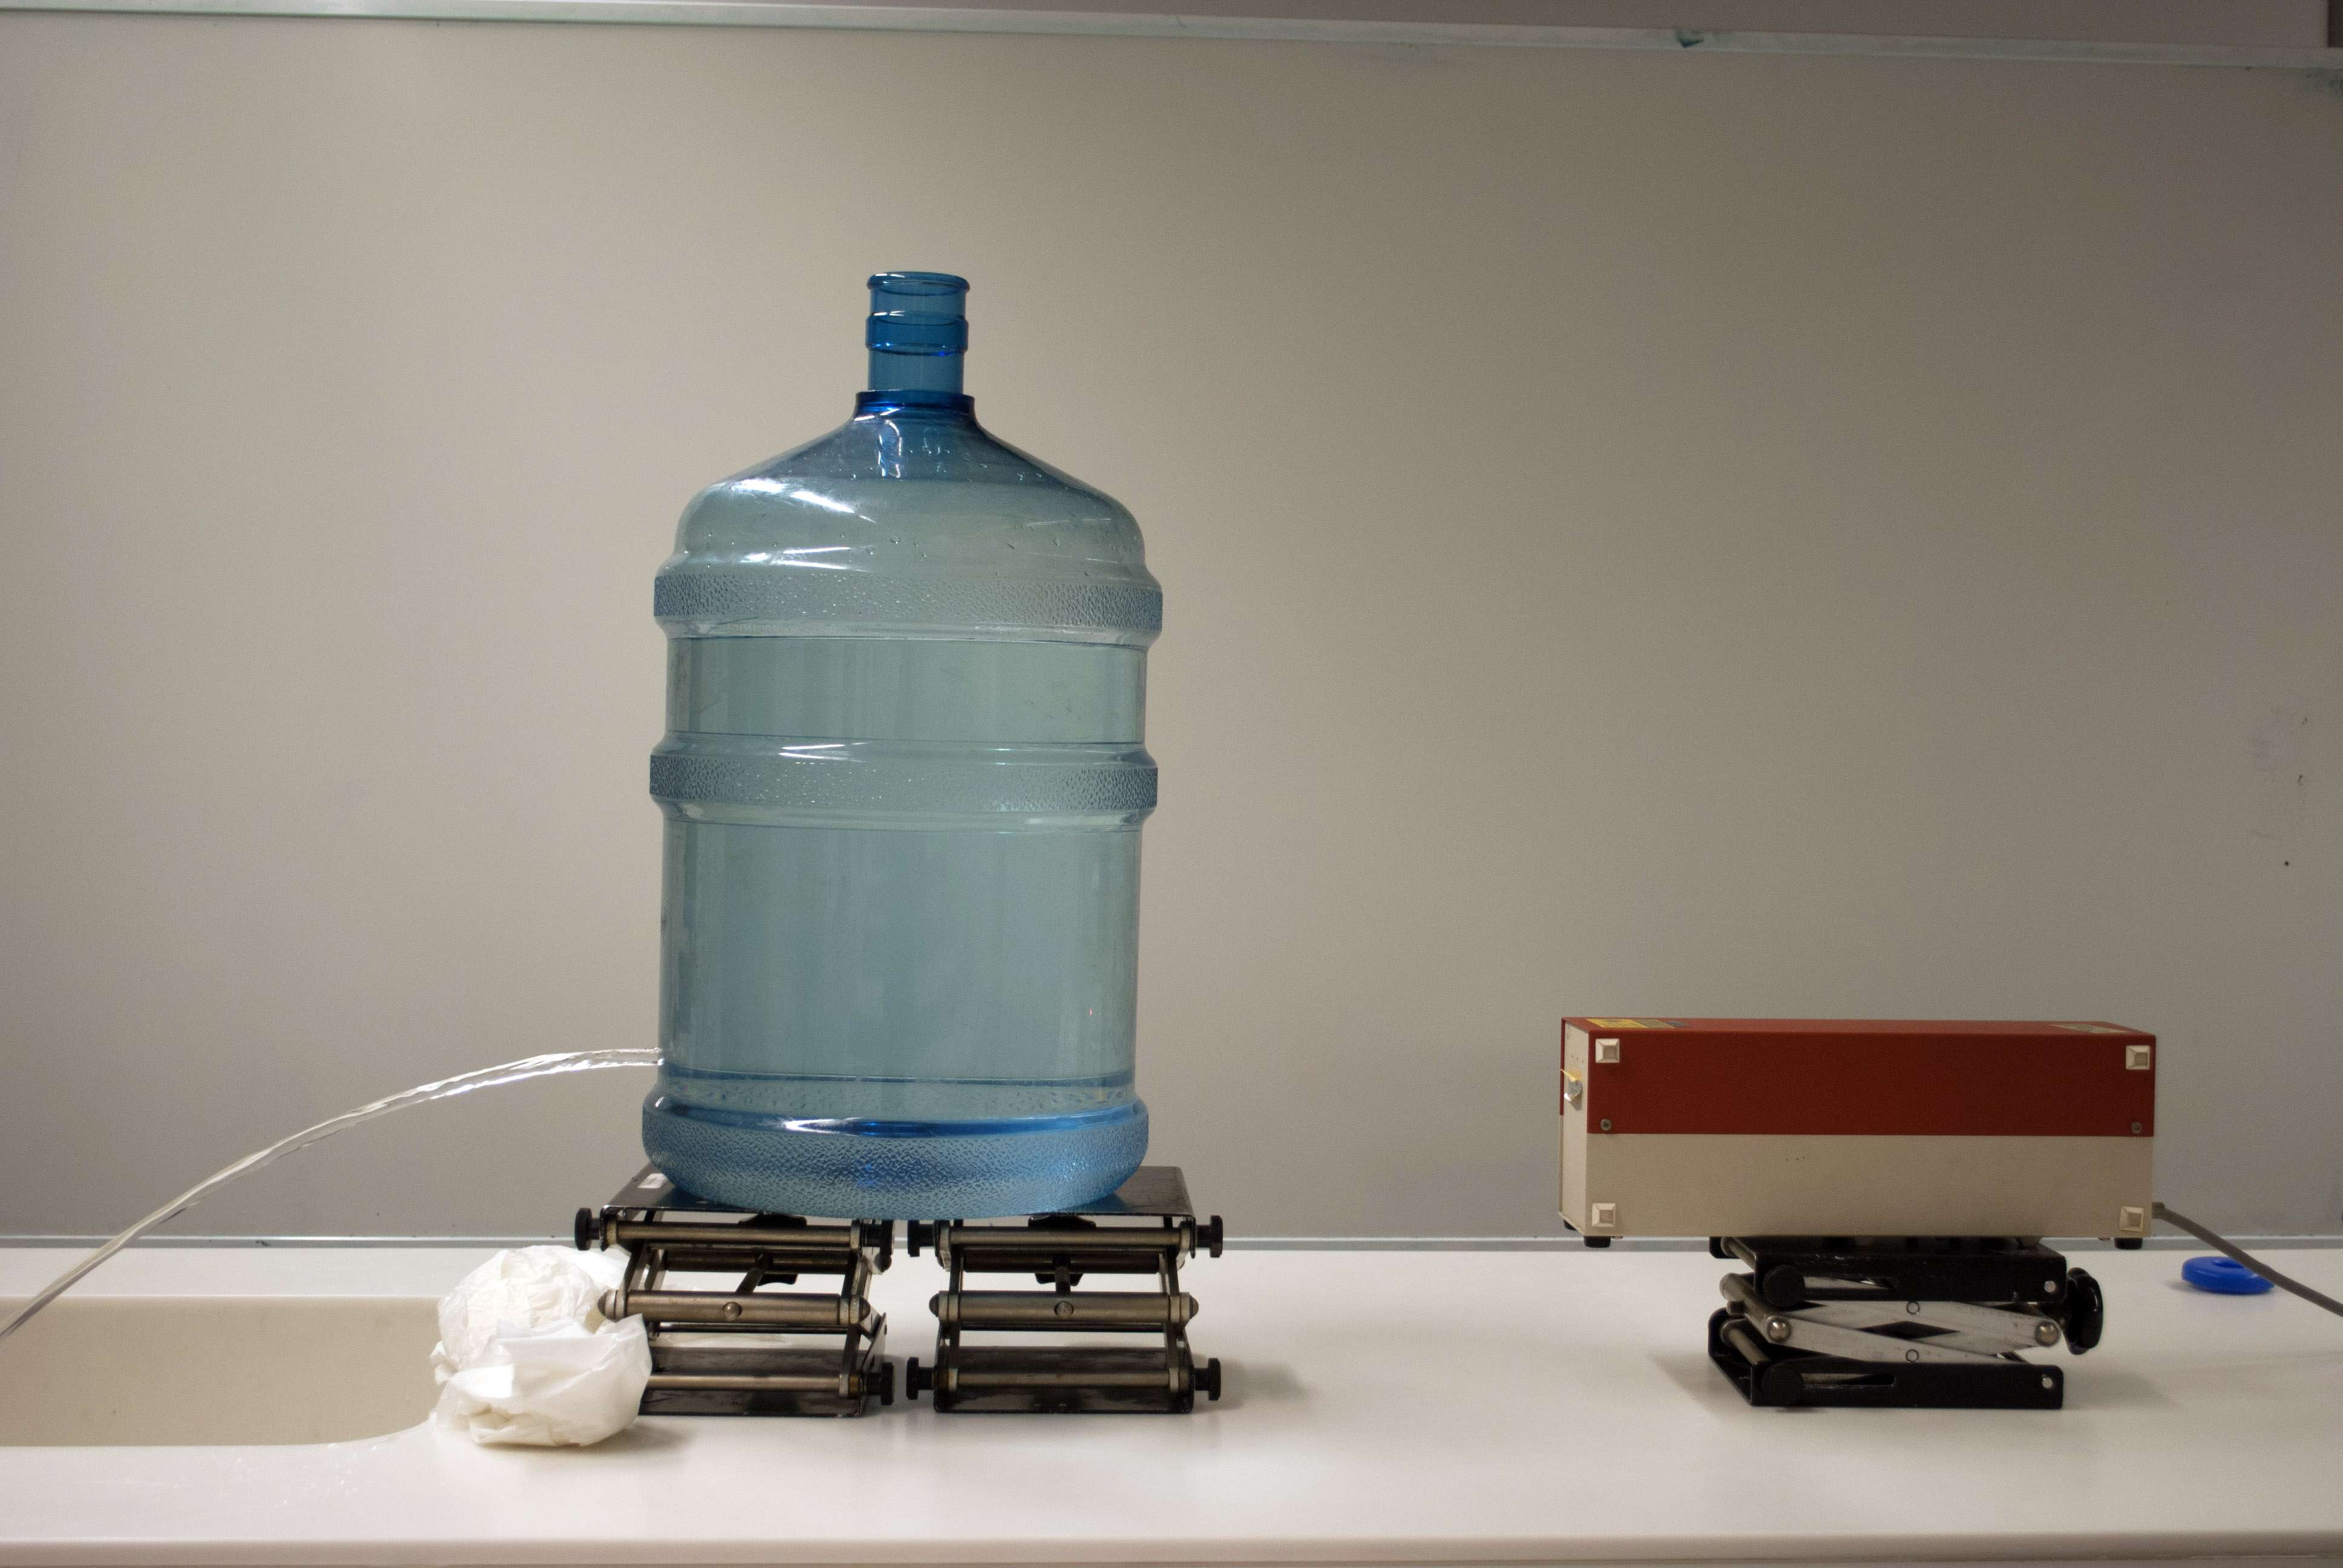
Fig. 15.56 The setup where we used a water cooler tank as water reservoir. The hole in the tank has a diameter of about 8 mm; slightly smaller could also work. You can adjust the lab lifts’ heights to set how far the water jet reaches into the sink.#
Procedure#
For visibility, gather all students around the setup. Darken the room and immediately show the demo. Put the plug in the water tank and start the conversation with the students.
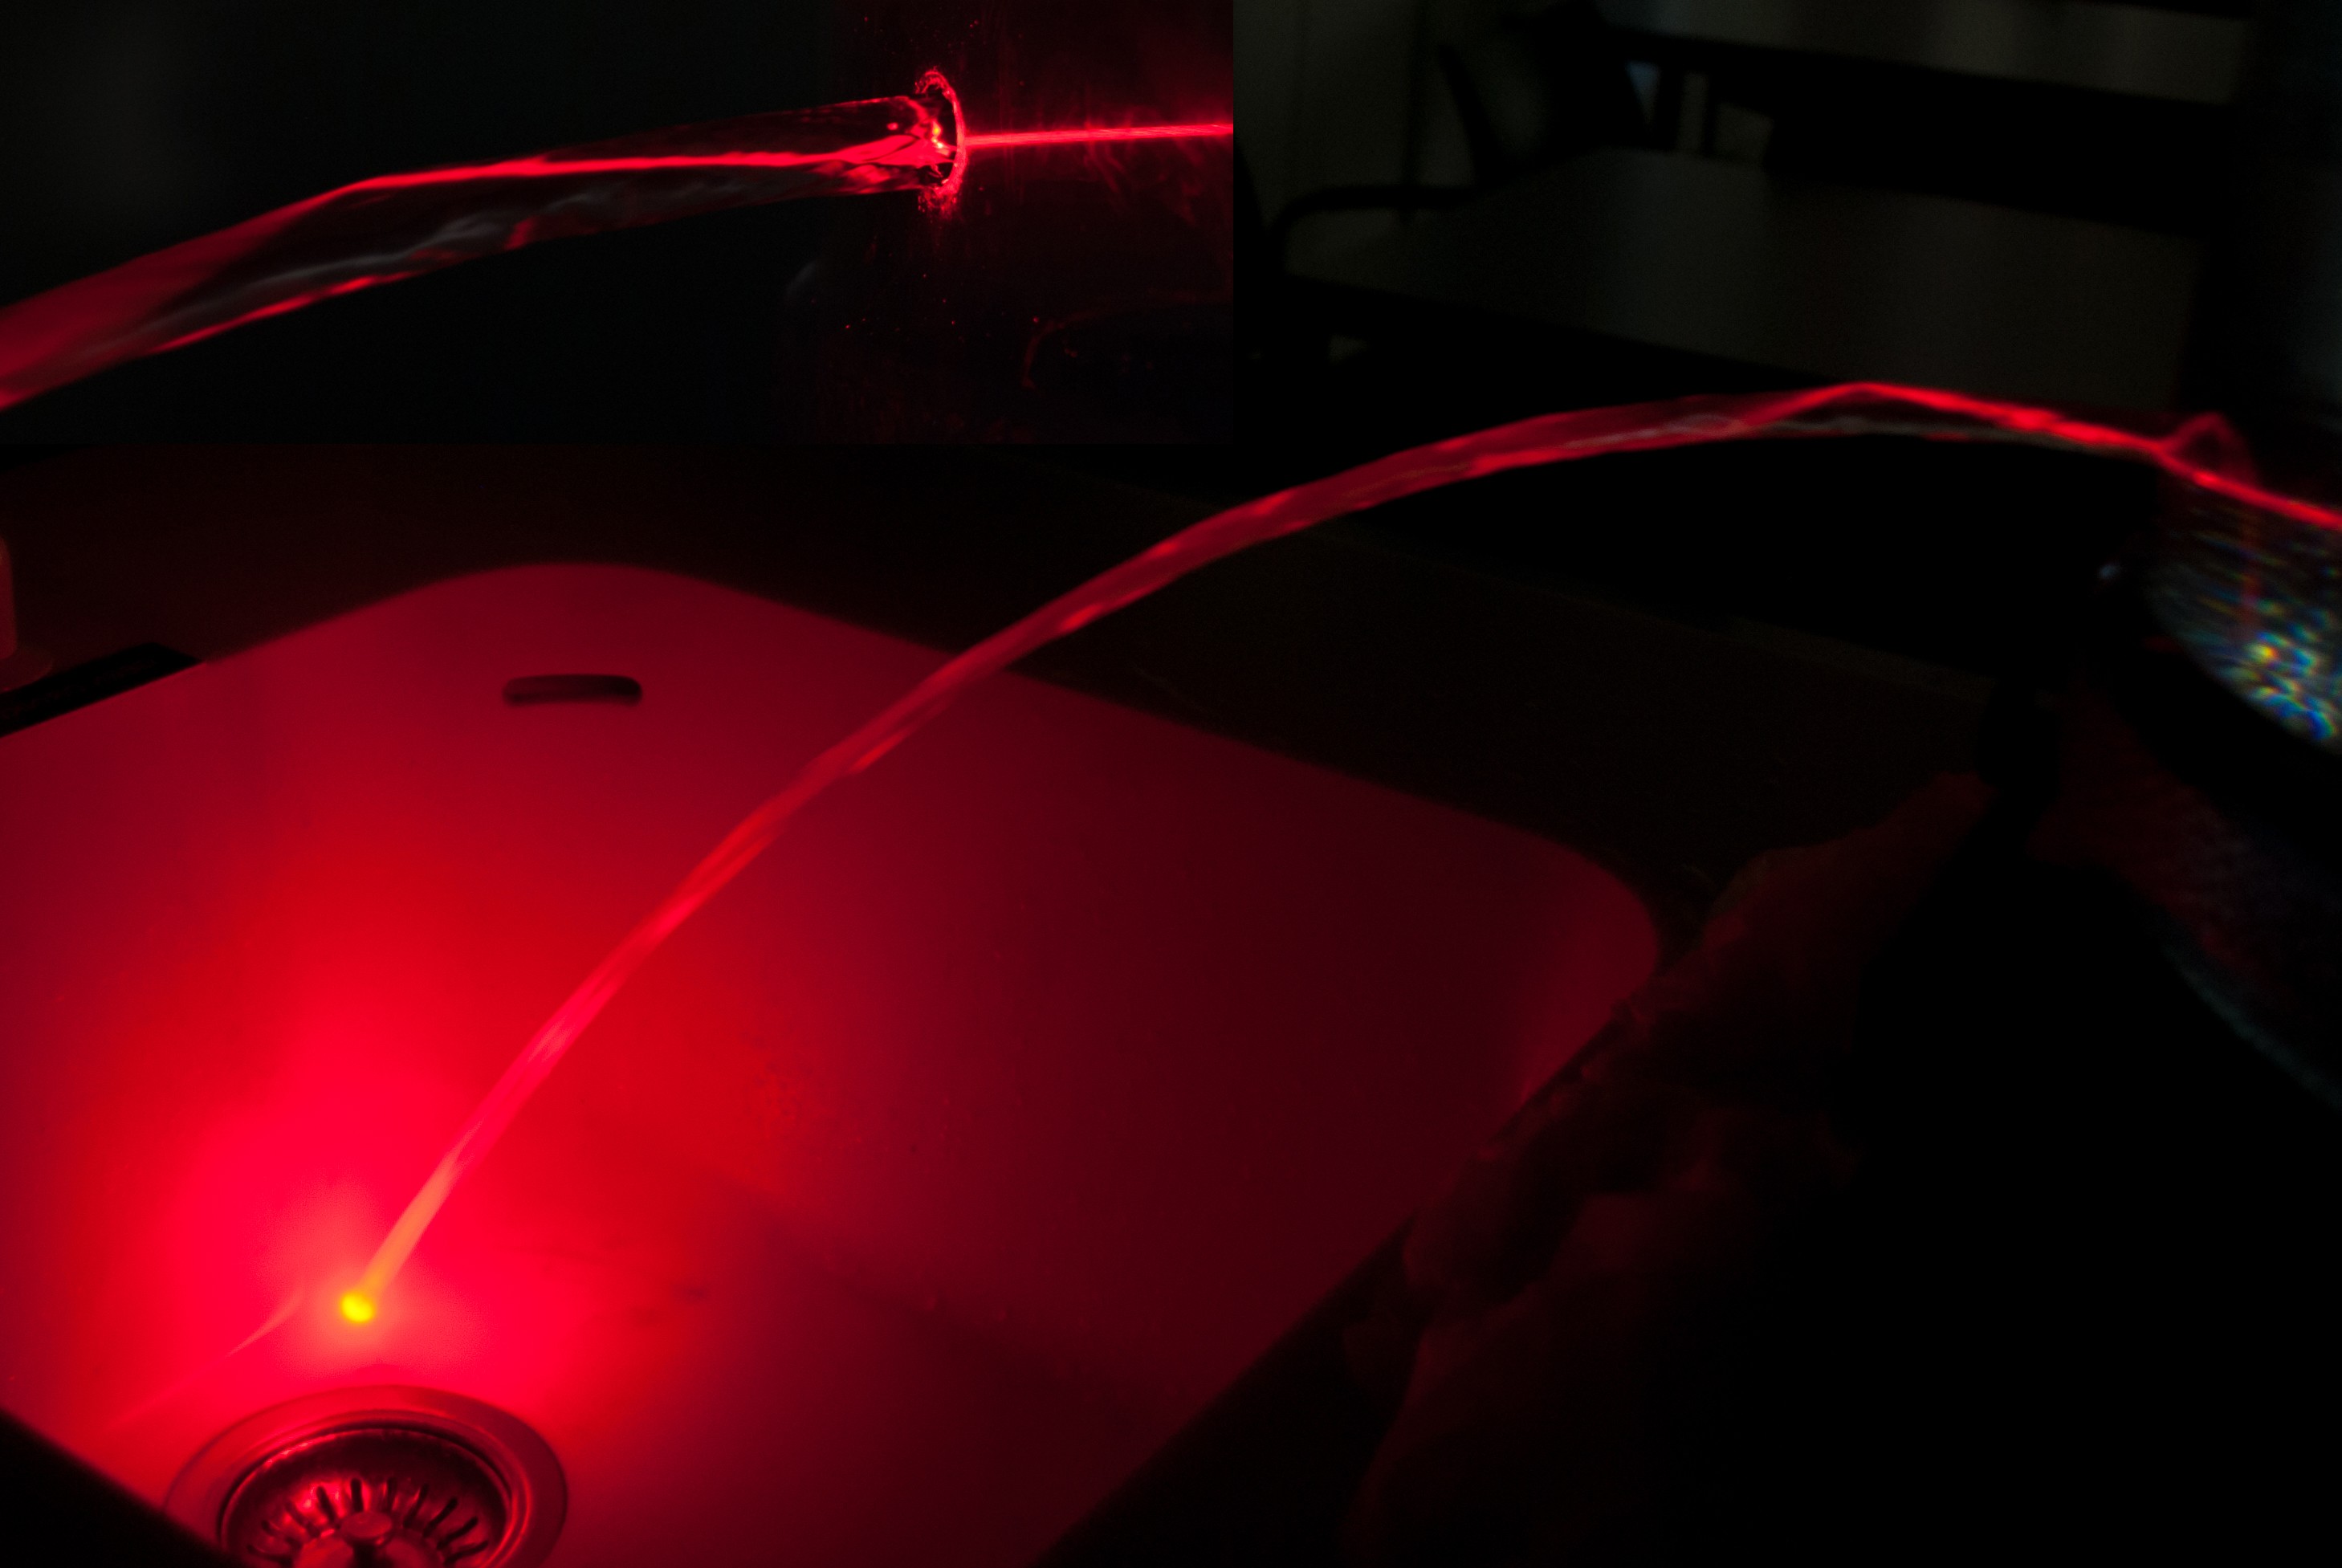
Fig. 15.57 The laser beam follows the water jet into the (white) sink. The inset in the top left shows a detail of the opening and the first total internal reflection.#
As an introduction, this demo is well suited to explain internal reflection. Do we see a kink of the light beam somewhere? What happens? If you have a small aquarium, you can expand this demonstration by showing how light reflects at different angles, see figure .
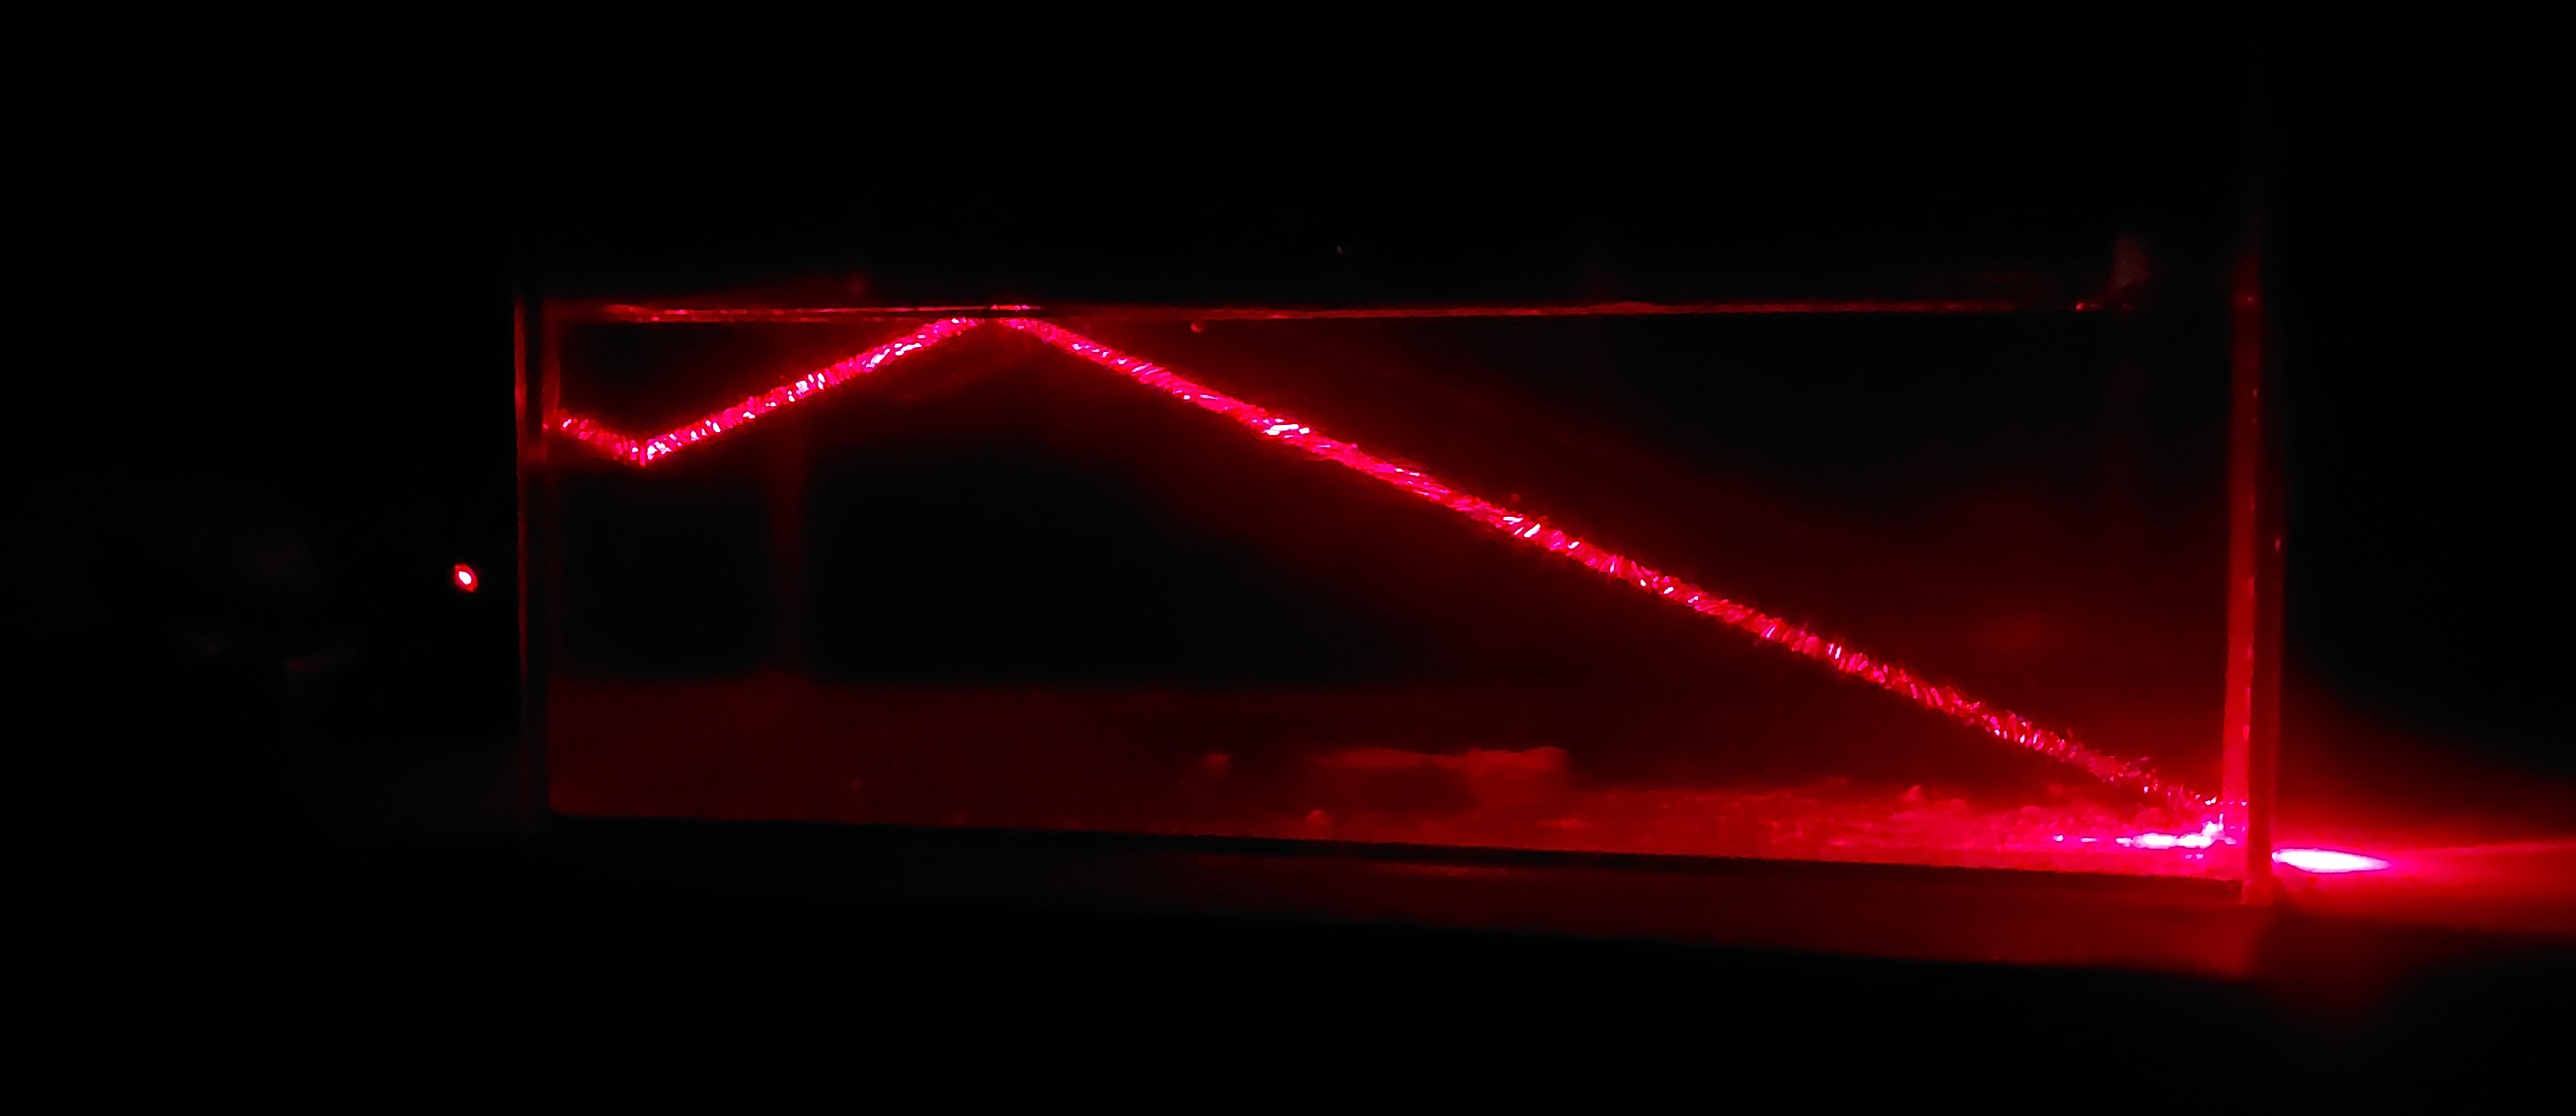
Fig. 15.58 Using an aquarium with chalk dissolved in it to investigate internal reflection.#
If you want to test students’ understanding, you can ask what happens if less water flows out of the tank and the water falls more steeply. Most students will give the correct answer, still it is important to ask for an explanation. You might choose to have all students write down that explanation. You will get answers like “the light cannot follow the water,” which provides the teacher’s task to dig deeper what students really mean and ask for a more scientific explanation. If you then remove the plug again and just wait, most students will be amazed at how long the light remains trapped in the water. Only at the very last moment, the light beam does no longer ‘follow’ the water. In advanced classes, you can calculate the critical angle.
Physics background#
At the beginning of the demo, the angle of incidence is larger than the critical angle, causing total internal reflection. As the initial speed decreases, the angle of incidence at the first water-air transition eventually becomes smaller than the critical angle, causing refraction. In fact, this transition is somewhat gradual: if the angle of incidence is slightly less than the critical angle, only a small part will refract, while a large part of the light still reflects.
Tip
A brief detour can be to close the top of the bottle (e.g., with your hand). Due to air pressure, the jet will quickly decrease, which surprises the students as well. Additionally, it offers an easy way to regulate the amount of water flowing from the tank.
In advanced classes, a connection with horizontal projectile motion is also possible. With some simple distance measurements, you can determine the initial speed of the water.