20.1. Spectacular spectrum#
| Author: | Ed van den Berg and Frank Schweickert |
| Time: | 15 minutes |
| Age group: | 14-18 and special events |
| Concepts: | Refraction, dispersion, spectrum, rainbow, prism, lens |
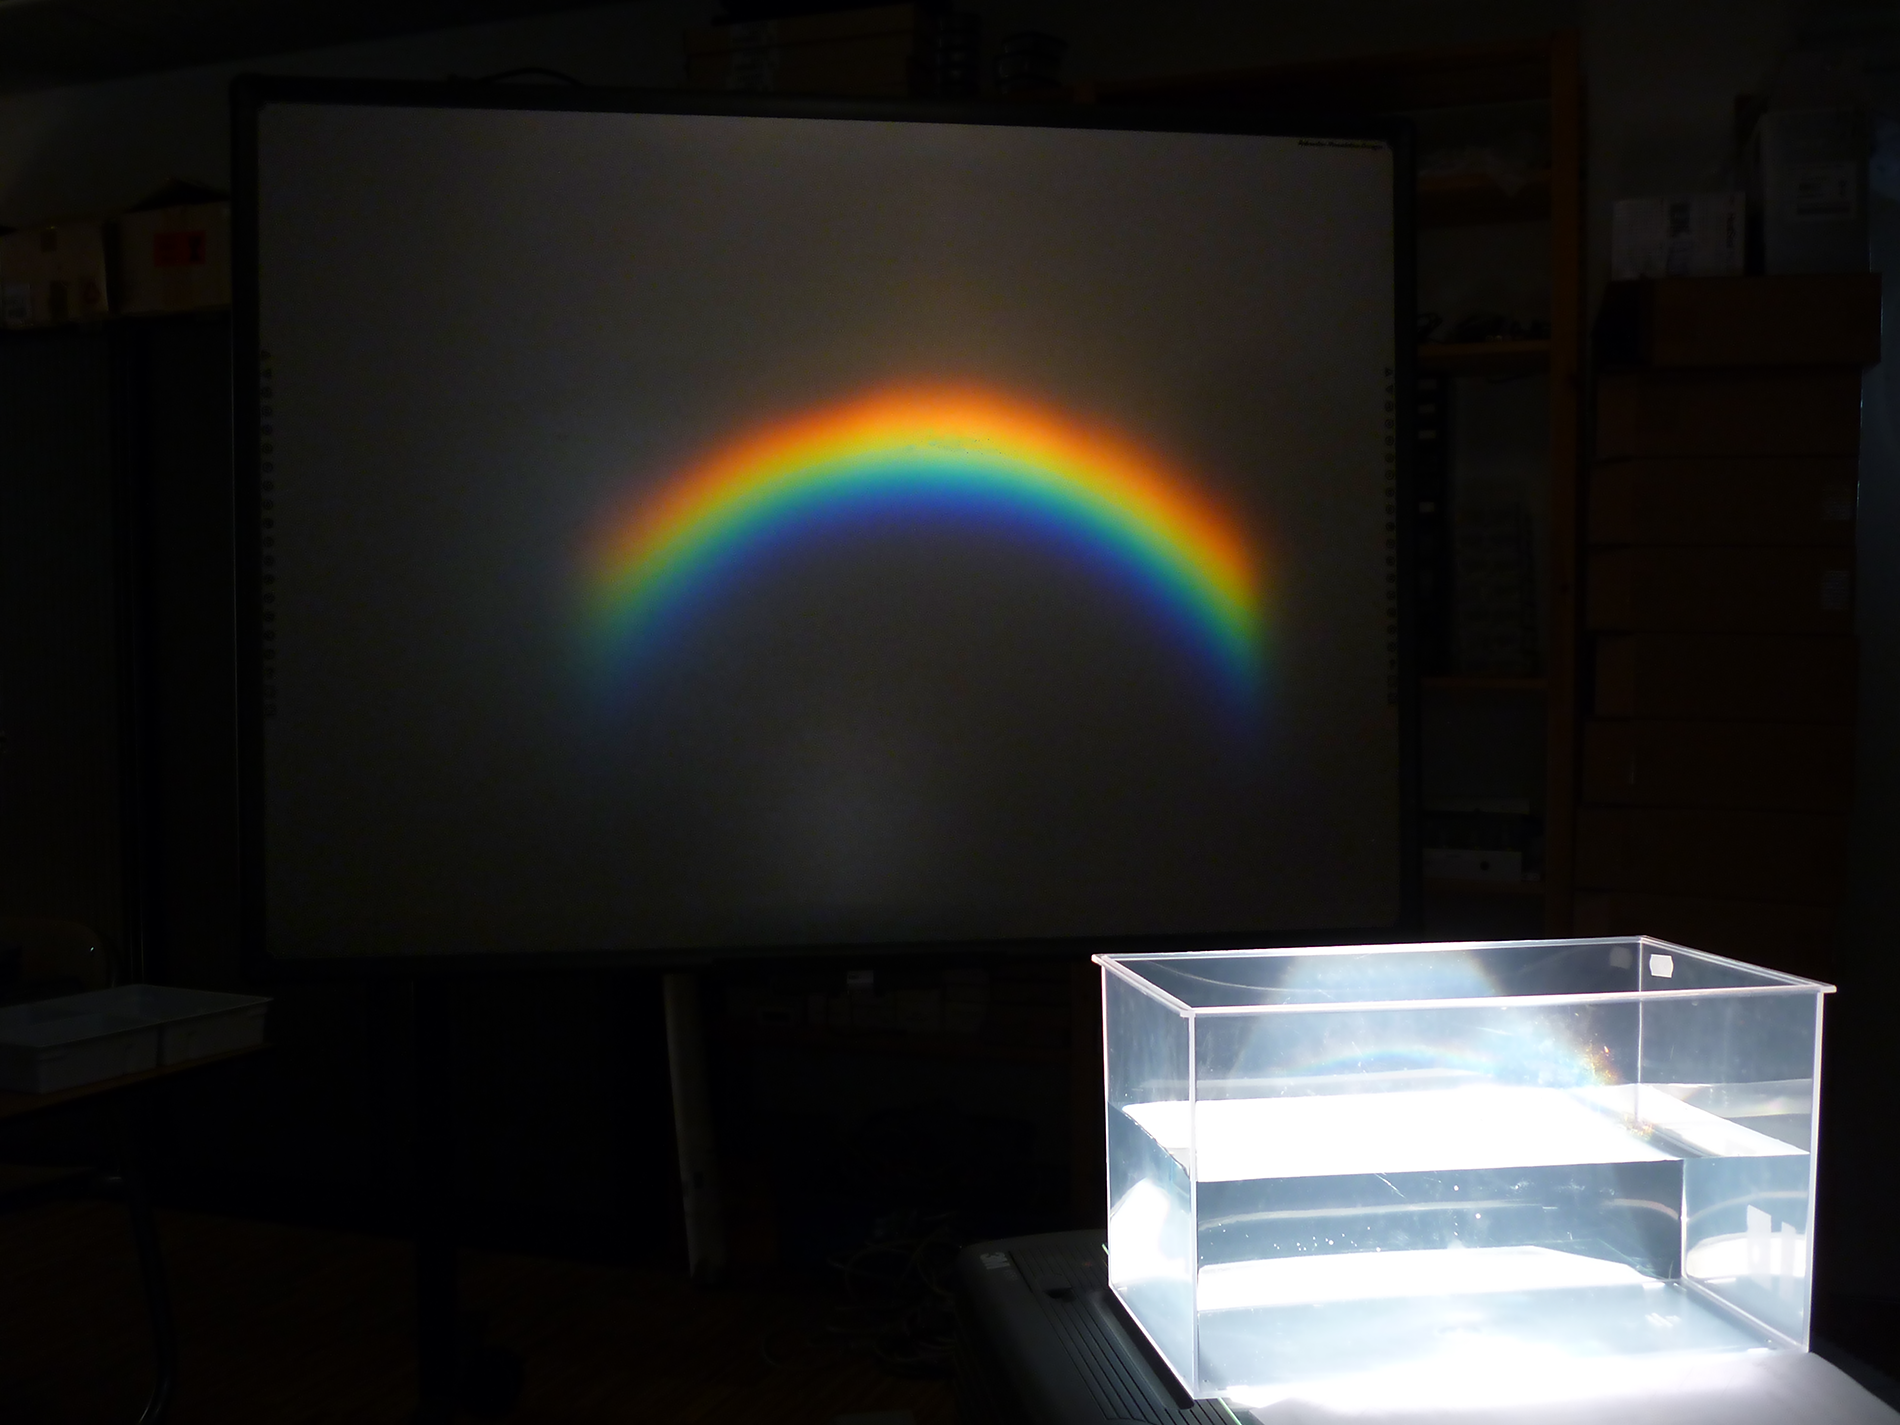
Fig. 20.1 An aquarium filled with water is put on an overheadprojector#
Introduction#
You turn of the lights and then there is this beautiful spectrum on the wall (Figure 20.1 and Figure 20.2 ). Most students will be amazed… Indeed, the demonstration can be used for events to illustrate the beauty of physics, but it constitutes also a useful exercise in geometrical optics.
Equipment#
An old fashioned overhead projector (OHP) of which the upper convex lens is removed as only the flat Fresnel plate is used
A transparent plastic container (for example a terrarium from an animal store)
Water
Several A4 sheets of paper
A white wall or projection screen
A piece of white carton.
Preparation#
Cover the OHP with white sheets of paper. Put the container with water (about ¾ filled) on top of this and arrange the papers such that there is a narrow slit (up to 1 cm) next to the container where the light can pass through (Figure 20.2). Set-up and try out.
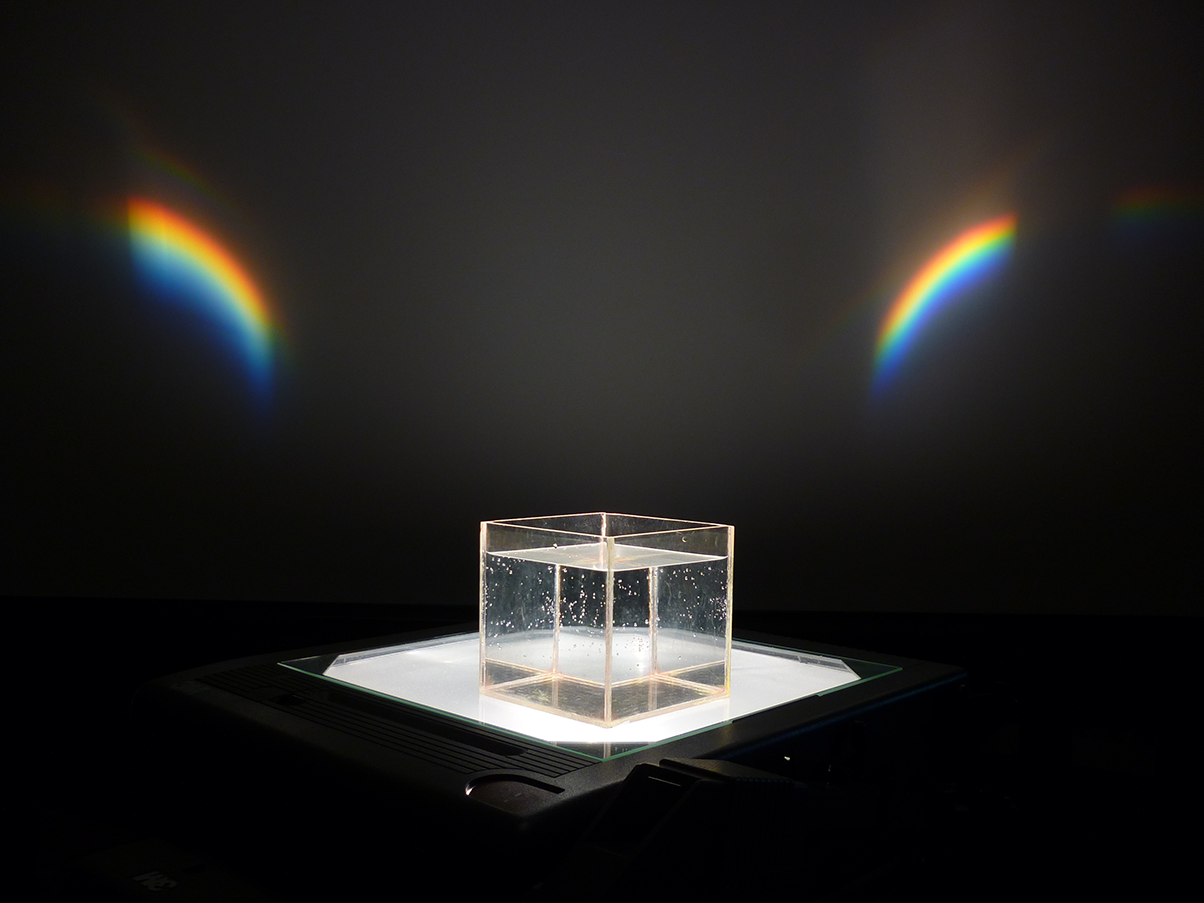
Fig. 20.2 The aquarium is slightly rotated resulting in two spectacular spectra.#
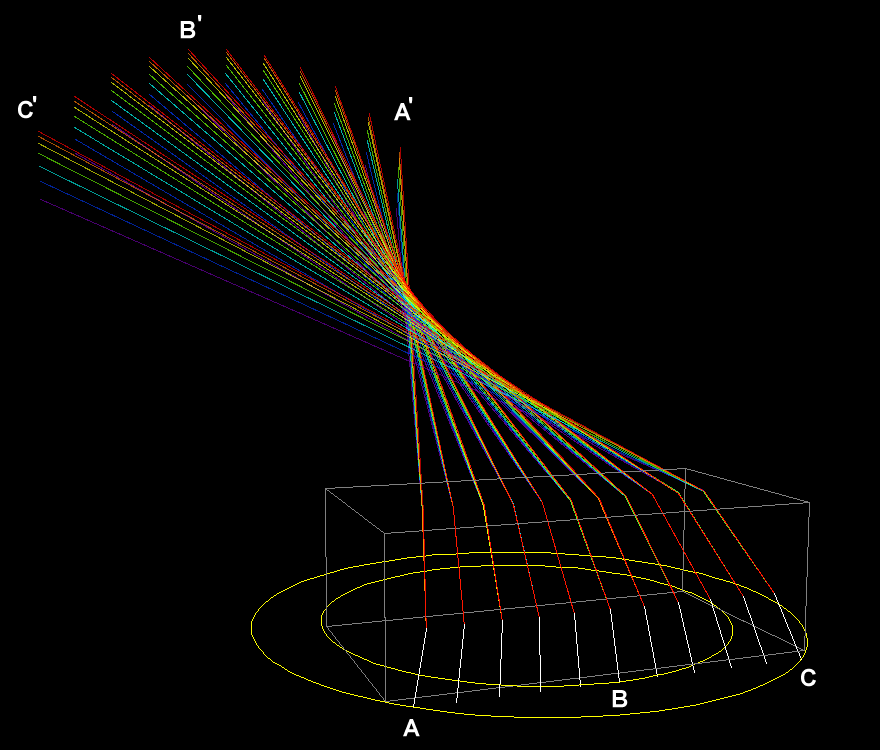
Fig. 20.3 The light rays move from A, B and C to A’, B’ and C’.#
Fig. 20.4 The setup. The rainbows appear on the left and right walls.#
Procedure#
When the students come in, the spectrum is already visible on the wall.
The teacher asks rather trivial questions such as: what do you see? What does it look like? What do you usually use to obtain a spectrum? Is the image on the wall virtual or real?
The teacher takes the container with water from the OHP and uses the white carton to illustrate that the Fresnel plate produces a cone of light. Tilt the carton a little from the horizontal position and move it upwards. Light rays near the center are very steep, light rays are less and less steep as one moves away from the center.
Task for the students: try to explain the following:
In this set-up: what causes the separation of colors (dispersion) and the formation of a spectrum?
Why is the spectrum shaped like a rainbow? Alternatively prepare a worksheet with light rays A, B, and C (Figure 20.3) drawn from the Fresnel lens up to the container and ask students to sketch what happens to these light rays when entering and exiting the container and use that to explain the image on the wall.
A hint from the teacher (if necessary): by covering part of the slit show that the left part of the slit forms the right part of the spectrum image and the right part of the slit forms the left part of the image.
Physics background#
The glass plate of the OHP is a Fresnel lens which produces a cone of light with light rays that are steep near the center of the lens and less steep on the outside. The light rays which form the spectrum come from a small slit next to the container with water and form part of this cone of light. The vertical boundary of water/container and the horizontal water surface together form a prism which produces the separation of colors. Comparison of light rays A, B, and C in Figure 20.3 shows that B is steeper (nearer to the center of the lens) and A and B are less steep. So the image of B (B’ in Figure 20.3) will appear higher on the wall than the images A’ and C’ of rays A and C. Furthermore, light rays A and C cross which can be easily busy by covering part AB of the slit (right part of spectrum disappears) or part BC (left part of spectrum disappears).
The spectrum on the wall looks very much like a rainbow, but it is another phenomenon altogether. The rainbow is a virtual image which cannot be captured on a screen and moves along with the observer. It is formed when light rays from the sun (behind the observer) are refracted in water drops. On the other hand our “rainbow” is a real image which can be captured on a screen. , the inventor of this demonstration, did some calculations and computed the curvature of the red and blue parts of this spectrum.
Follow-up#
There are possibilities for computation in the artikel ‘Ein Regenbogen ohne Regen’ (in German) which is accessible through the link in the references below.