
2.1. Installation of BASH terminal#
Every operating system has a tool called a terminal (or command line) where you can type commands to interact directly with the system. It’s a powerful way to control the computer without using graphical windows or menus. However, terminals differ between operating systems:
Linux/macOS: They use a BASH terminal with commands based on Unix-like systems, such as
lsto list files.Windows: It has its own command line (CMD or PowerShell) with different commands, like
dirto list files. However, tools like WSL (Windows Subsystem for Linux) or Cygwin let you use Linux commands on Windows.
Each terminal uses slightly different syntax and commands, but the idea is the same: you type instructions, and the computer follows them. In the future you will be using BASH, for instance, in all bioinformatics applications. If you need to run code on computing clusters, using those also involves the BASH terminal.
We will next install the BASH terminal (Windows) or learn how to find already installed BASH terminal on your computer (Linux, macOS). Make sure to follow the appropriate instructions depending on the operating system (OS) of your laptop.
Linux Command Line for Windows: Cygwin
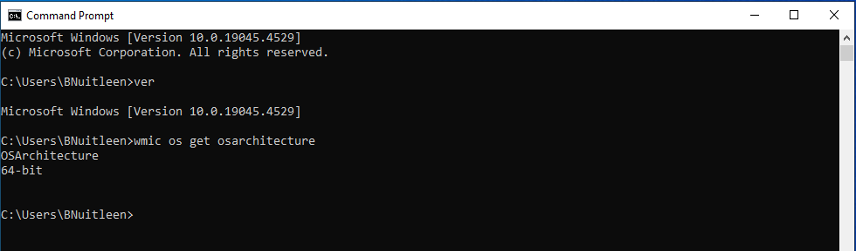
Check the version of your Windows system: Type “cmd” in your Windows search box. This will direct you to the native Windows command line application (use “command prompt” application, not “power shell”) where you can type commands and see outputs. You will see the Windows version of your system as a header. You will see a prompt that looks like this: C:\Users\YourUserName> which shows your current location in the file system. If you want to give a command to Command prompt to write (in computer language: return) the Windows version of your system, you can type the command
verand check the output. Next you need to check if your system is 32-bit or 64-bit by typing the commandwmic os get osarchitecture. You will likely see that you have a 64-bit system, as the most modern systems have. This information will help you decide the version of the software you will install.
Notes:
You are still not able to interpret Linux commands.
The classical shortcuts such as
Ctrl+Cdo not work as expected in the terminal. You need to go through right-click and selectcopyorpasteoptions.
Download Cygwin Installer: Go to the official Cygwin website. Download setup-x86_64.exe for the 64-bit Windows system. If you have a 32-bit system as an exception, you should find the installer in the time machine section of the website. (Please contact your TA for help if this is the case for you.) Run the setup-….exe file and select “Install from Internet” option. You can leave the other settings at default until Choose a download Site step. You can select a mirror domain from the servers,such as: https://mirror.checkdomain.de. Please note that this domain is just an example and if it does not work for you, you can pick another domain from the list.
In the next step, you will be asked to select packages. There are three packages you will need to select, the first one is called Vim. Under View, select Full. In the Search field, type Vim. In the resulting table, find the row that contains Vim package: “Vi IMproved - enhanced vi editor”. To activate the row, press “Skip” in the New column. The row will get highlighted in blue. Next, change “Skip” into a version of Vim you want to install by clicking on the drop down menu (triangle right from “Skip”) and select the version (the latest available). Now you should be able to tick the box in the “src” (source) column. In addition to Vim, also search and select unzip and tree in the same way. Then press Next. This may take a couple of minutes to complete. You can now launch the Cygwin terminal via the created desktop shortcut or “Start” menu.
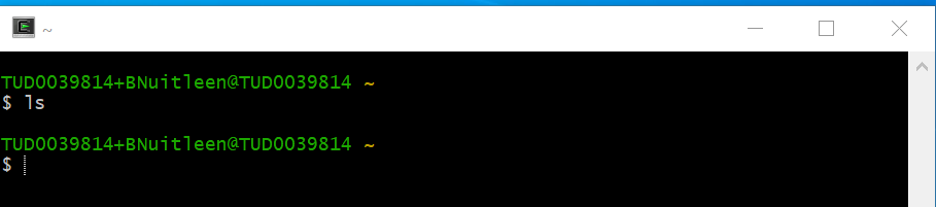
Test Cygwin Installation: Let’s get used to using this terminal and some commands. When you first launch it (type “Cygwin” in the search box or it will already have a shortcut on your desktop), you will see the current folder path you are in. In the figure below, you see an example path (location).
TUD00398144+BNuitleenis the user name, which will be different in your terminal as you will have another username and a different path to your home folder.
Let’s try the ls command to see the content of the current directory. In this case there is nothing - this directory is empty because the isolated home directory of Cygwin is different than your Windows user profile directory. You can think of the cygdrive (Cygwin’s home directory) as a plugin into Linux system.
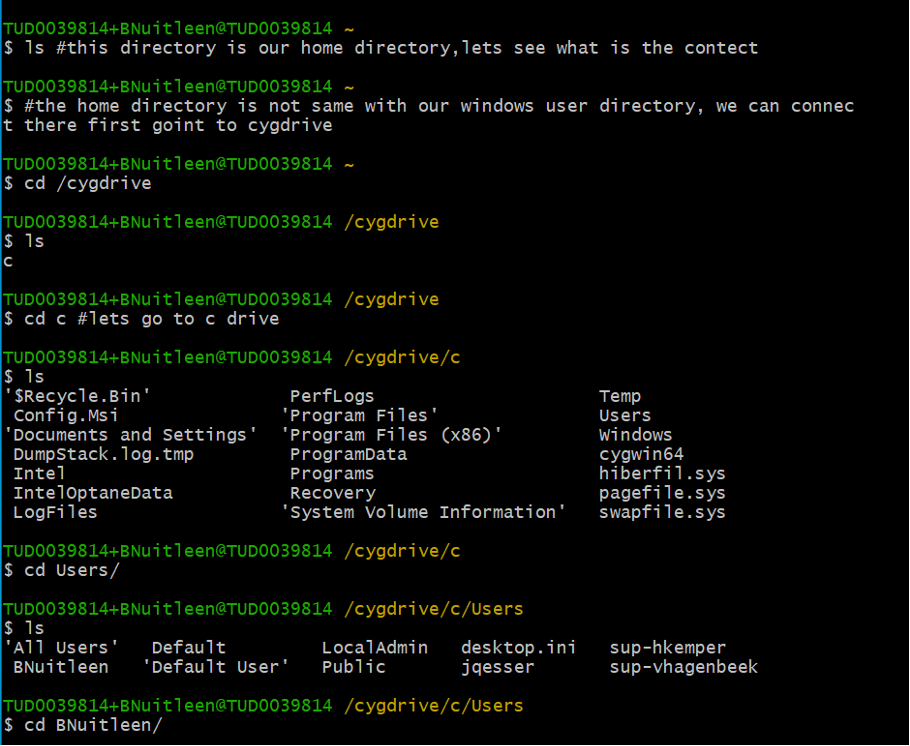
Now, you can try the commands you see below. The cd command is used to move to another directory. For example, if you wish to go to your home directory, you can type cd ~ (where tilde symbol denotes home). If you wish to move one directory up with respect to your current location (i.e., to the parent directory), you can type cd ... As you want to go to cygdrive, you can type cd /cygdrive. (Be aware that there is a space between the command cd and /cygdrive.)
Once you are in your cygdrive, you will see that your path will change to YourUserName/cygdrive. Next, you can check the content of your cygdrive folder by typing ls. The output list will be different for everyone but you should have a C drive - in the Windows system, this is the location of Users folder. You can use cd and ls commands to change your path to Users folder and see the content. You can compare this with reaching the same folder via using file explorer, and compare the content you see with the output list.
While doing so, you can also add comments (a text which is not taken as a command) next to your command line using # (note that you won’t use this much in practice, but it’s handy for giving instructions). You can also check the history of your commands using history command and then save the last commands in a text file using the history 13 > command_history.txt. Below, you can see the content of our command_history.txt file.
   36  ls # this directory is your home directory, let's see its contents
   37  # the home directory is not the same with your Windows user directory,
   you can connect there by first going to cygdrive
   38  cd /cygdrive
   39  ls
   40  cd c # let's go to c drive
   41  ls
   42  cd Users/
   43  ls
   44  cd BNuitleen/
   45  ls
   46  cd Documents/
   47  history 10
   48  history 13 > command_history.txt
You’re now ready to use the BASH terminal via Cygwin on your Windows computer. Note that you will need to navigate from cygdrive to your computer’s contents when you open Cygwin in the future.
MacOS comes with a terminal that uses BASH, so you are all set!
To open the terminal: press Command + Space to open Spotlight search, type Terminal, and press Enter.
In two places in the following sections, you will see options to install additional packages in your Mac’s terminal, namely the tree and unzip. To be able to install these packages, you first need to install Homebrew. To do that, follow these steps.
In your terminal, run
xcode-select --install. It’s possible that you already have Xcode, in which case you’ll get a message in your terminal about it already being installed.In your terminal, next run
curl -fsSL -o install.sh https://raw.githubusercontent.com/Homebrew/install/HEAD/install.sh. This downloads the installation script.To execute the installation script, next run
/bin/bash install.sh. Many things will start showing up in your terminal, which is normal. If needed, confirm the installation by writing your password or agreeing to what the installation asks you.To determine the type of your shell, run
echo $0in your terminal. The output should be bash or zsh.Next we want to make sure that Homebrew is recognized across your macOS. If output of step 4 is zsh, run
vim ~/.zshrc. If it was bash, runvim ~/.bash_profile. Navigate to the end of the file you opened either with arrow down or withG. Enter insert mode by pressingi, the copy-paste these two lines into your file:
# Add Homebrew's executable directory to the front of the PATH
export PATH=/usr/local/bin:$PATH
Next press Esc to exit the insert mode, and save and exit file with :wq!. You may get notifications that you’re editing a “read-only” file, but that’s exactly what we want to do in this case, so follow Vim’s instructions on how to save/write your changes.
Once we’ve modified the file in step 5, we need to activate these changes by running for zsh
source ~/.zshrcand for bashsource ~/.bash_profile.
You’re now ready to install packages with commdans such as brew install rar and brew install tree.
Linux comes with a terminal that uses BASH, so you are all set!
To open the terminal: use Applications Menu, or alternatively use shortcut Ctrl + Alt + T.