2.4. Setting up Git#
This section focuses purely on the technical setup of Git and GitLab integration. It provides step-by-step instructions to get your repositories connected and ready for use. For a deeper understanding of Git concepts such as repositories, commits, pushes, etc., see this book section.
2.4.1. Video Tutorials#
The following instructional videos provide visual step-by-step guidance for setting up Git and GitLab on different operating systems. They complement the written instructions below and can help you follow along more easily during the setup process.
Instructional video for Windows.
Instructional video for macOS.
2.4.2. Setting up GitLab - SSH key#

Fig. 2.1 Why we need an SSH key. GitLab logo used in accordance with GitLab’s brand guidelines.#
An SSH key is a secure authentication method that acts like a digital pass, allowing GitLab to verify your identity when accessing repositories from your computer. SSH uses a pair of cryptographic keys: a private key (kept secret on your computer) and a public key (shared with GitLab). Without an SSH key configured, GitLab requires you to enter your username and password for every push or pull operation. Setting up an SSH key is a one-time process that streamlines your workflow and provides better security than password-based authentication.
Therefore, we will first set up the SSH key.
Log in to TU Delft GitLab using your NetID and password.
You should be able to see your repositories: a private repository and a repository shared with your peer. A repository (also called a “project”) looks like this:
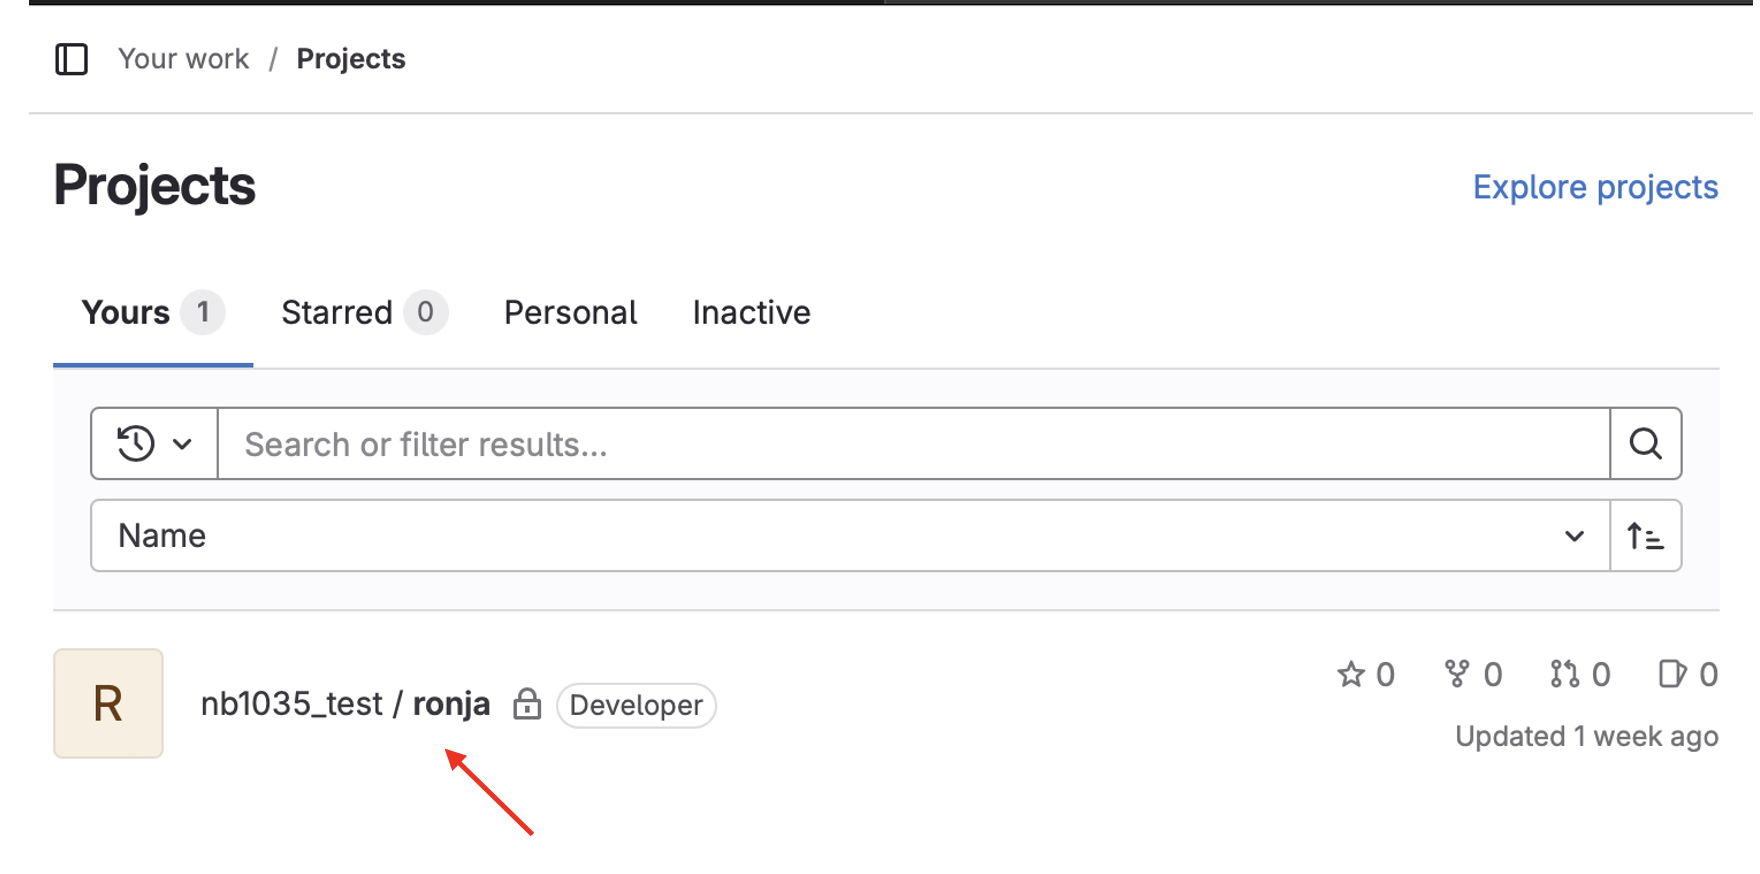
If you click on the name of your project (red arrow on the figure above), you will see a page like this:
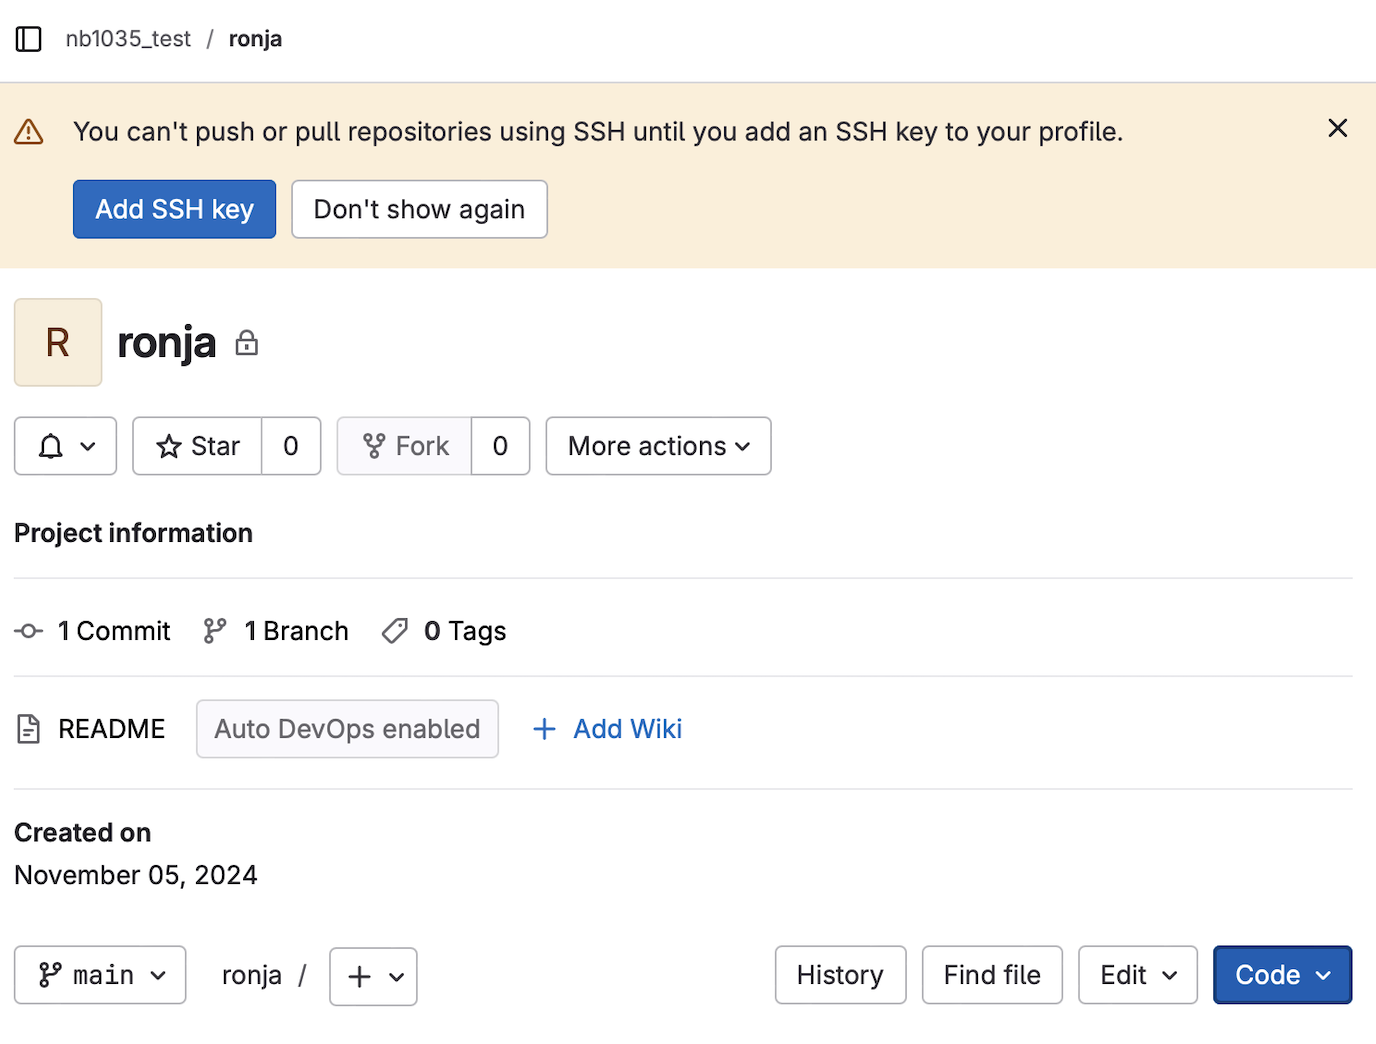
You will notice the warning regarding the missing SSH key at the top of the screen.
To check if you already have an SSH key, run
ls .sshdirectly after opening your terminal (Git Bash for Windows). Once you run the command, look for files namedid_ed25519andid_ed25519.pub(or similar). If you don’t see them, you need to generate a new SSH key.To generate a new SSH key, run
ssh-keygen -t ed25519 -C "your_email@student.tudelft.nl"in your terminal. When prompted, you can pressEnterto accept the default file location. You will also be asked to set a password/passphrase - you can leave this empty by pressingEntertwice.Now that you’ve generated the key, you need to copy it and then paste in GitLab. To copy your key, run command
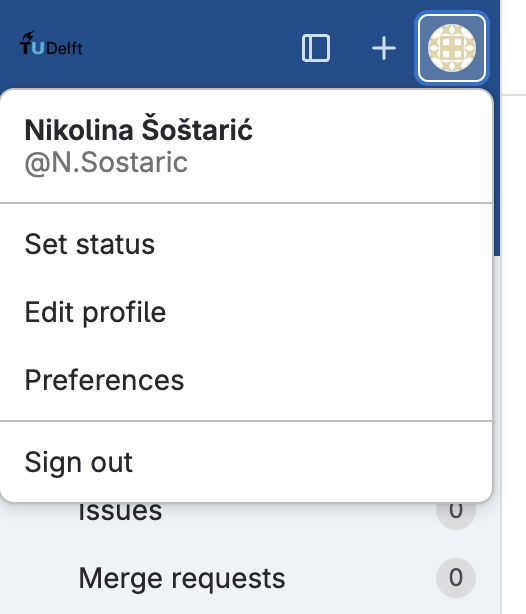
cat .ssh/id_ed25519.pubin your terminal. Select and copy the entire output, staring withssh-ed25519. In Git Bash, you may need to use right-click > Copy instead of the usualCtrl + Cshortcut.In GitLab, click your profile picture in the upper-right corner, and select Preferences. Then in the new left sidebar that appears, find SSH Keys and click on it.
Paste your SSH Key into the Key field. Add a title for the key (for example, “My Laptop SSH Key”). As Expiration date, select a date approximately 5 years in the future (such that your key remains valid throughout your studies). Then click Add key.
Run this command in your terminal to test the SSH connection to GitLab:
ssh -T git@gitlab.tudelft.nl. The first time you connect, you may see a warning that “The authenticity of host … cannot be established” and be asked whether you want to continue. Type inyesand pressEnter. If you set a passphrase in step 5, you will also be asked to enter it here. If you didn’t set one, just pressEnter. You should then see a message like “Welcome to GitLab, @username!”, which means the connection is working.
2.4.3. Cloning GitLab Repositories in VS Code#
Now you will clone (download) GitLab repositories to your computer using VS Code. You can choose between two methods: using VS Code’s built-in terminal or using VS Code’s graphical interface. Both methods will achieve the same result. You will first clone your private repository from GitLab. Then you can repeat the same steps below for the shared peer feedback repository.
2.4.3.1. Method 1: Using VS Code Terminal#
If you’re not already logged in, log in to TU Delft GitLab using your NetID and password. You should be able to see your repositories: a private repository and a repository shared with your peer. If you cannot find them, click on your profile picture and then on your profile name. This will bring you to the list of your repositories.
If you click on your project, you will see a page like this:
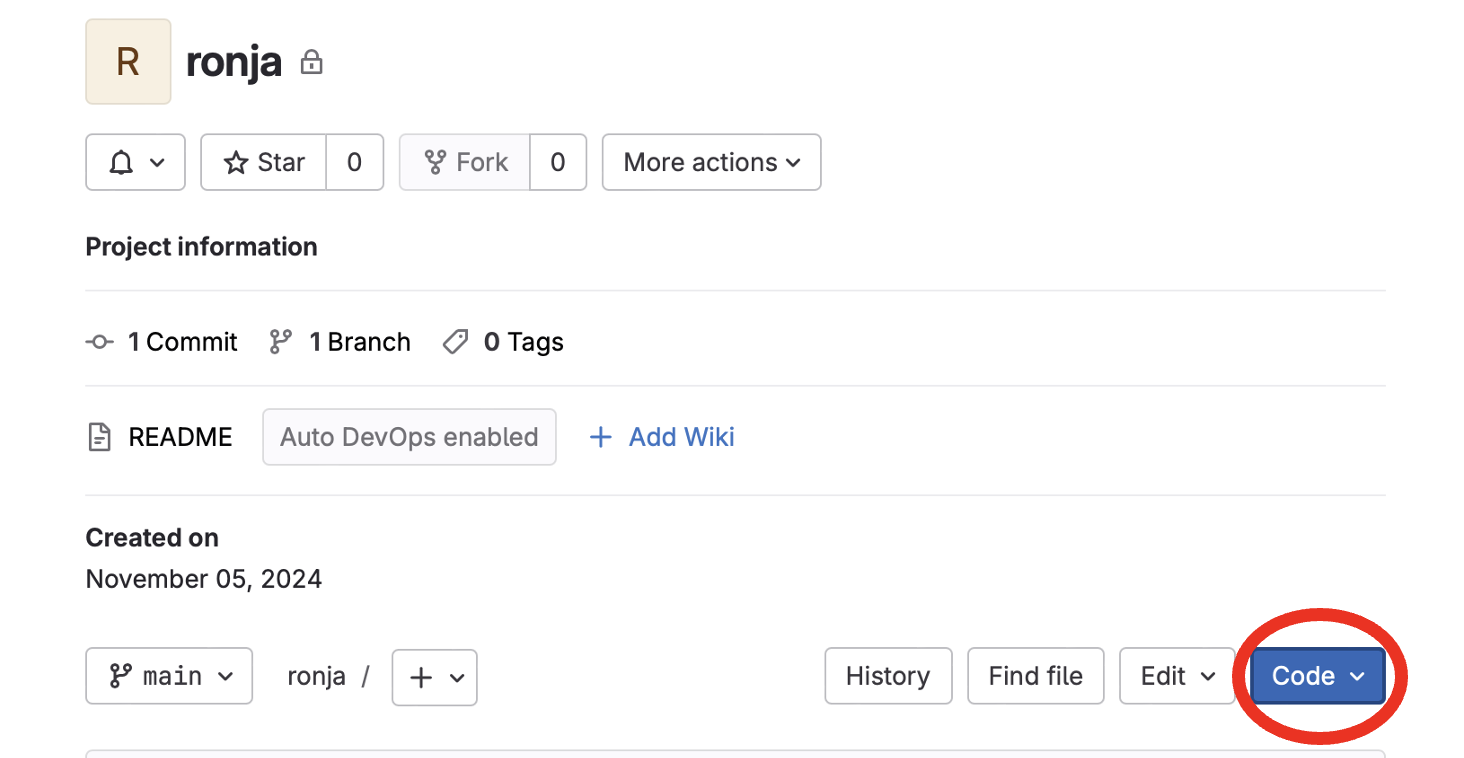
Click on the blue button “Code” (circled red on the image). In the dropdown menu, click the copy icon next to “Clone with SSH” to copy the repository link. You are now ready to go to VS Code.
Determine the location where you want to place your git repository. We recommend creating a new folder
Programming-Foundations/for this purpose in your home directory. You may have already done this in the previous section.Open VS Code. In VS Code, click on File > Open folder, then navigate to and then open the folder determined in step 4. Open the built-in terminal in VS Code by clicking Terminal > New terminal in the top menu. This opens a terminal in the bottom half of your VS Code window. Type the following command in the VS Code terminal (make sure to replace the placeholder with your link from above) and run it by pressing
Enter:
git clone PASTE_ADDRESS_FROM_STEP_3_HERE
When the command finishes, a folder of the same name as your GitLab repository will appear on your computer (this is the cloned repository).
Next, in VS Code, click on File > Open folder, then navigate to your newly created folder from step 5, and click Select. You’re now inside the local copy of your GitLab repository.
2.4.3.2. Method 2: Using VS Code GUI (Graphical Interface)#
Alternatively, you can clone repositories using VS Code’s graphical interface:
Follow steps 1-4 from Method 1 above to get your repository’s SSH link from GitLab and select a suitable folder.
Open VS Code. Press
Ctrl+Shift+P(orCmd+Shift+Pon macOS) to open the Command Palette.Type “Git: Clone” and select it from the dropdown list.
Paste the SSH link you copied from GitLab (from step 3 above) into the input field that appears.
VS Code will ask you to choose a location to save the repository. Navigate to the folder where you want to place the repository (step 4 from Method 1) and click “Select Repository Location”.
After cloning is complete, VS Code will ask if you want to open the cloned repository. Click “Open” to switch to your newly cloned repository.
Now repeat the chosen method for your shared peer feedback folder.
How to find your home directory
Your home directory is the folder that contains your Documents folder, your Downloads folder, and many others. It is called Home in your file explorer and often labeled with a little house icon.
SSH vs. HTTPS
Using SSH instead of HTTPS has a few practical advantages:
Easier authentication: With SSH, once you’ve set up your SSH key and added it to your GitLab profile, you don’t have to enter your username and password each time you push or pull. SSH keys provide secure, passwordless access to your GitLab repositories, which is particularly helpful if you frequently push or pull changes (as we encourage you to do).
Enhanced security: SSH keys are generally more secure than password-based authentication. When you use an SSH key, you are authenticated through a key pair (a public and a private key) instead of through a password. This reduces the risk of unauthorized access, especially for sensitive repositories.
Avoiding rate limits or two-factor authentication prompts: Some Git platforms, including GitLab, enforce rate limits on HTTPS requests or require frequent re-authentication due to two-factor authentication (2FA) policies. With SSH, once your key is configured, these restrictions won’t interfere with your workflow.
2.4.4. Configuring Git#
2.4.4.1. Git config#
To configure Git properly before first use, you need to set your user identity first. This information allows Git to record who makes changes in each commit, which is essential for collaboration and version tracking.
Open your terminal (Git Bash for Windows) and run the following two commands one by one. Make sure to replace the placeholders with your actual NetID and TU Delft email address:
git config --global user.name "your_netID"
git config --global user.email "your_email@student.tudelft.nl"
Once configured, you’ll be able to start using Git as your version control system, with your name and email correctly linked to all your changes.
2.4.4.2. Git pull configuration#
If you are working in the VS Code terminal, it is also a good idea to run the following command once:
git config --global pull.rebase false
This makes Git use the simplest method for combining changes when you pull updates, which helps to avoid unnecessary conflicts.
Note for macOS and Linux users
This configuration step is especially important if you’re using macOS or Linux. On these systems, Git is typically installed via package managers (such as Homebrew on macOS or apt/yum on Linux), which don’t provide configuration options during installation. On Windows, Git comes with a graphical installer that allows you to configure settings like this during the installation process. Therefore, macOS and Linux users need to set this configuration manually using the command above.