Lesson 1 - Basics#
Authors: Anne van den Dool
Last Edited: 14/02/2024
Edited by: Niels van Silfhout, Dieter van Dortmont
👩🏫1.1 Introduction (3 min)#
📑 1.1.1 Rhino: Installing Rhino and Grasshopper (10 min)#
To commence your journey into 3D modeling with Rhino Grasshopper, you will need to install the software. You can locate the installation files and instructions on software.tudelft.nl (for TUDelft students) or via rhino3d.com.
Rhino version and reporting issues
In this course, we use Rhino 7. If you detect any issues or want to provide feedback, please share them via GitLab or email at prototyping@tudelft.nl.
📑1.2 Basic controls (30 min)#
📌 What: Introduction to the controls of Rhino and Grasshopper (reading), working in Rhino and Grasshopper (exercise)
For Whom: Beginners in Rhino/Grasshopper
Time: 30 min (15 min reading + 15 min exercise)
If you are new to 3D design software, using Rhino and Grasshopper for the first time can be a bit overwhelming. In the next section, you will first walk through the ins and outs of the user interface, then you will learn the basic controls. Finally ending with a small exercise to get you started with Rhino and Grasshopper.
📑 1.2.1 Rhino: User Interface (Reading 10 min)#
🖱️Open Rhino
You will now see the following interface (left for 🪟windows, right for 🍎mac):
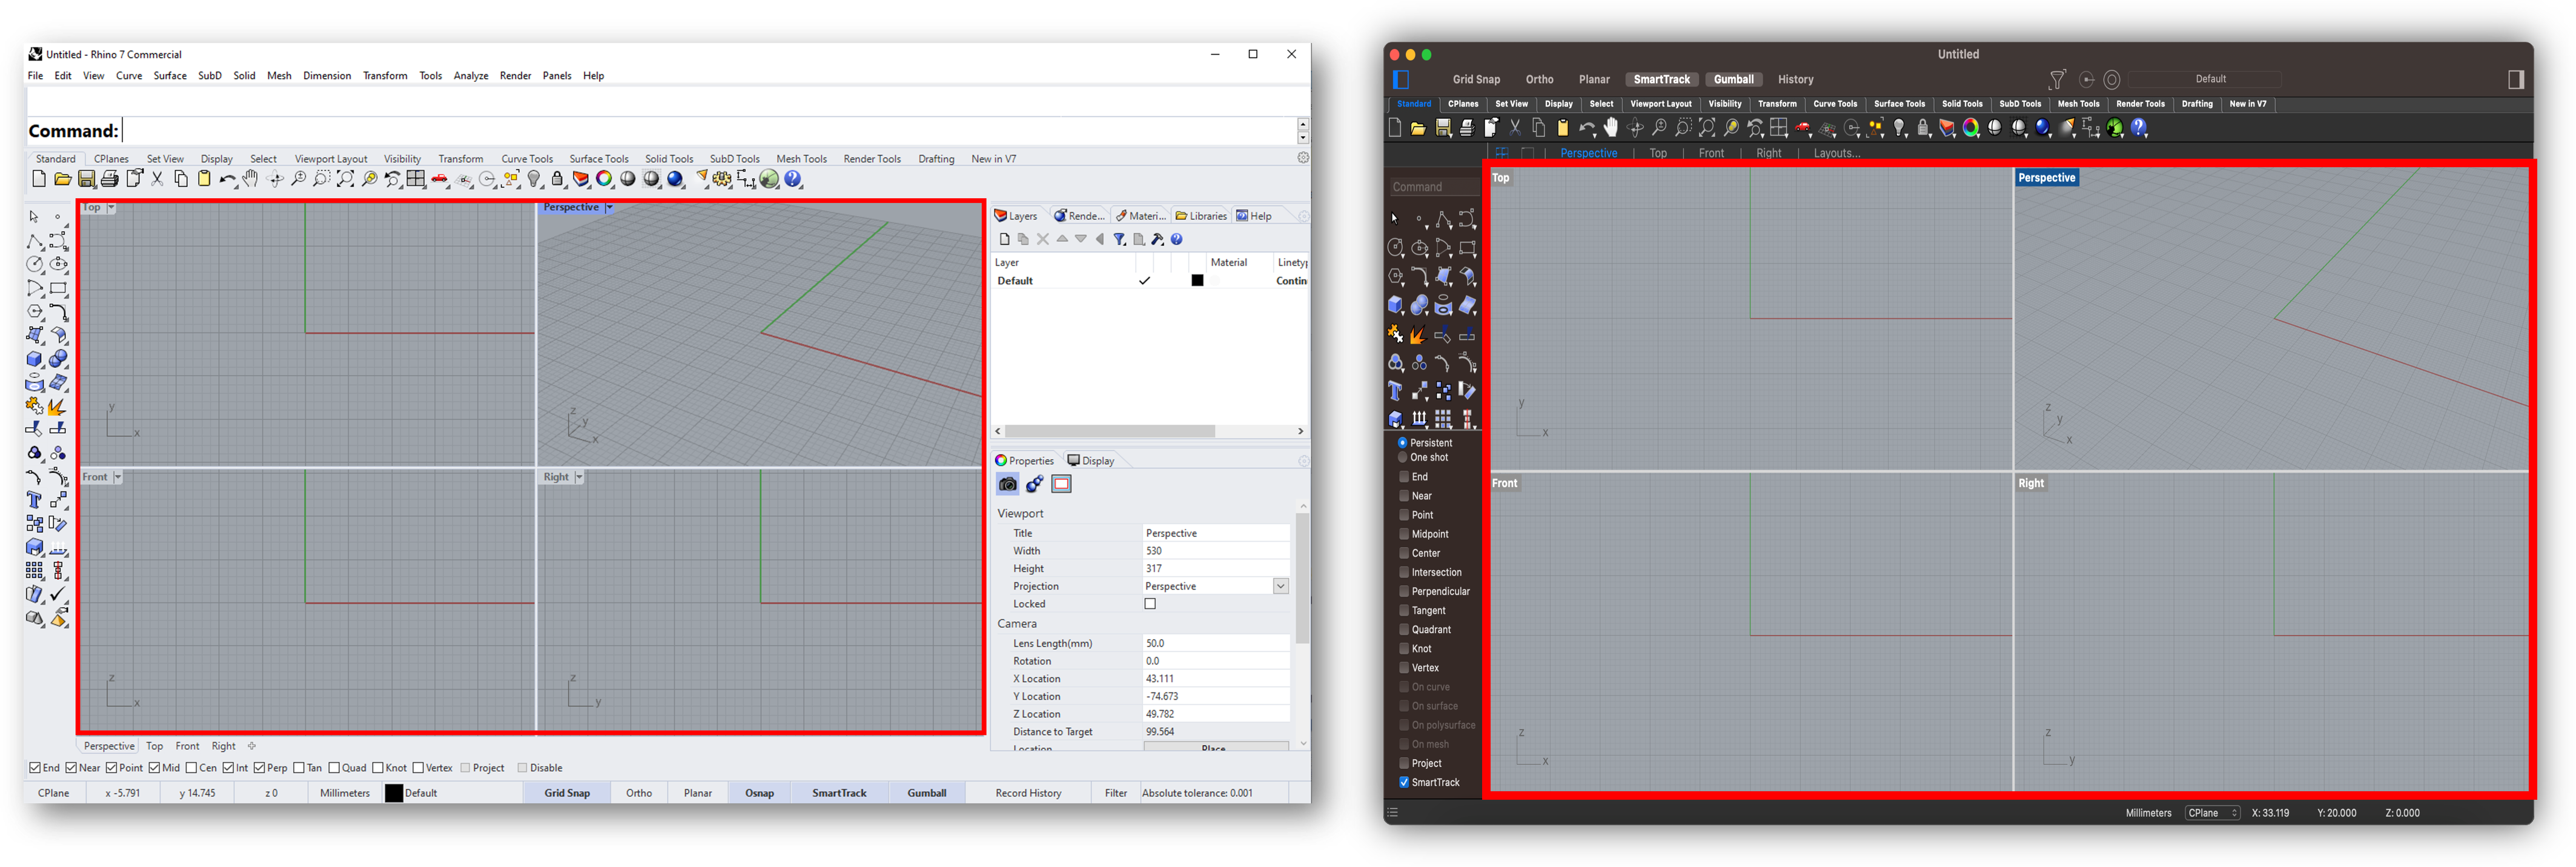
The central part of the screen is called the viewport, here marked in red. By default Rhino shows 4 different views. The viewport is your workspace, here you can view your 3D model.
At the top there are different tabs for different workflows, for example [Curve Tools]. By clicking these tabs you gain access to more specialized tools, and the lay-out of bar on the left and top changes. We will mostly be using the [Standard] tab, which is selected by default.
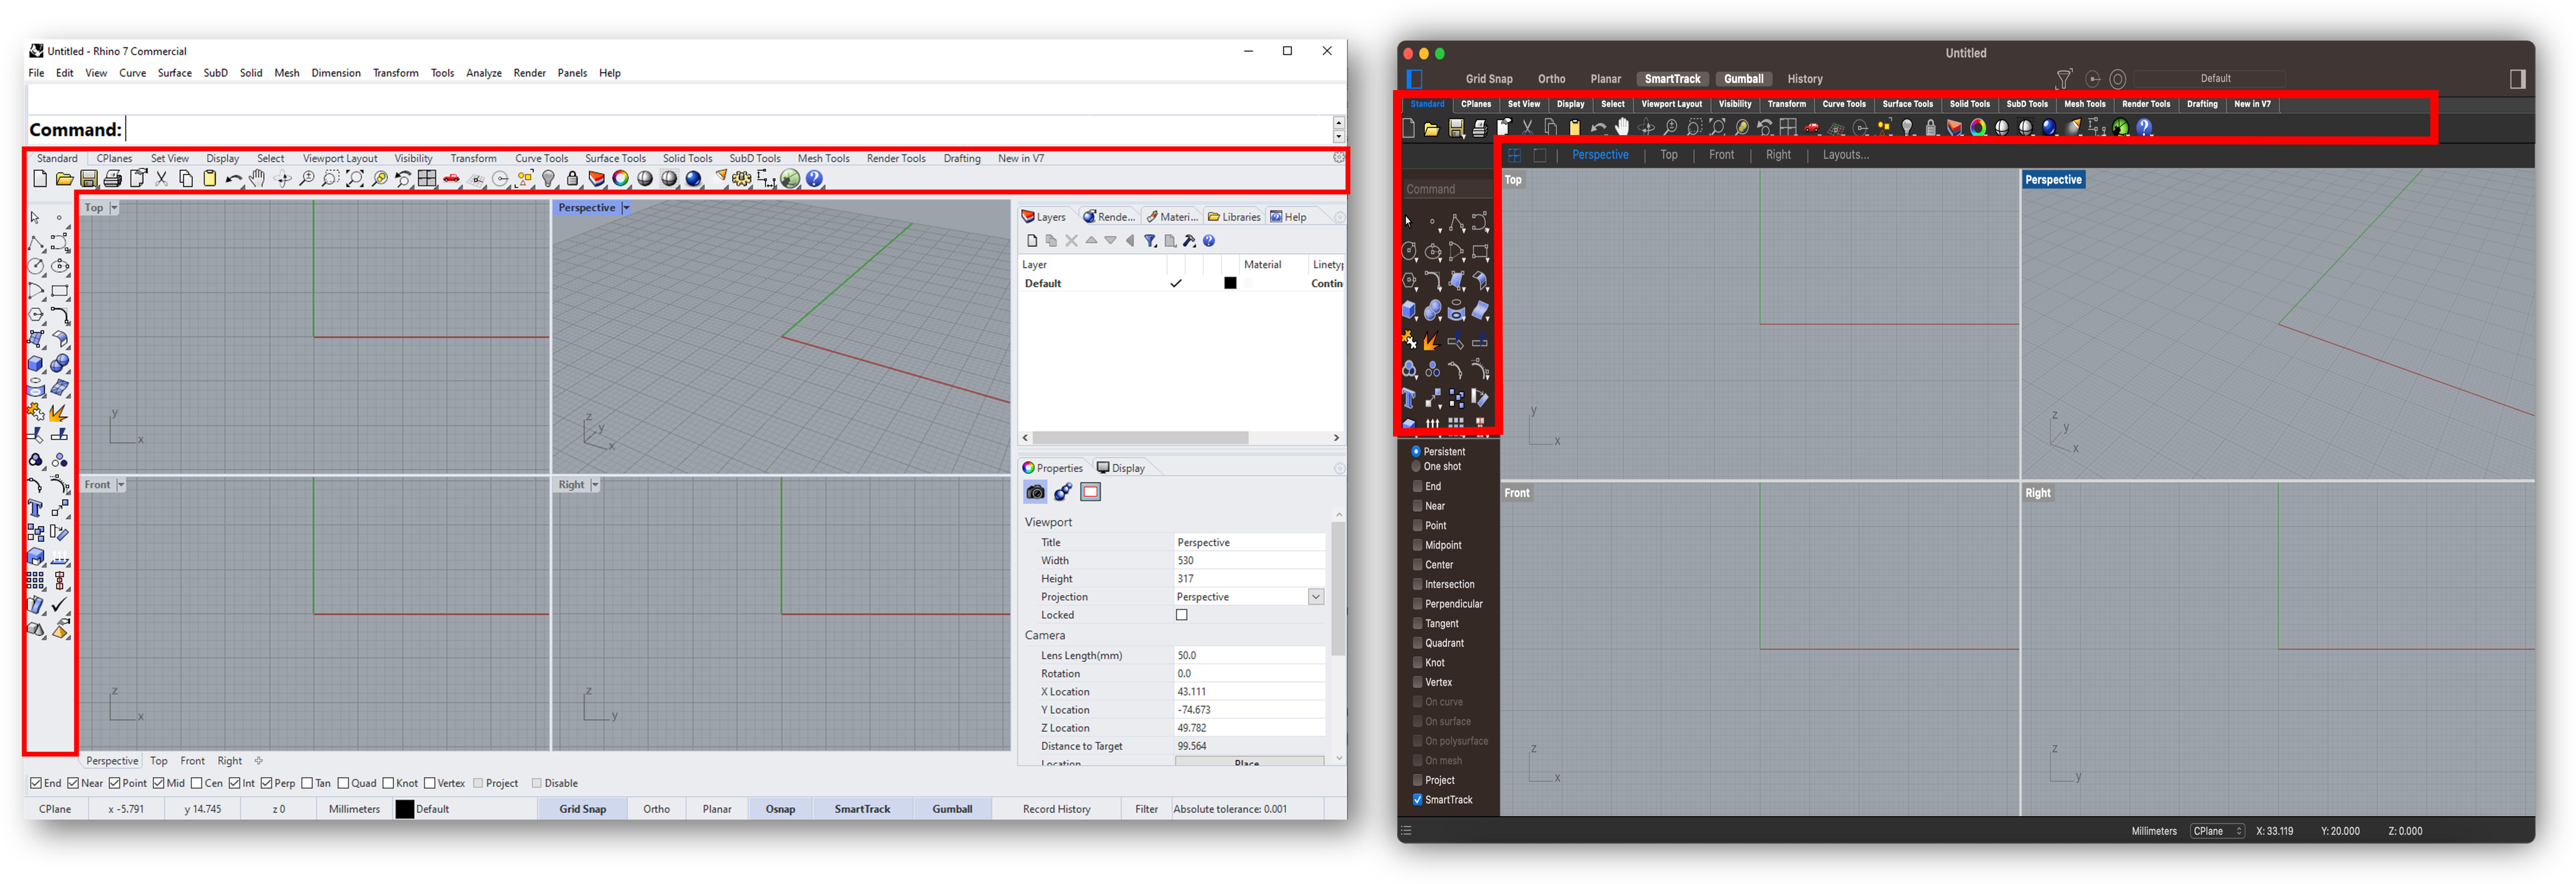
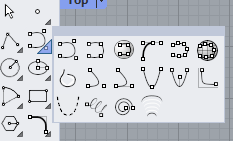
All of the different tools in Rhino can be accessed via the bar on the left. By clicking the triangle in the corner of some of the icons, you have access to even more options.
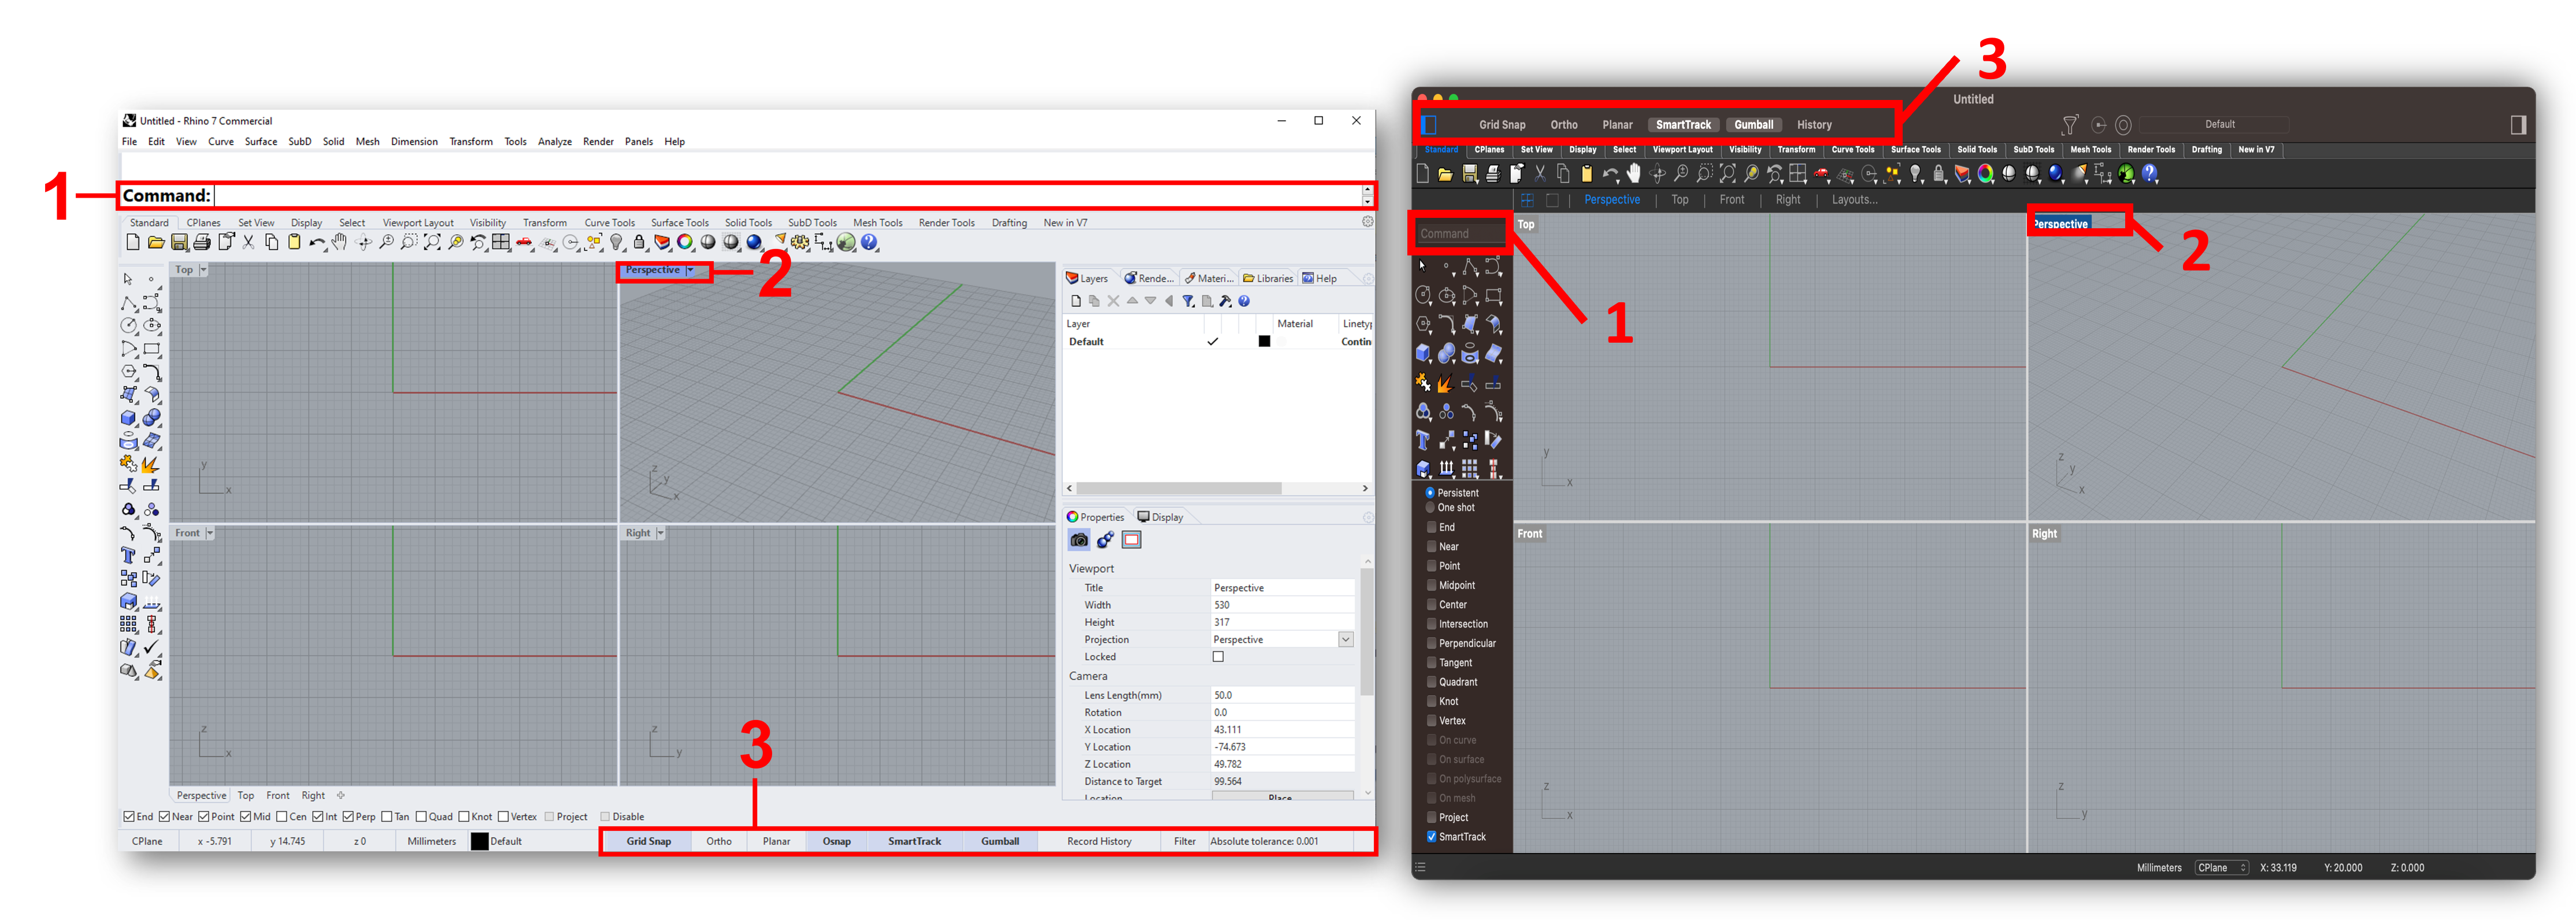
This is the [Command:] line, another way of accessing all the tools in Rhino. The [Command:] line is an intelligent tool, and depending on the input can do many different things, more on that later.
By clicking the 🔽 next to a viewport (or right click if you’re working on mac), you can adjust how your model looks. Most of the time you will use [Shaded].
[Gumball] allows you to move objects directly in the viewport using handles. [Grid Snap] [Osnap] causes tools to snap to the grid and to other objects. [Record History] turning this on allows you to undo and redo actions.
| Rotate | Hold right mouse button |
|---|---|
| Pan | Right mouse button + shift |
| Zoom | Scroll |
| Select | Left click |
| Box select | Hold left mouse button and drag. Drag from right to left to select everything the box touches. Drag from left to right to select only objects completely inside box |
| Repeat previous command | Right click |
📑 1.2.2 Grasshopper: User Interface (Reading 5 min)#
To open Grasshopper:
🖱️Click the [Launch Grasshopper] button as shown below
OR
⌨️Type “Grasshopper” in the [Command:] line and press Enter

The Grasshopper interface is quite straight forward. For now the most important parts are:
The component library, including tabs for any plugins you might have installed.
The canvas, where you build your script.
The file-manager, where you can switch between documents.
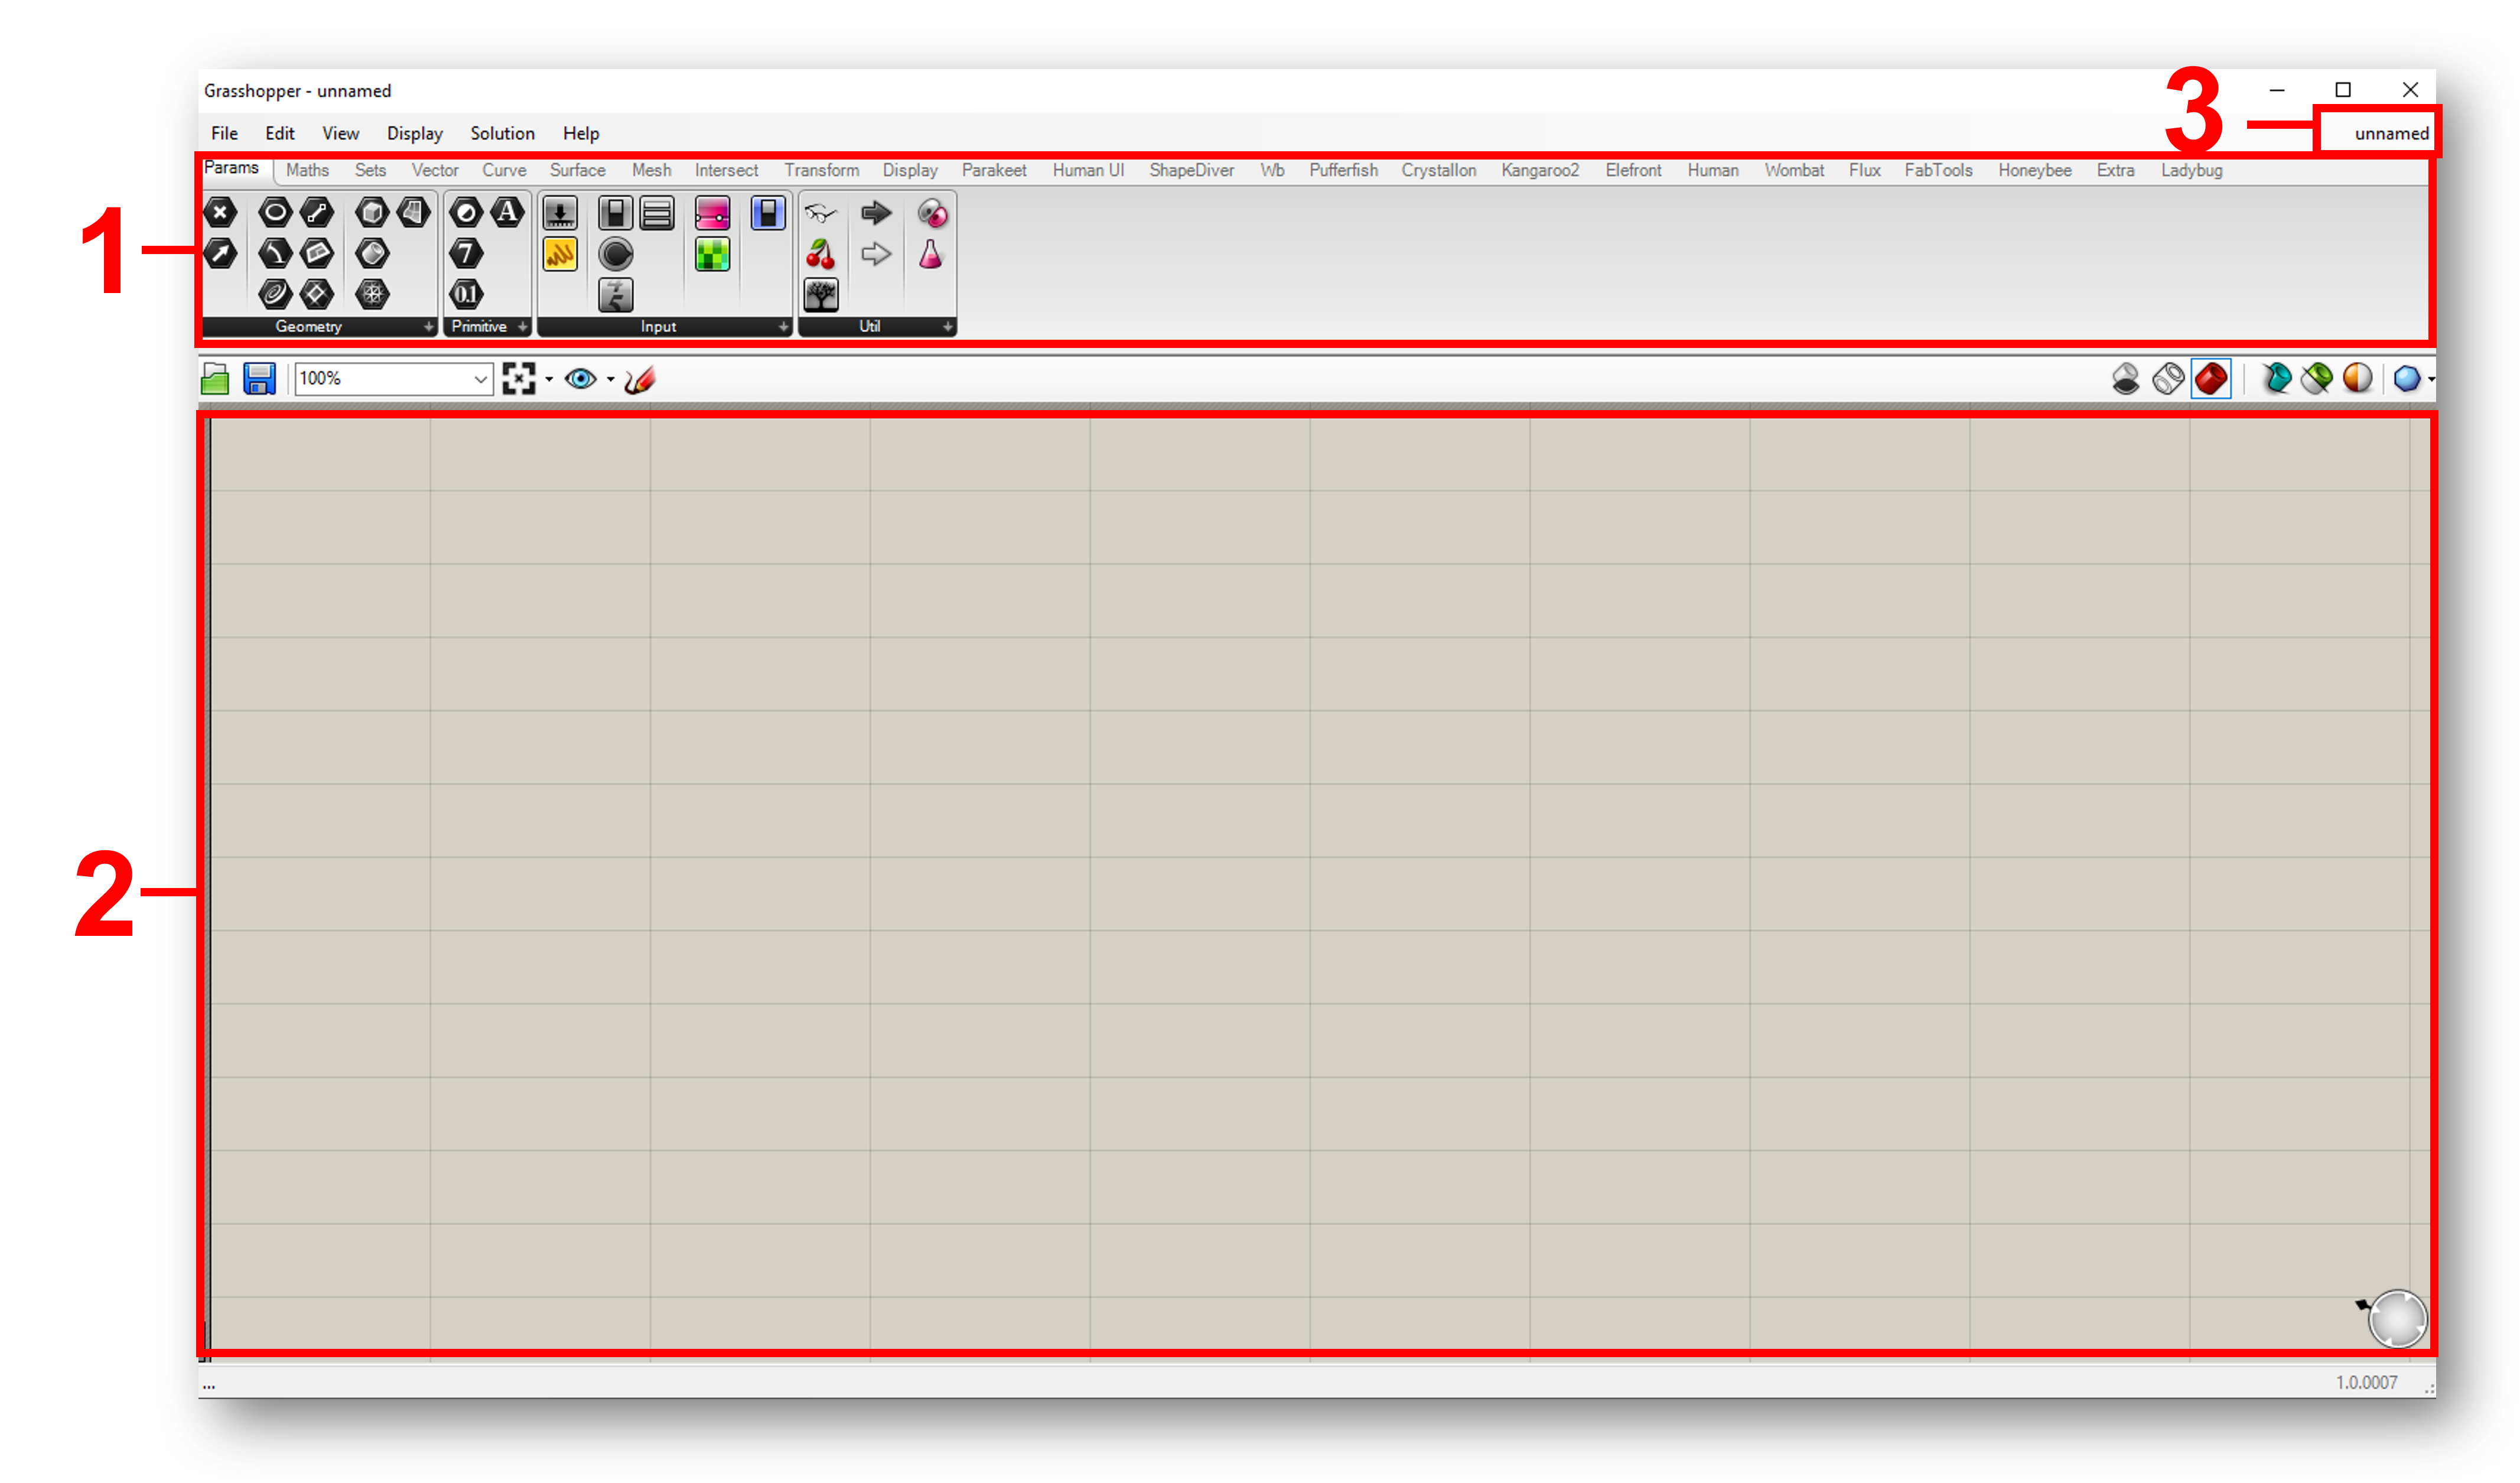
Grasshopper is a visual coding tool. This means that you create a 3D model by connecting different functional blocks together called components.
This way you can build a script which takes certain inputs to produce the desired output.

Every component has inputs and outputs. Inputs are on the left side of a block, outputs on the right side.
💡Tip: Switch between icons and text
You can switch between icons and text components in the [Display] menu at the top of the interface. You can also switch on [Draw full names] to make components easier to understand.

Placing and connecting components#
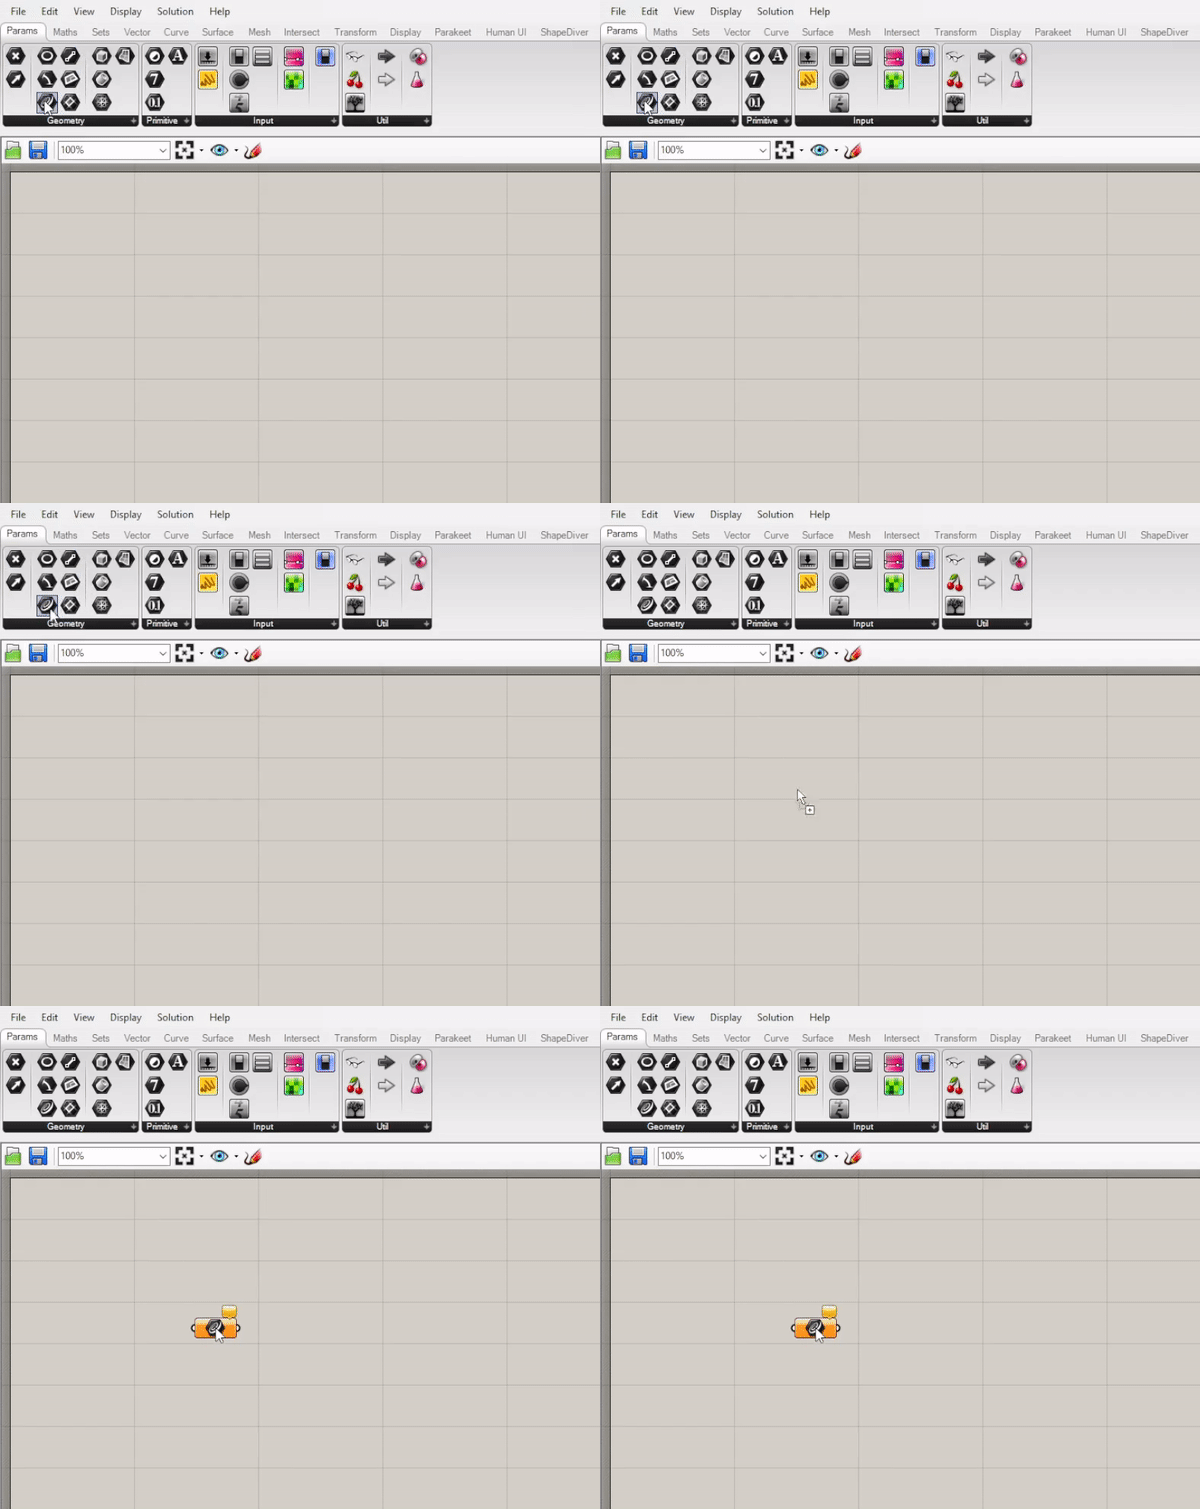
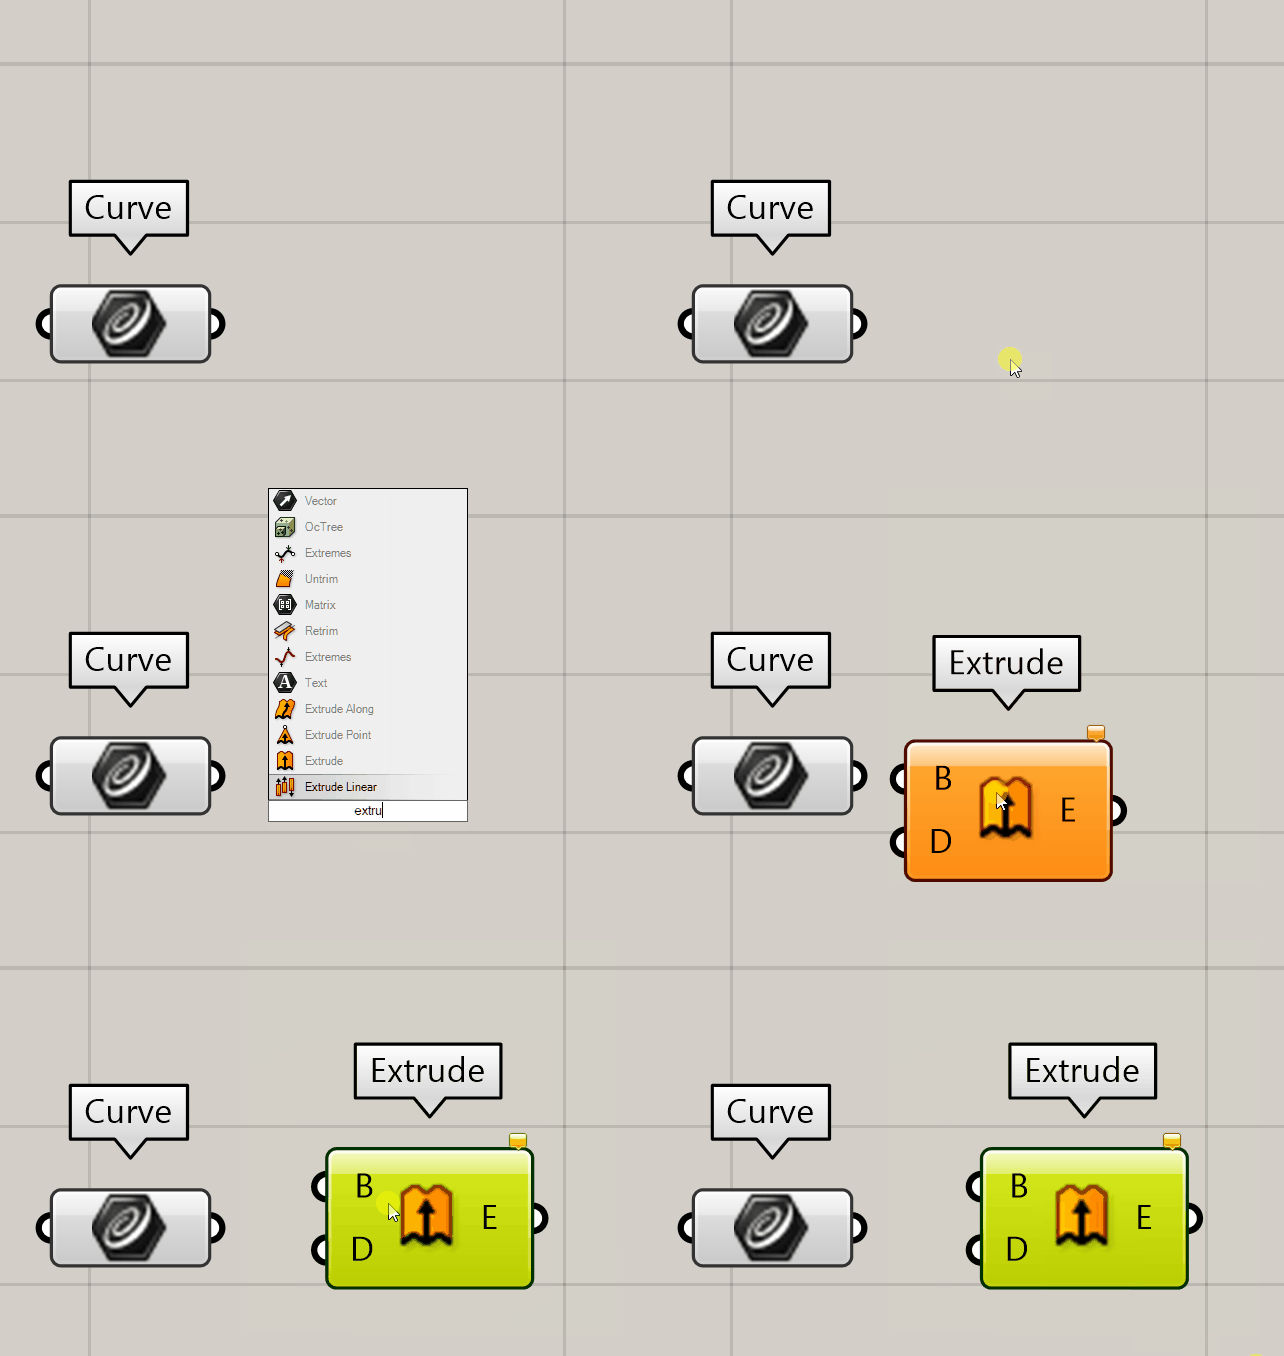
To place a component, either 🖱️drag from the toolbar or 🖱️double click the workspace to search by name.
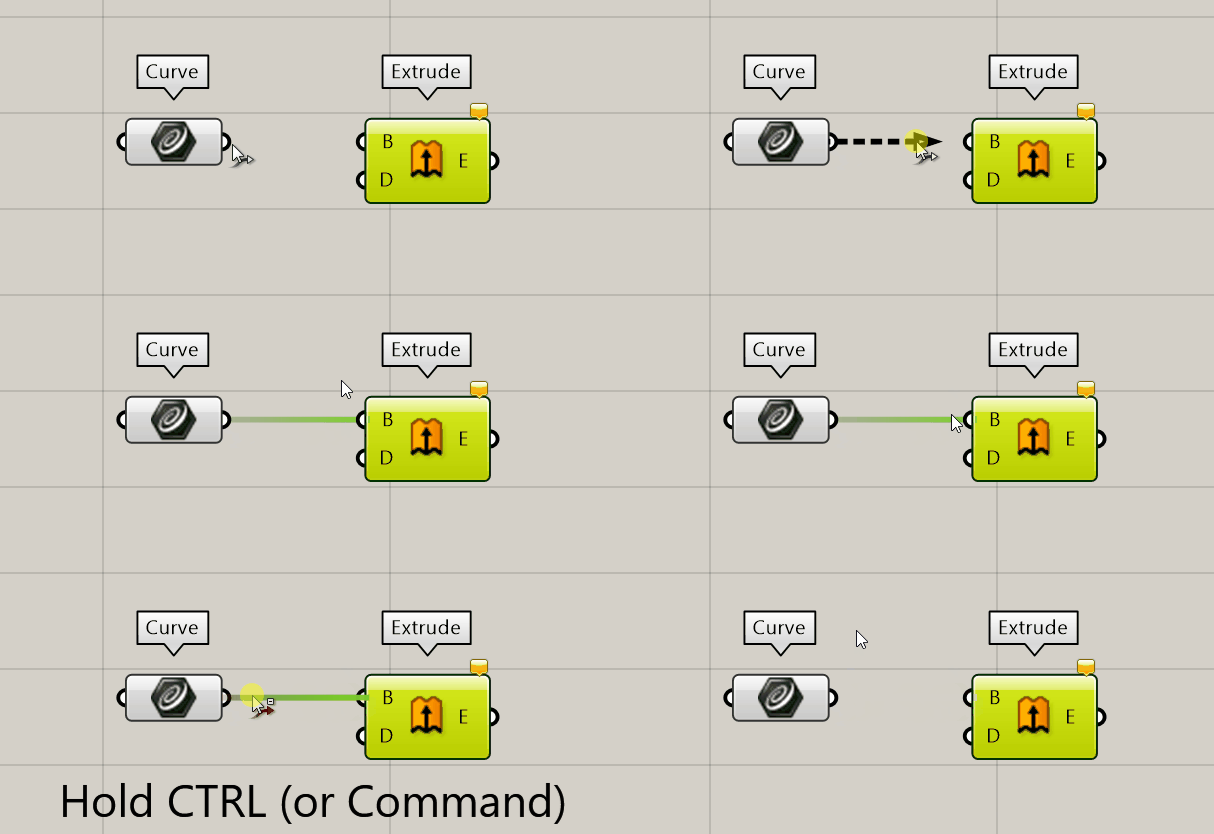
To connect components, simply 🖱️drag from an output of one component, to the input of the next. To undo a connection, 🖱️hold CTRL (or Command on Mac) and drag from the output to the input.
Inputting and Outputting Data#
When hovering your cursor over an input/output a tool-tip pops up. These tool-tips can help determine what needs to be connected where. Reading out the outputs can help verify the expected outcome and check for errors.
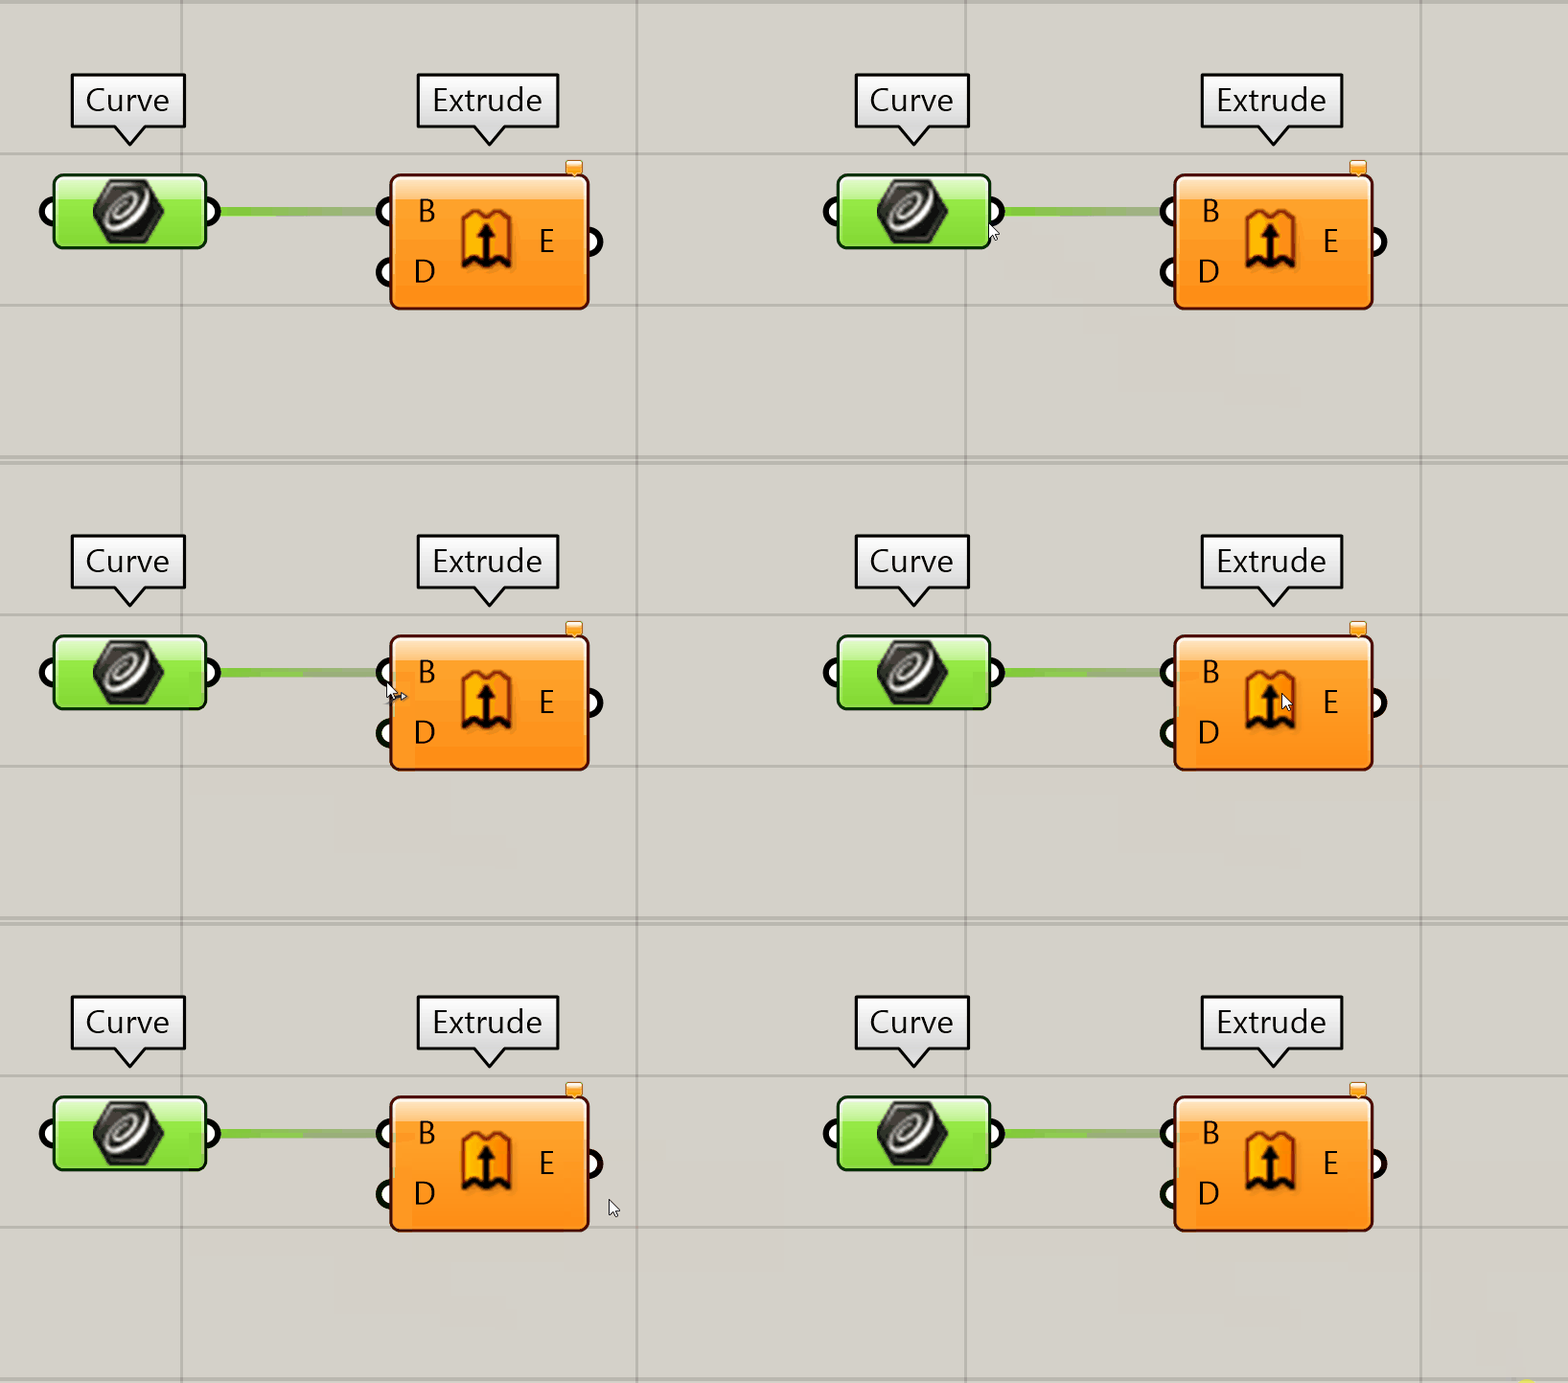
One of the basic components we will use often as an input in Grasshopper is a Number Slider. You can find them in the Input menu under params.
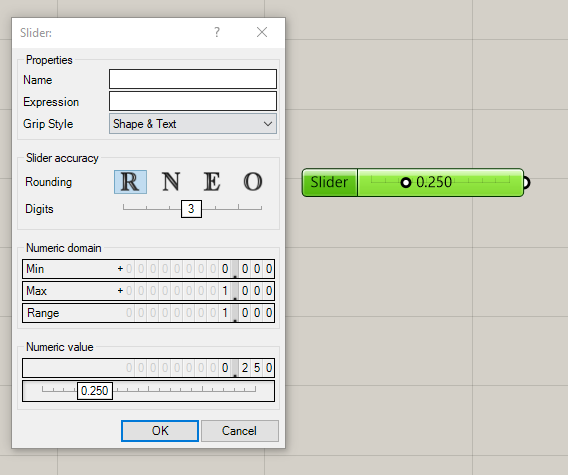
By double clicking the slider, a popup appears with settings. Here you can change the name of the slider, set the number of digits and change the minimum and maximum values.
💡Tip: A faster way to create your sliders
For a faster way to create sliders, you can type a number in the search bar to create a slider. You can also create a slider with a set range by typing the minimum followed by two dots (..) and the maximum number. The amount of digits you use to type the numbers will determine the accuracy of the slider.

You can also use Rhino geometry as an input in Grasshopper. For example if you wanted use a curve as input:
🖱️ Draw a curve in Rhino, for example by selecting [Control Points Curve] from the toolbar on the left.
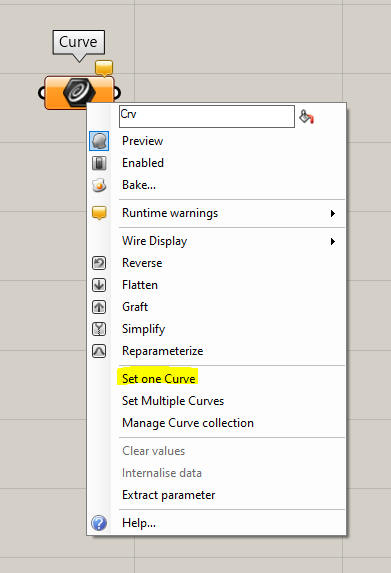
🖱️ Place a [Curve] component on the canvas in Grasshopper. You can do this by dragging it from the Params/Geometry toolbar or by double clicking on the canvas and searching for the [Curve] component.
🖱️ Right click in the middle of the component and select [set one curve].
A prompt appears in Rhino, asking you which Curve or Edge to reference. On windows this prompt will appear above the command line, in mac you will find it in the menu below the command line.
🖱️ Select the curve in Rhino by left clicking on it.
After selecting you curve, the curve component should turn green, indicating that it now contains geometry.
Exporting shapes from Grasshopper to Rhino#
Shapes built in Grasshopper show up as red translucent objects in Rhino. These red objects are placeholders, and can not be manipulated directly in Rhino.
To edit your Grasshopper models in Rhino you need to export the model. This type of exporting from Grasshopper to Rhino is called “baking”.
To bake an object from Grasshopper to Rhino:
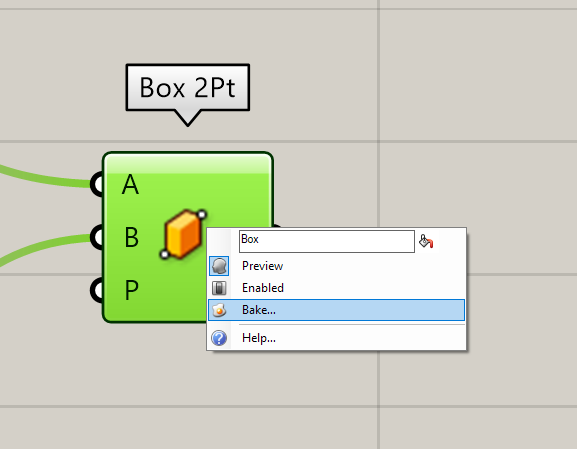
🖱️Right click the component you want to bake. Make sure you click in the middle.
🖱️Click [Bake…].
🖱️ You will be asked on which layer you want to bake the object. Select [OK].
You should now see your object in Rhino.
In the first exercise we will be building a simple shape in Rhino and Grasshopper to explore how these two programs work and in what ways they differ.
Try to create a cube in Rhino with the dimensions 10x10x10mm.

👀Hint: Cubes in Rhino
A cube is called "box" in Rhino.
Solution
You can either select the **[Box]** tool on the left **OR** type in “Box” in the command line.

Now you can select the first corner of the base in the viewport, then the second corner, and finally choose the height of your box. You can also type the exact dimensions into the command line.

Now see if you can create the same cube in Grasshopper

👀Hint: Cubes in Grasshopper
Use the components called [Box 2pt] and [Construct Point].

Solution
Grasshopper always allows for many different approaches to solve a problem. It is perfectly fine if you managed to get the same end result with a different script!
Here we will show one possible approach:

👩🏫1.3 Basic geometry (45 min)#
📌 What: Introduction to the basic geometries (video explanation), modelling geometry in Rhino and Grasshopper (video tutorials)
For Whom: Beginners in Rhino/Grasshopper
Time: 45 min (5 min video+ 40 min tutorials)
👩🏫1.3.1 Theory - Basic geometry (5 min)#
Recap
📺1.3.2 Tutorial - Modelling a teapot in Rhino (20 min)#
In this tutorial, you will learn how to construct basic geometry in Rhino. Watch the video below and follow along.
💡Tip: Viewport display options
By default, the viewports in Rhino are set to wireframe mode. This means you only see the outlines of objects. You can switch to shaded mode by clicking on the 🔽 next to a viewport (or right click if you’re working on mac).
📺1.3.3 Tutorial - Modelling teacups in Grasshopper (20 min)#
In this exercise, you will learn how to construct basic geometry in Grasshopper. Watch the video below and follow along. If you get stuck, you can check out the full solution below.
⚠️Caution: Pay attention to where you click
In Grasshopper, pay attention where you click. If you right click on the inputs of a component, you will get a different menu compared to when you click in the middle for example. If you want to group object or turn the preview of for multiple object, make sure you right click on a empty space on the canvas.
Solution

📑1.4 Best practice (5 min)#
📌 What: Some tips and tricks to help you troubleshoot in Rhino/Grasshopper (reading)
For Whom: Beginners in Rhino/Grasshopper
Time: 5 minutes
📑1.4.1 How to keep you Grasshopper script organized#
As projects get more complex, it is important to keep your Grasshopper script organized. Below are a few tips to keep your scrip readable (for yourself and others):
Work from left to right. Inputs should be put on the left, outputs on the right.
Keep connectors as straight as possible.
Turn off previews for components which you are not working on. This can be done by opening the right-click menu and clicking “Preview Off” while having components selected.
Group components by function. You can do this by selecting the components and using the shortcut CTRL+G (or Command+G on mac).
Label your groups. Use the component [Scribble] to add text
📑1.4.2 Troubleshooting in Rhino & Grasshopper#
Got stuck designing a working model/script using Rhino and/or Grasshopper? Under “Troubleshooting” you can find some some of our tips for frequently asked questions. Still stuck after these tips? You can also check out some links under “External Links” (Inspirational and further reading). If still no solution: try Googling (dedicated Grasshopper web forums), AI tools (e.g. ChatGPT), or of course human experts (e.g. teaching assistants, teachers, etc.).
💻1.5 Assignment lesson 1 (max 2 hours)#

💻 Create a creature using Rhino curves, which you import into Grasshopper. It does not have to be an insect, you can create any animal you like. Take a few hours to see what you can create, but do not spend to much time on this assignment.
💡Tip: Exporting a high-resolution image
Use the [Export Hi-Res Image] option in the file menu to create a detailed screenshot of your entire script.

🎓2022


With permission from students year 2022
🎓2021


With permission from students year 2021
🎓2020


With permission from students year 2020
🎓2019


With permission from students year 2019
